From the outset, I had thought the bodywork was in a relatively good condition, for its age and history. You do read horror stories of vehicles being totally rotted away after long storage (at best) in a barn or (at worst) under a tarpaulin in field. Yes, the sills were the usual period feature (i.e. flakey rust held together with fibre glass filler - see Left Sill and Right Sill) and at some stage it's been in a prang with front end repair but, generally, it was structually sound with good metal, some surface rust, and a few tweaks / minor repairs required. The main task was to strip off the layers of paint (at some point it was resprayed blue) and the protective battleship grey primer that was applied to everything.
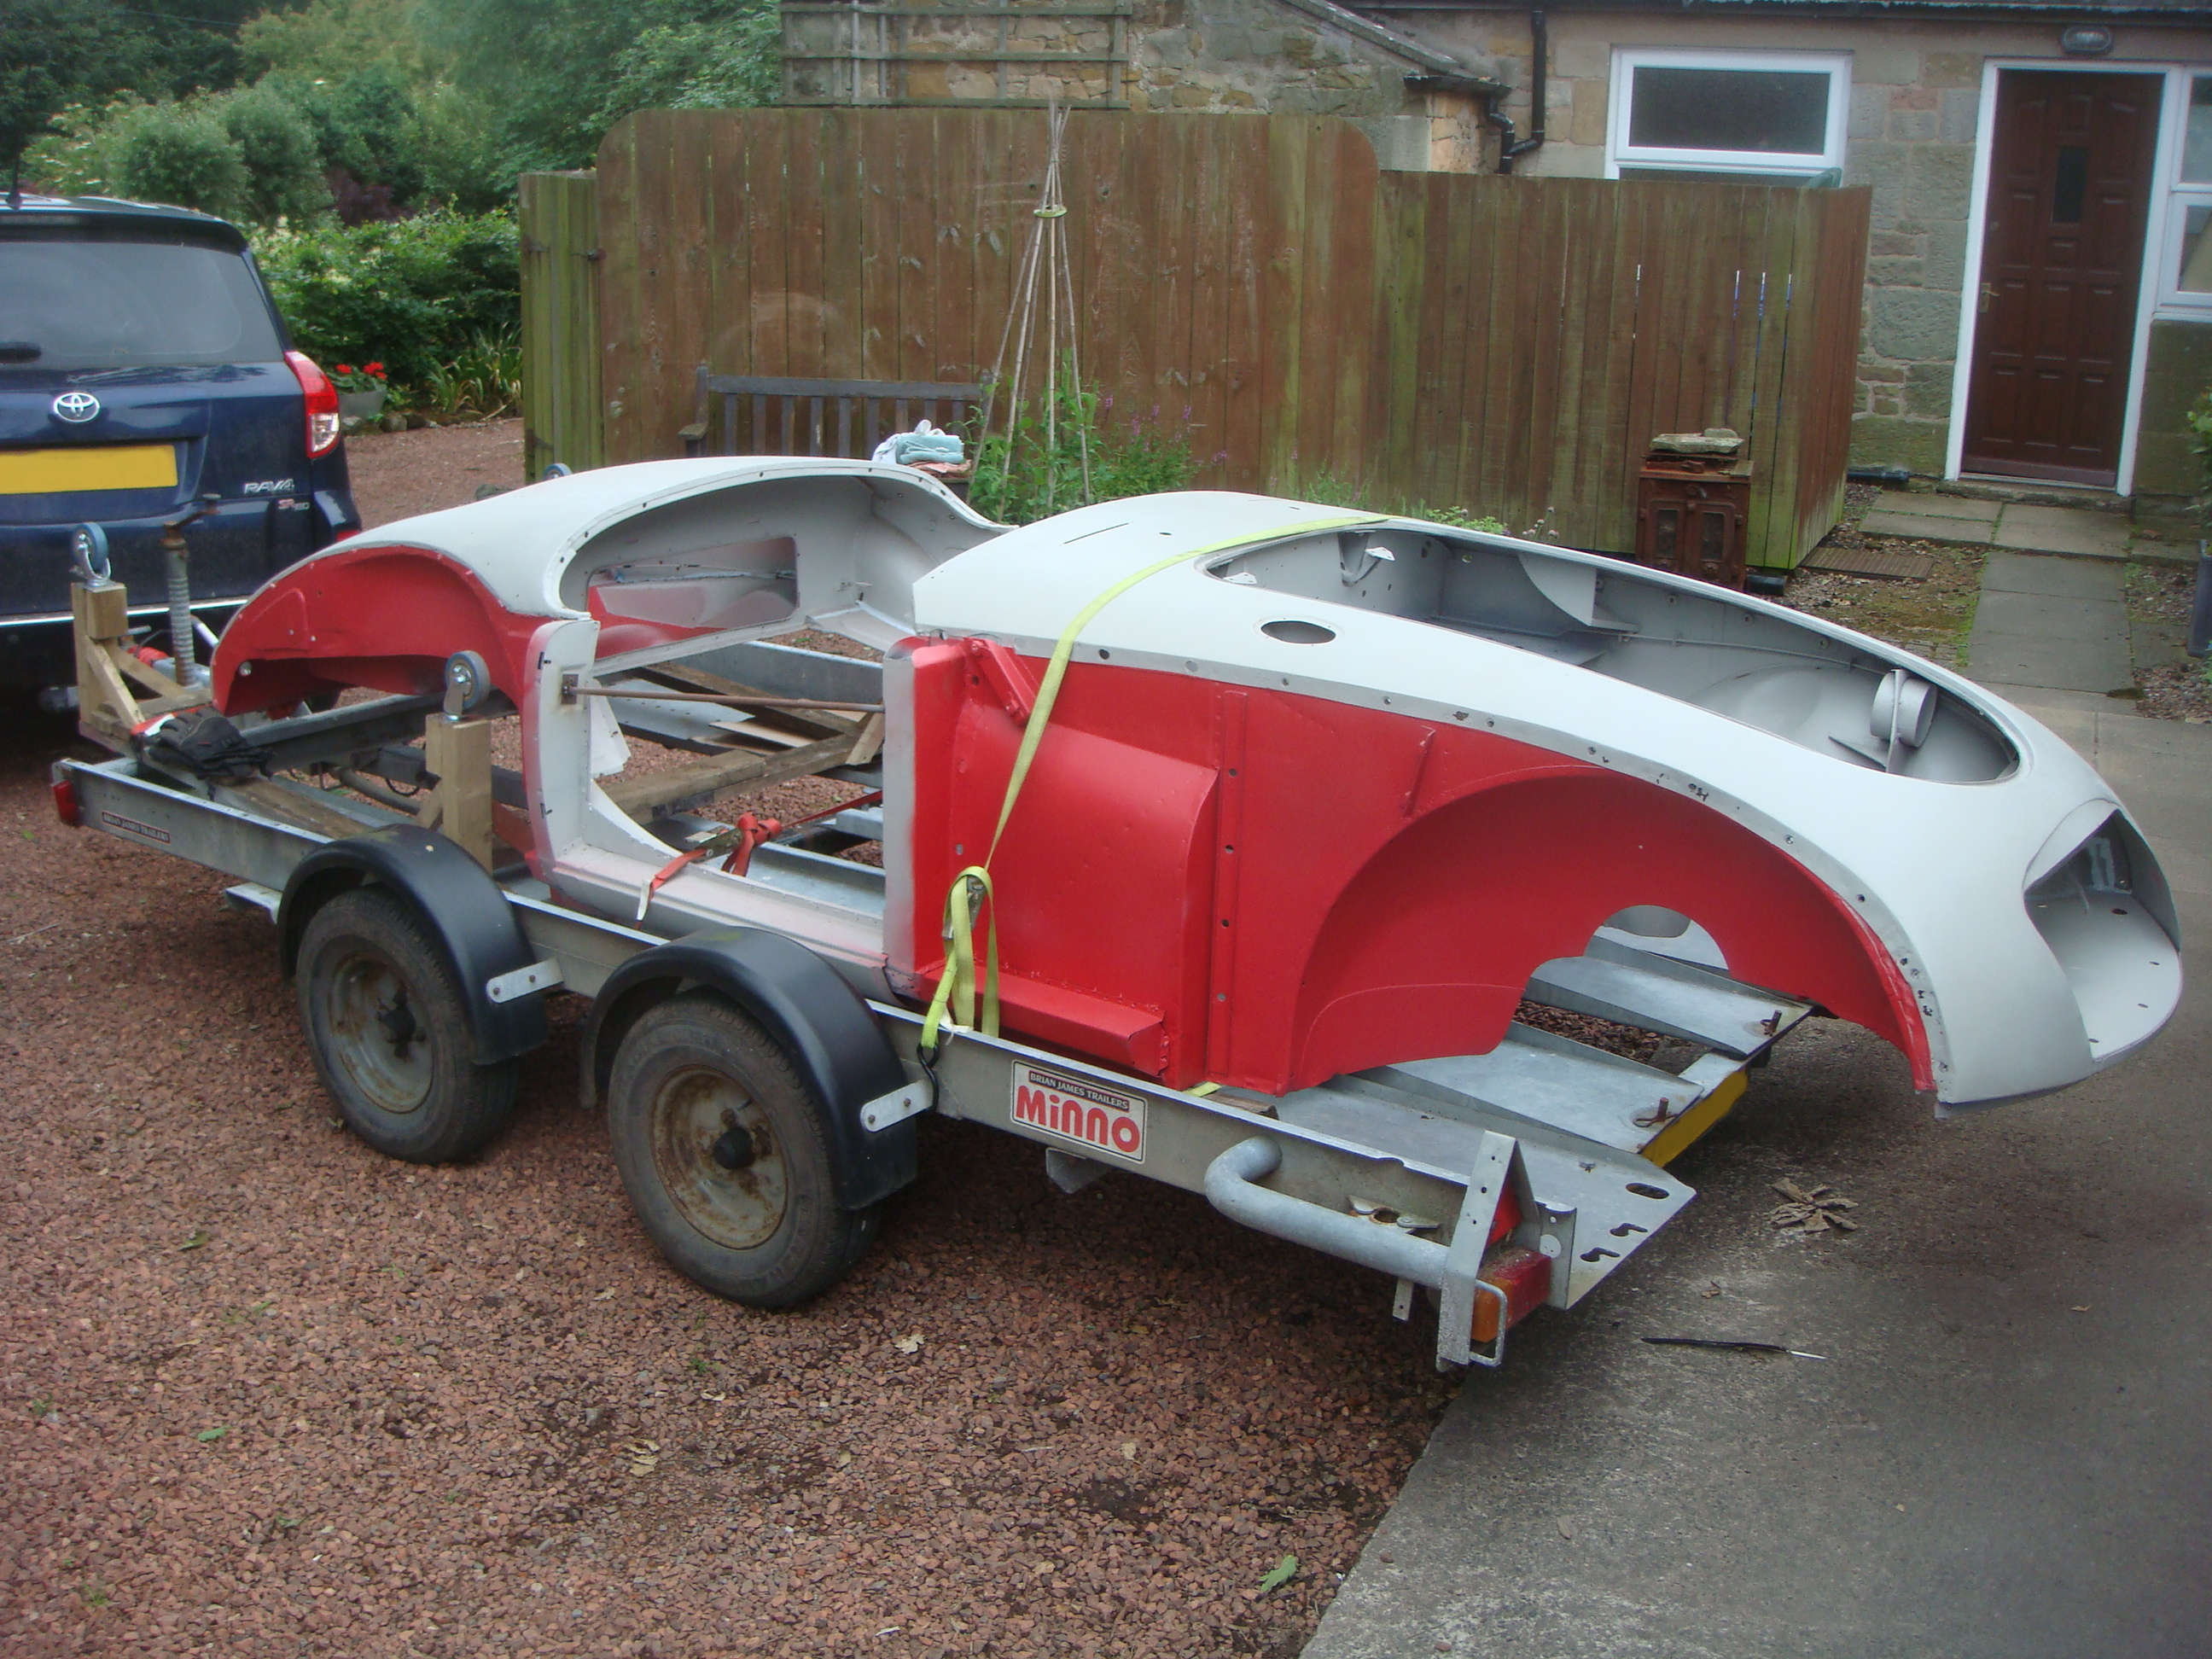
In general, everything was ground back to bare metal, any surface rust treated with Fertans rust converter, repairs made where necessary, surface coated in uPol Dolphin ultra fine filler then sanded back to get smooth finish, before receiving two coats of epoxy primer. This should then be ready to send to the spray shop for top colour finish
Wings (or fenders if you prefer)
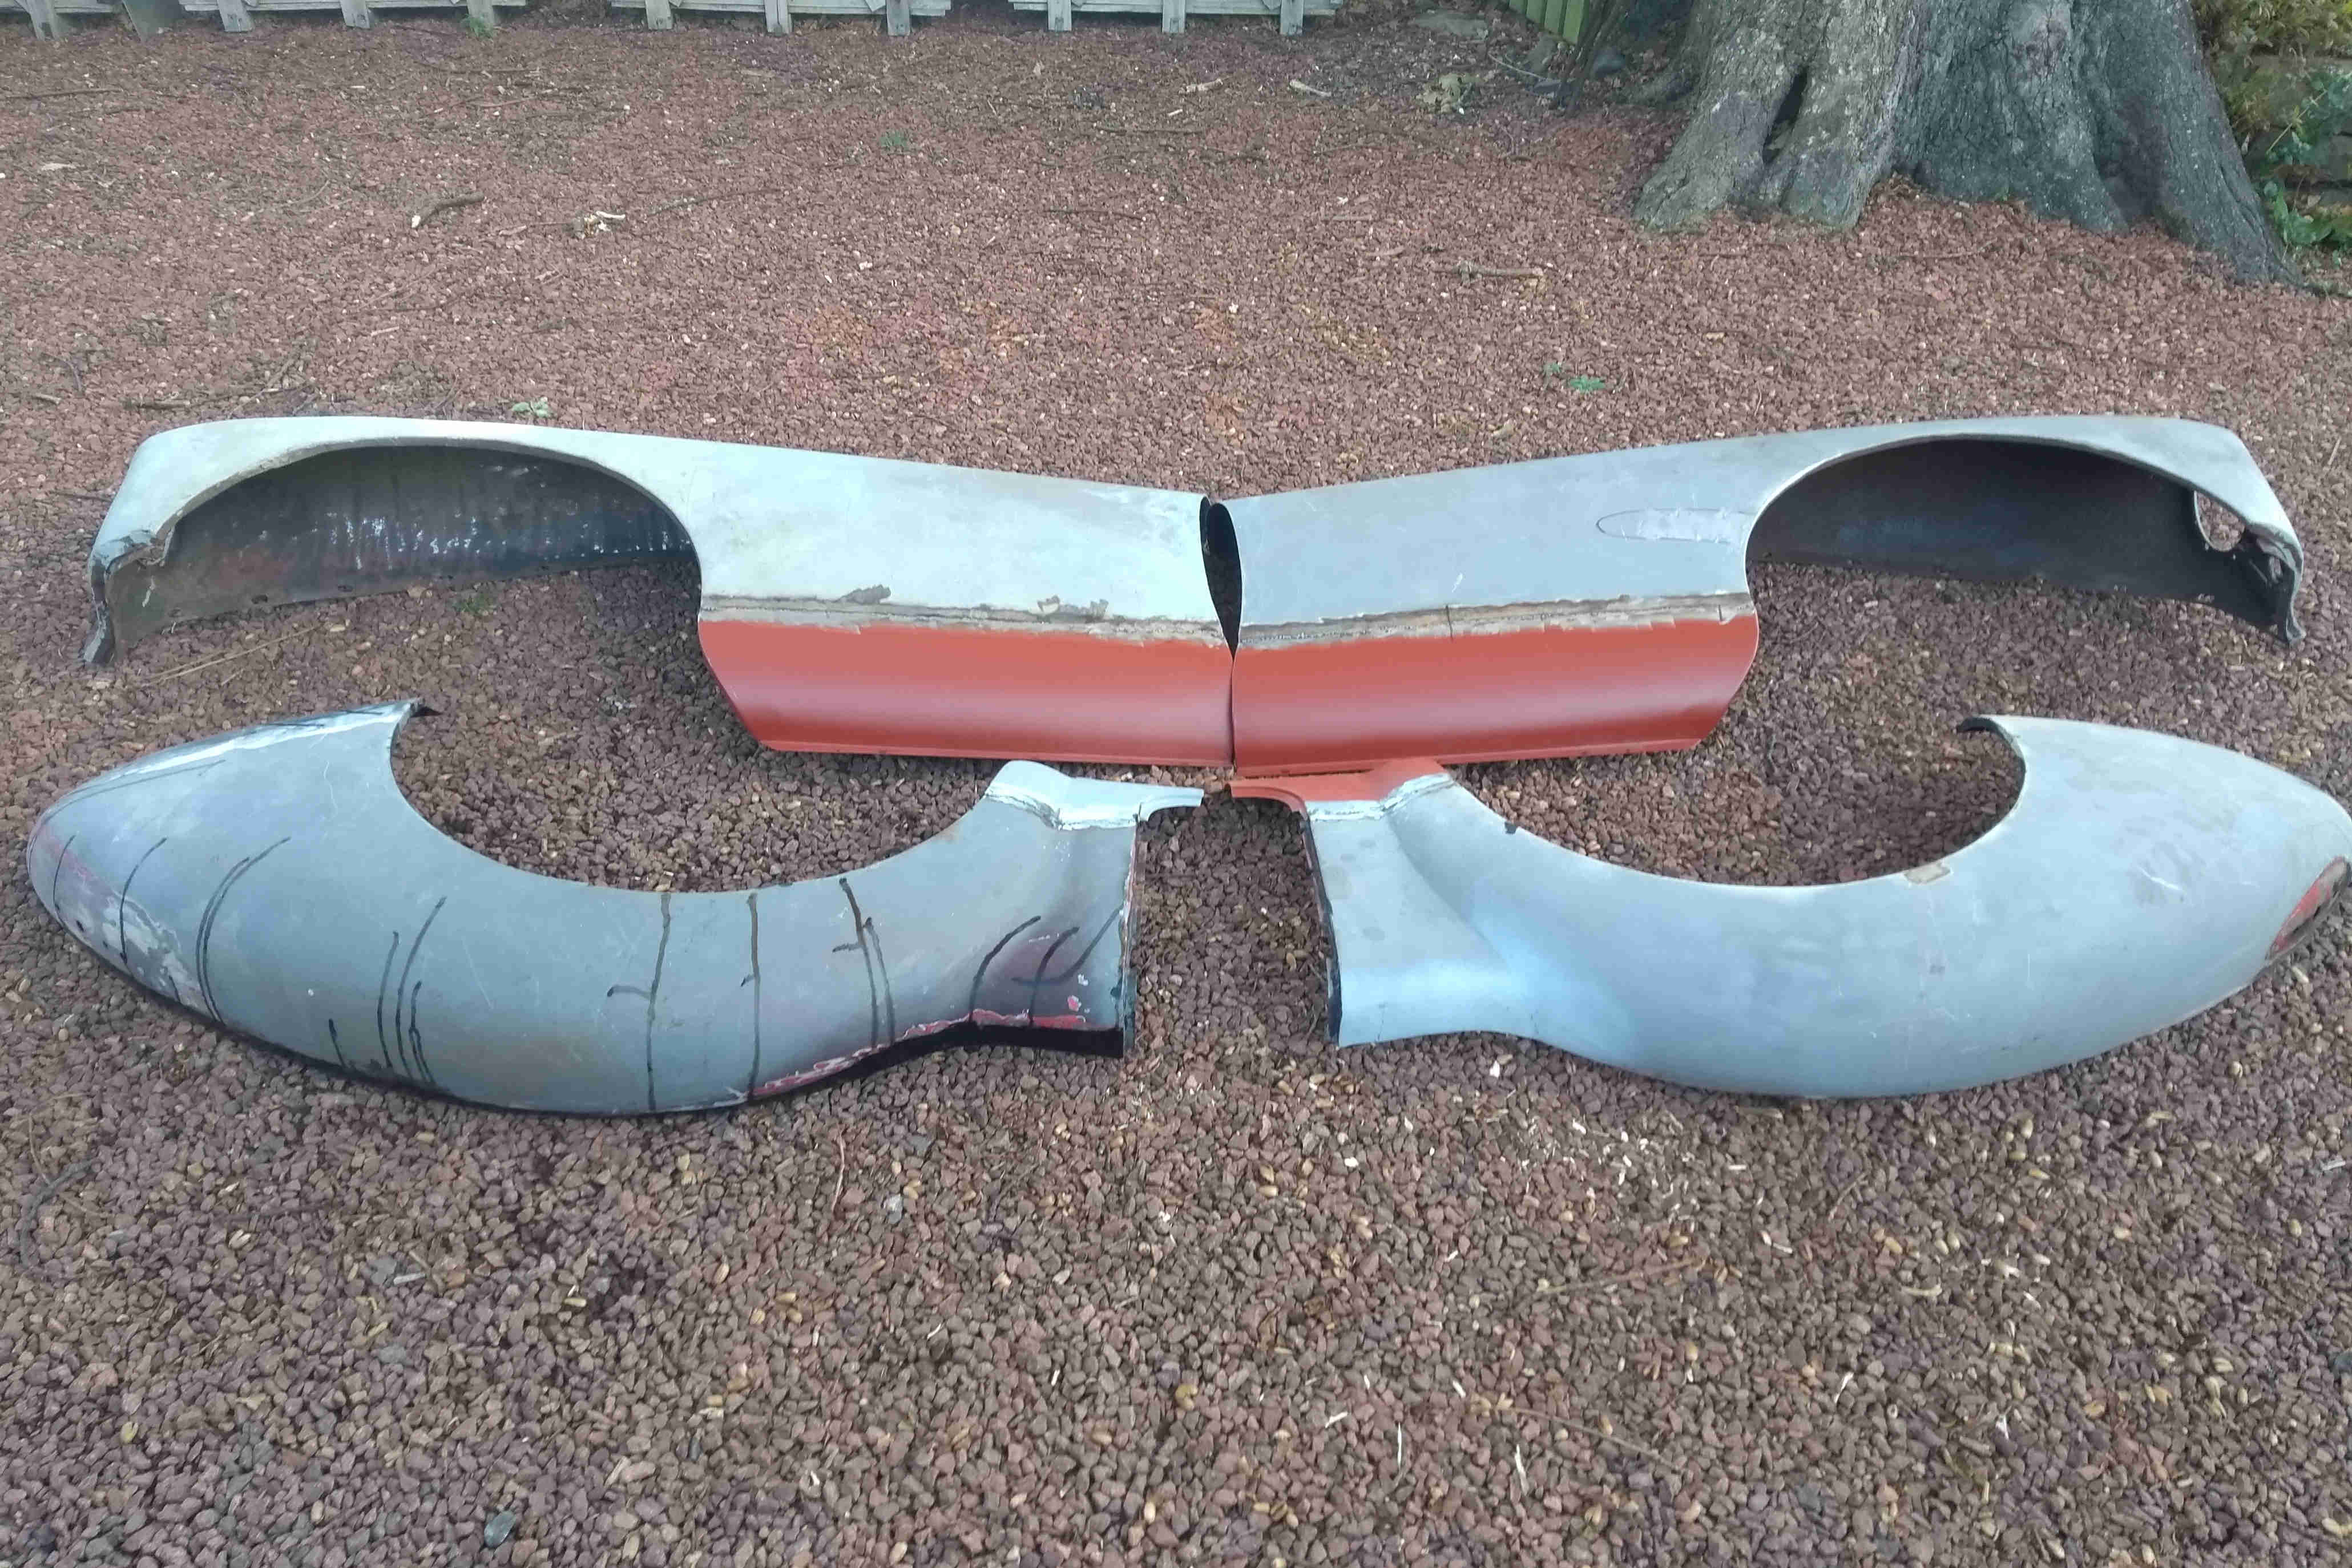
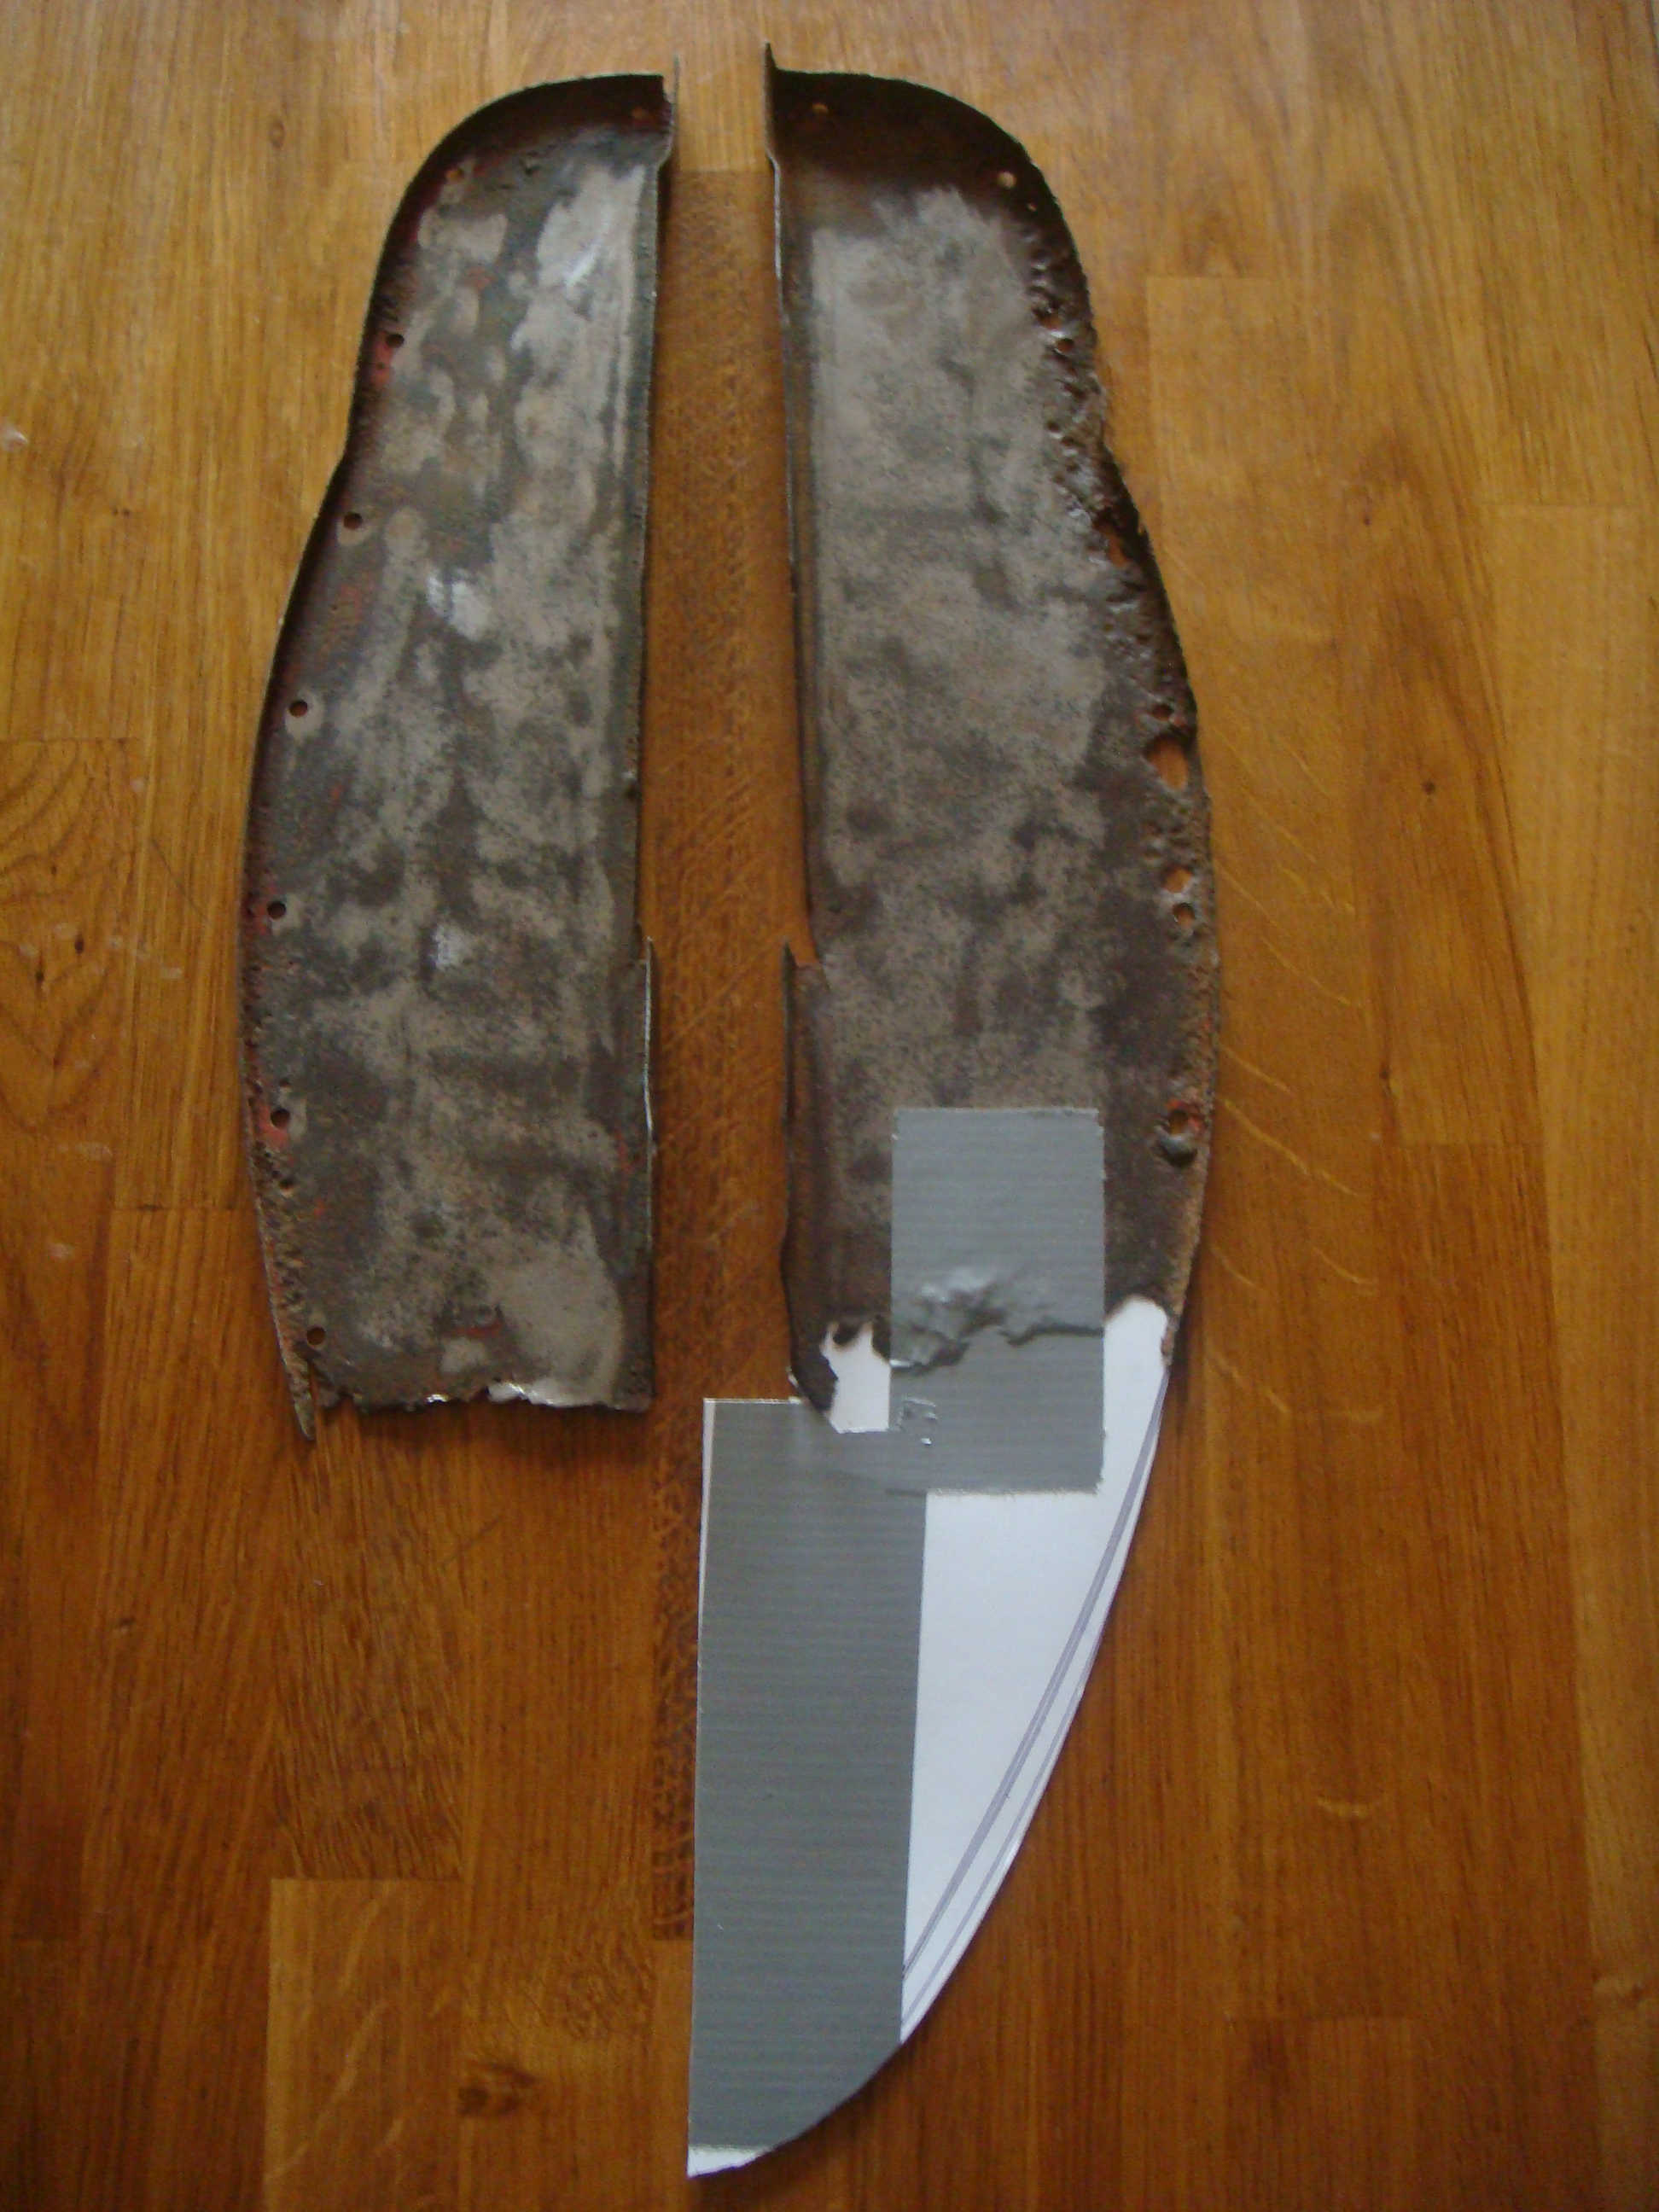
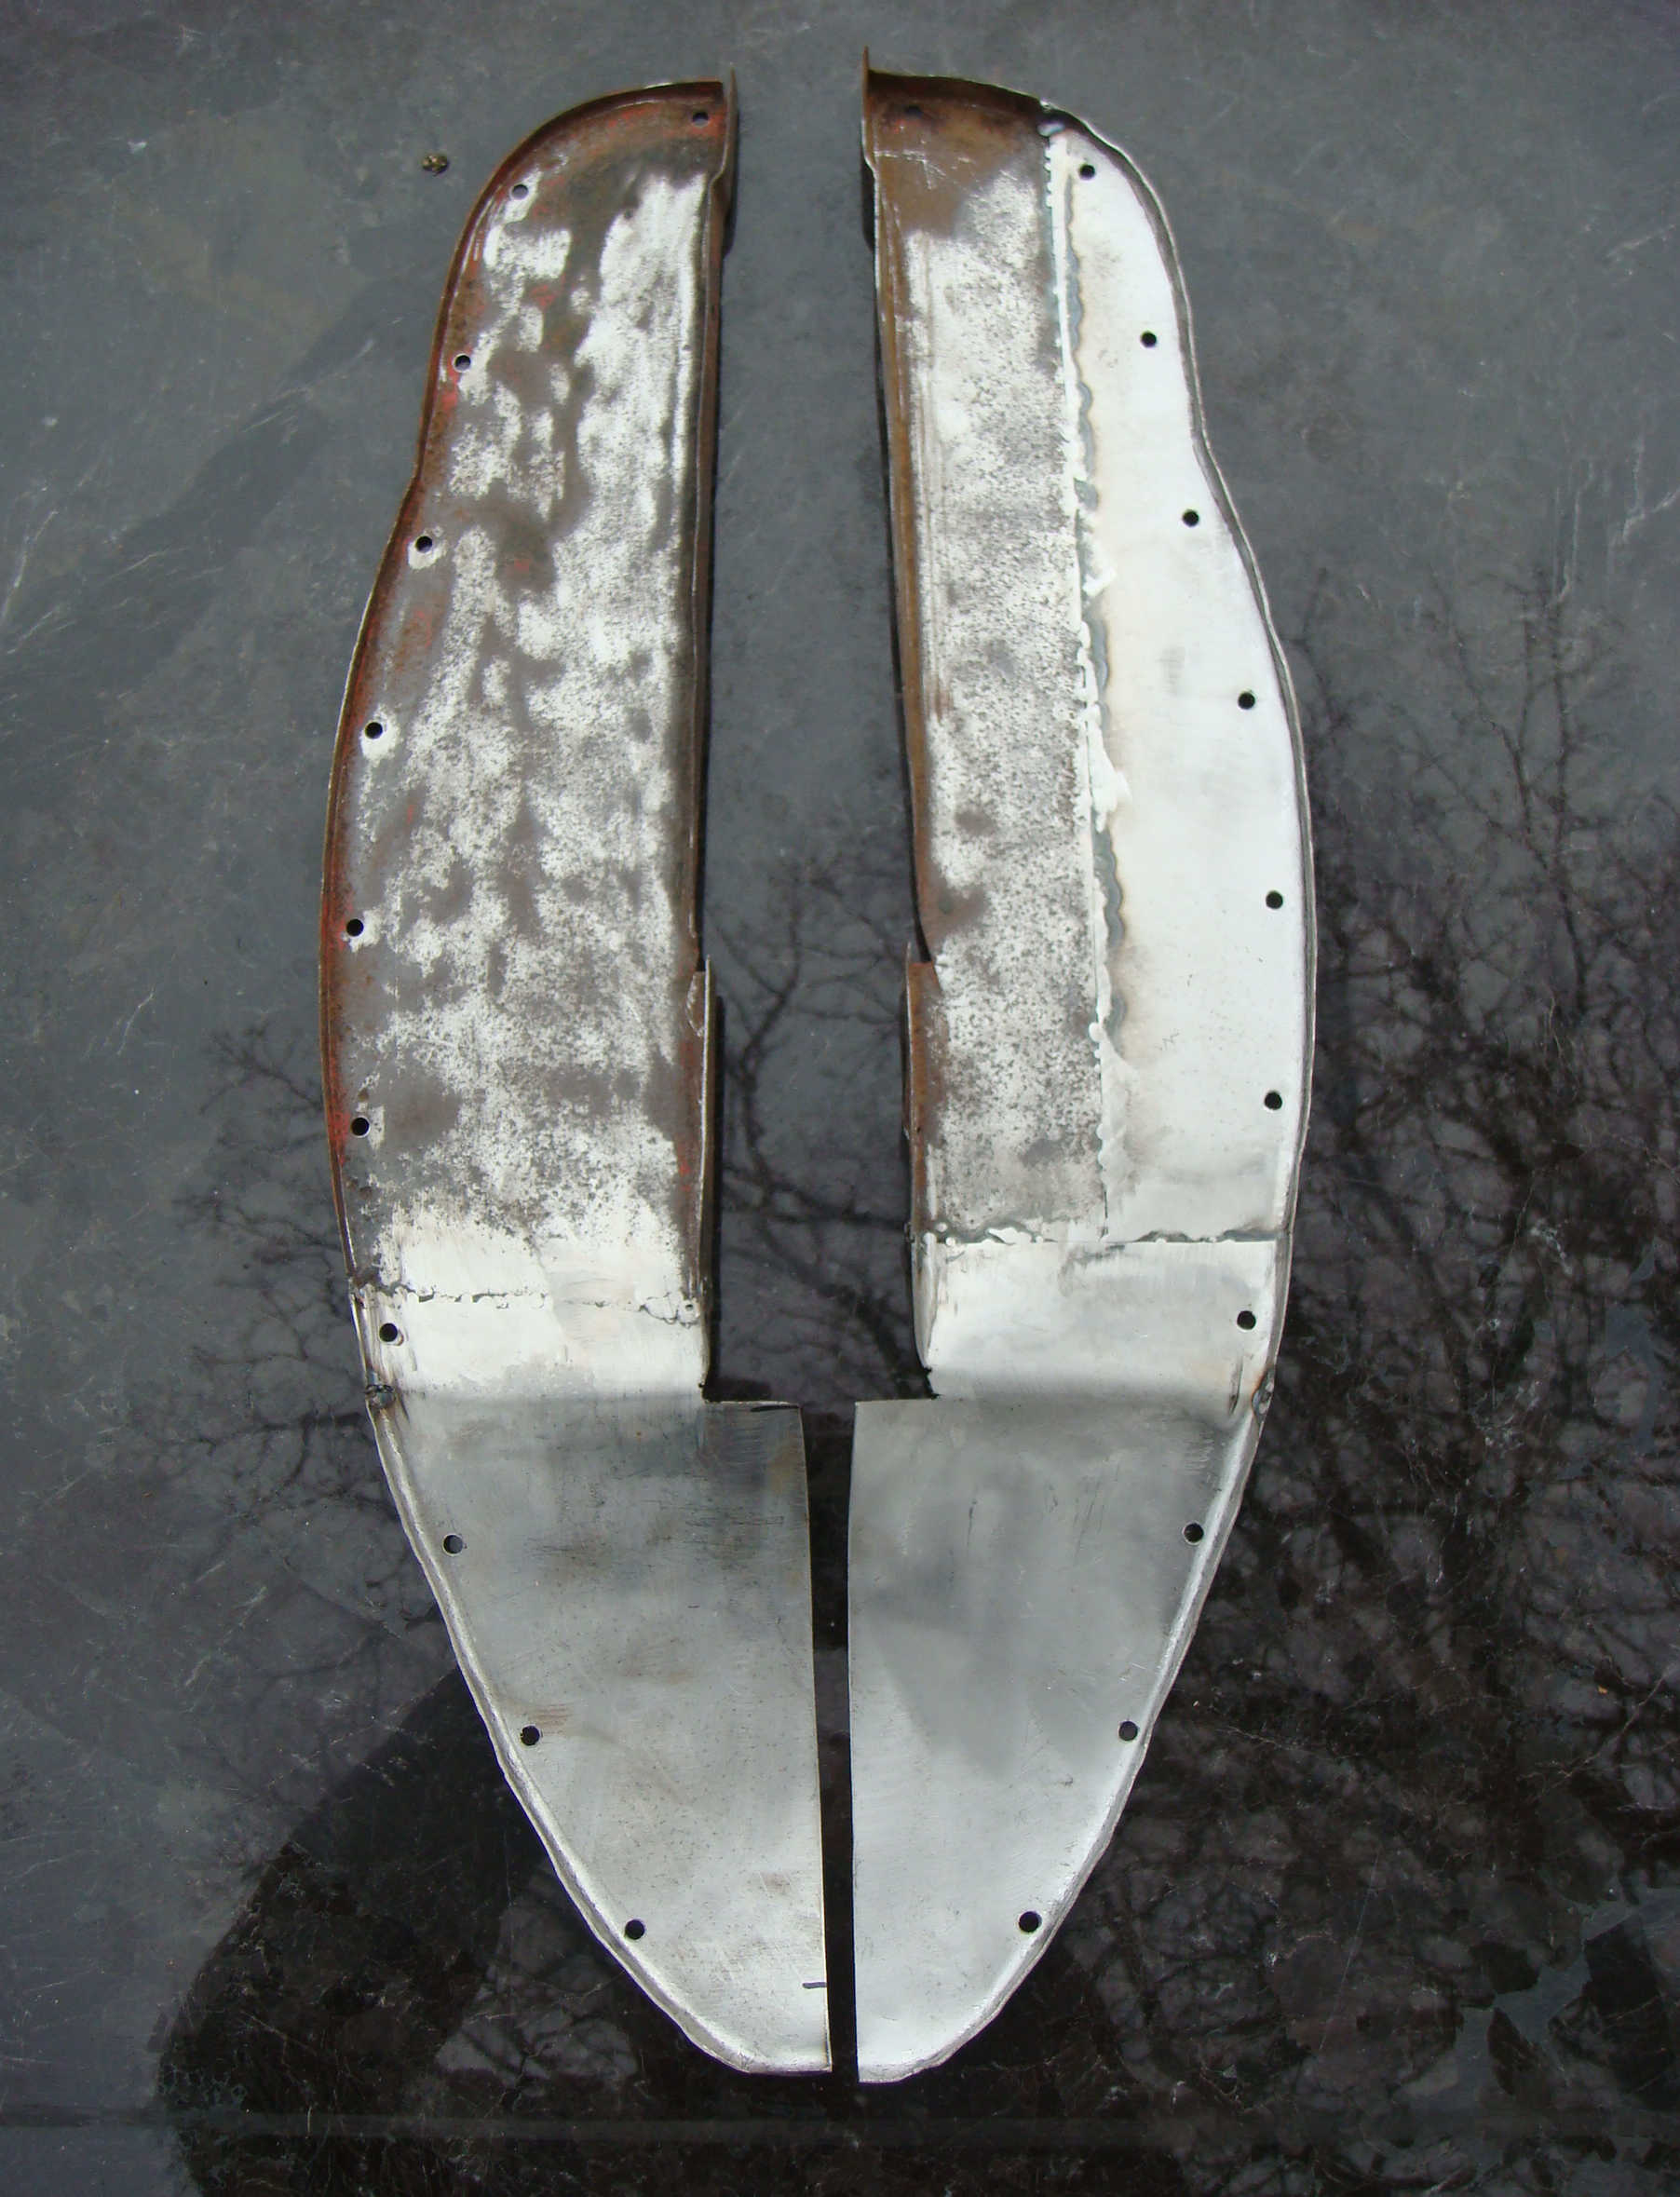
All four wings were suffering with bottem end rot which was not unexpected - another feature of a 60 year restoration. So common that repair sections are readily available and I even had one in the box of bits that came with the car. the repair setions were a good fit and a relatively simple job of cut & butting these onto the wings. The rear left wing had a bash in the very end but that was fixed by being beaten out.
Click thumbnail
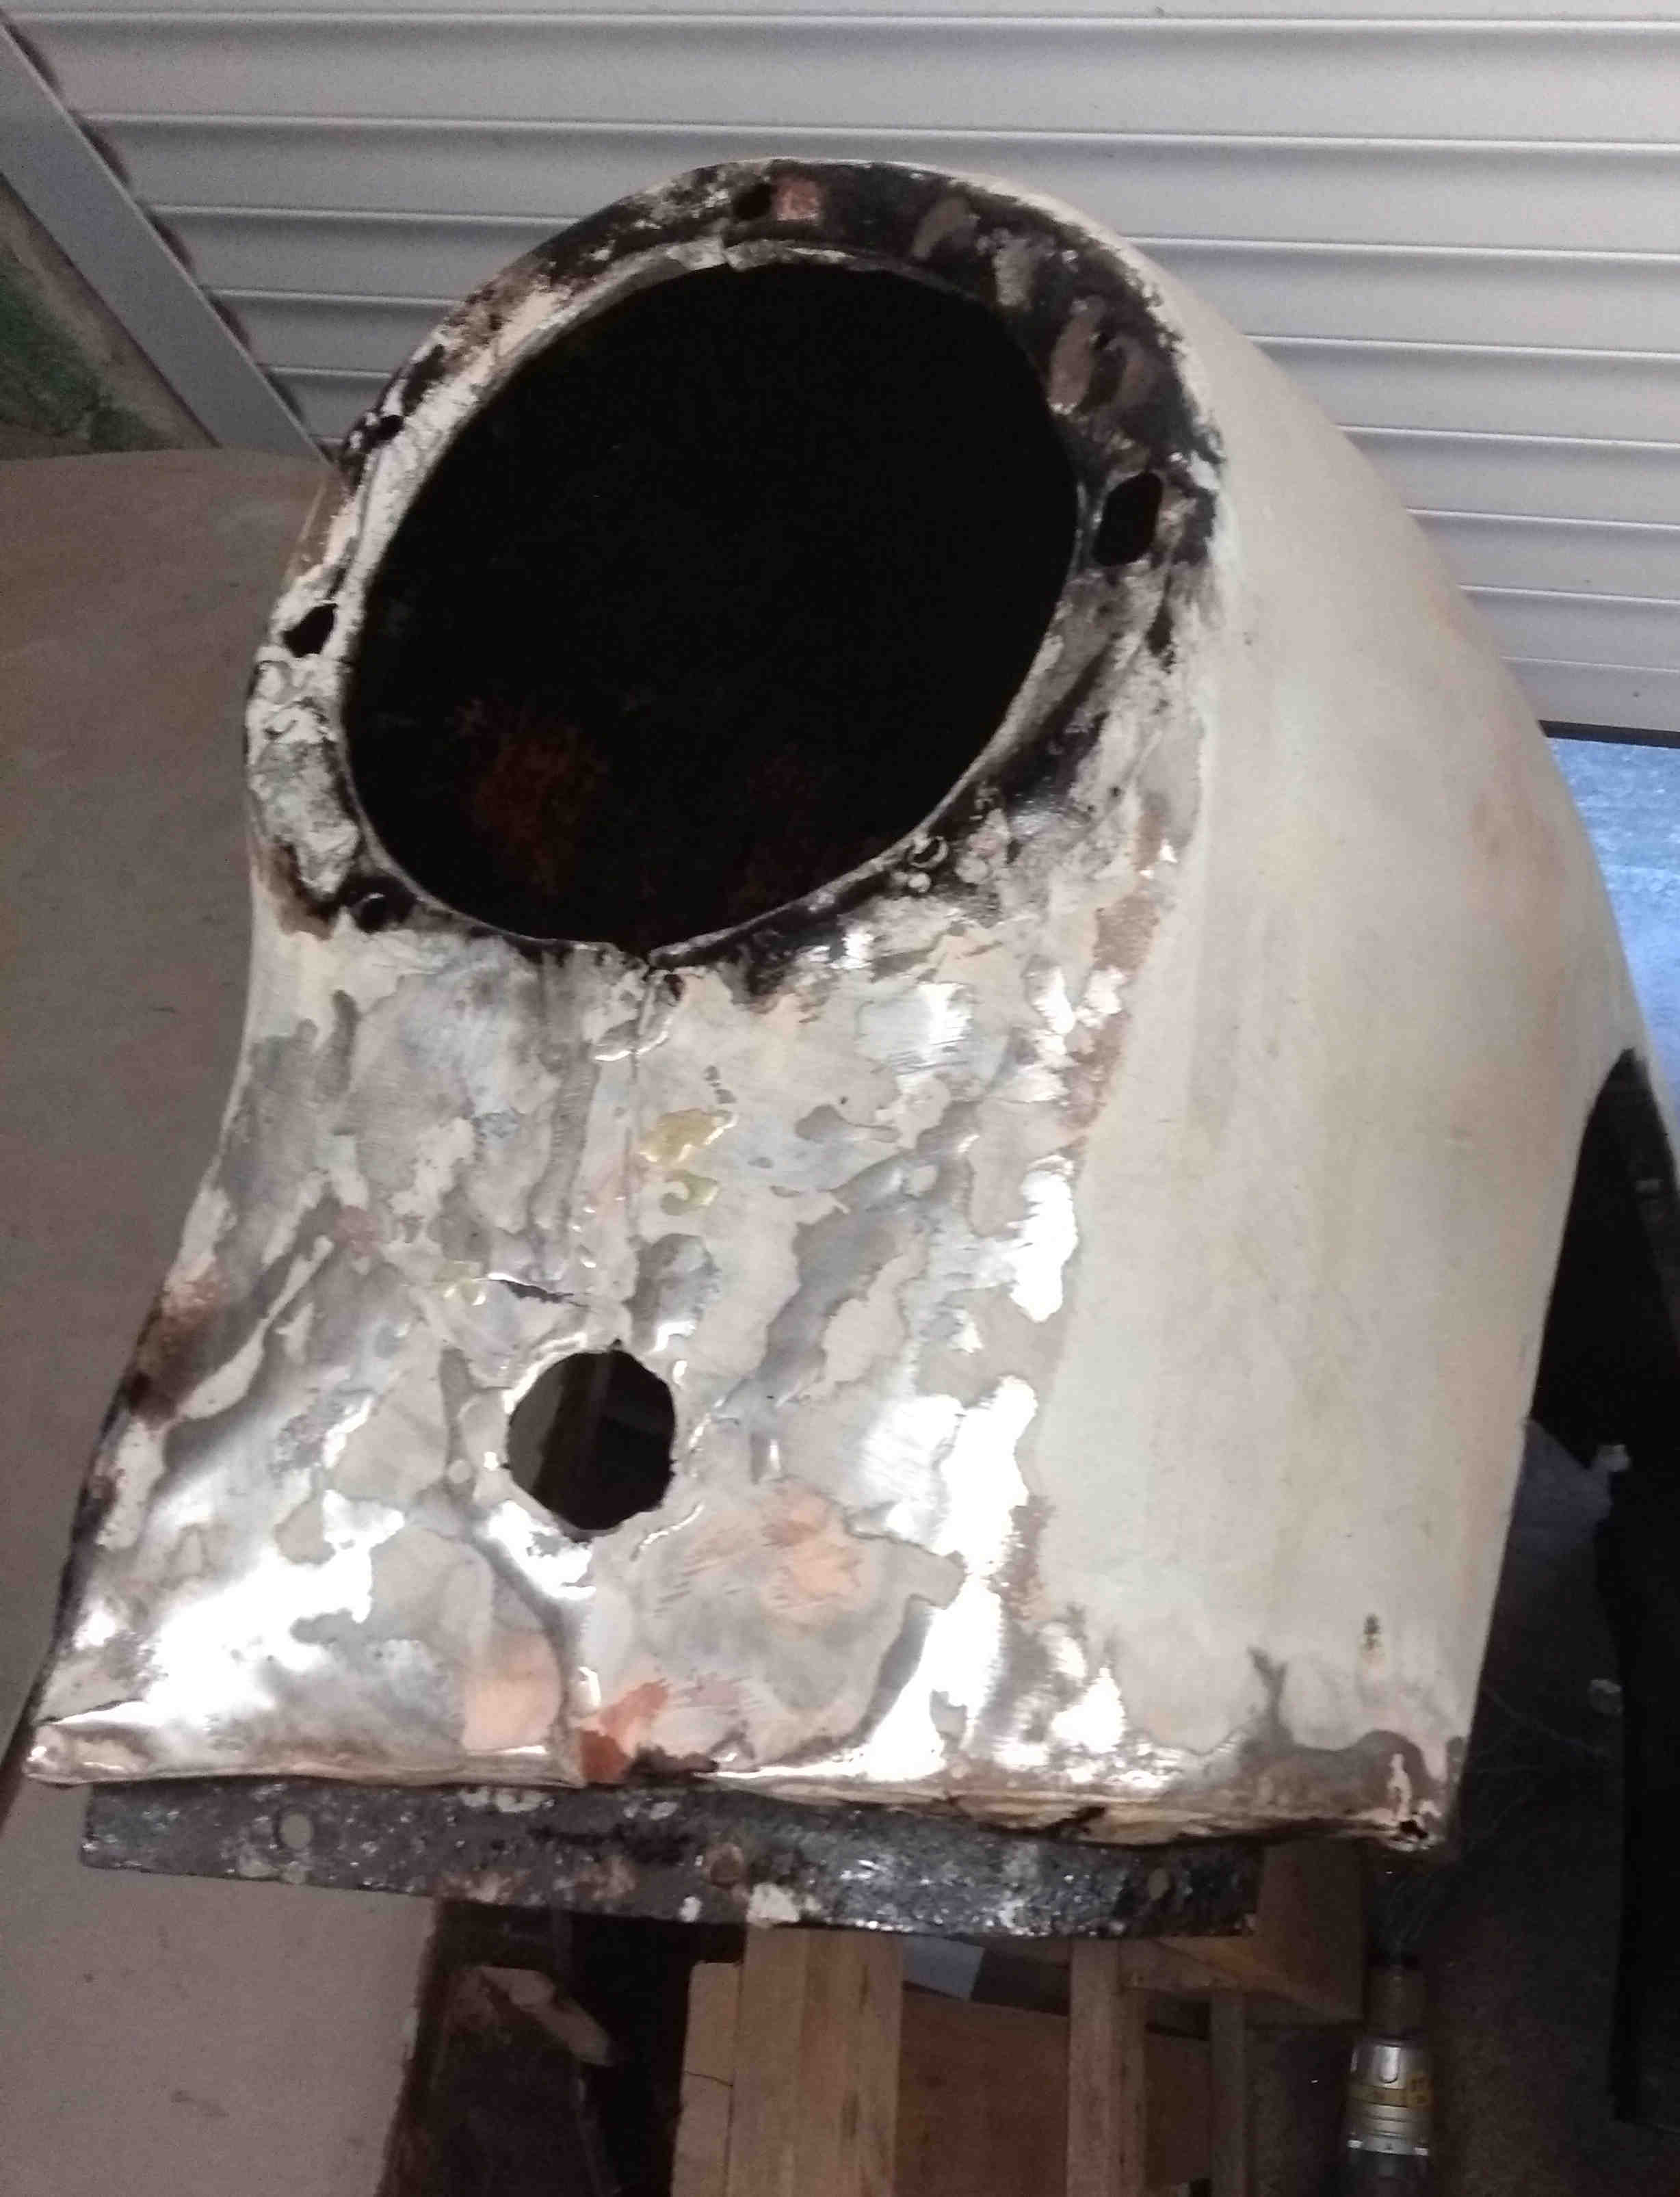
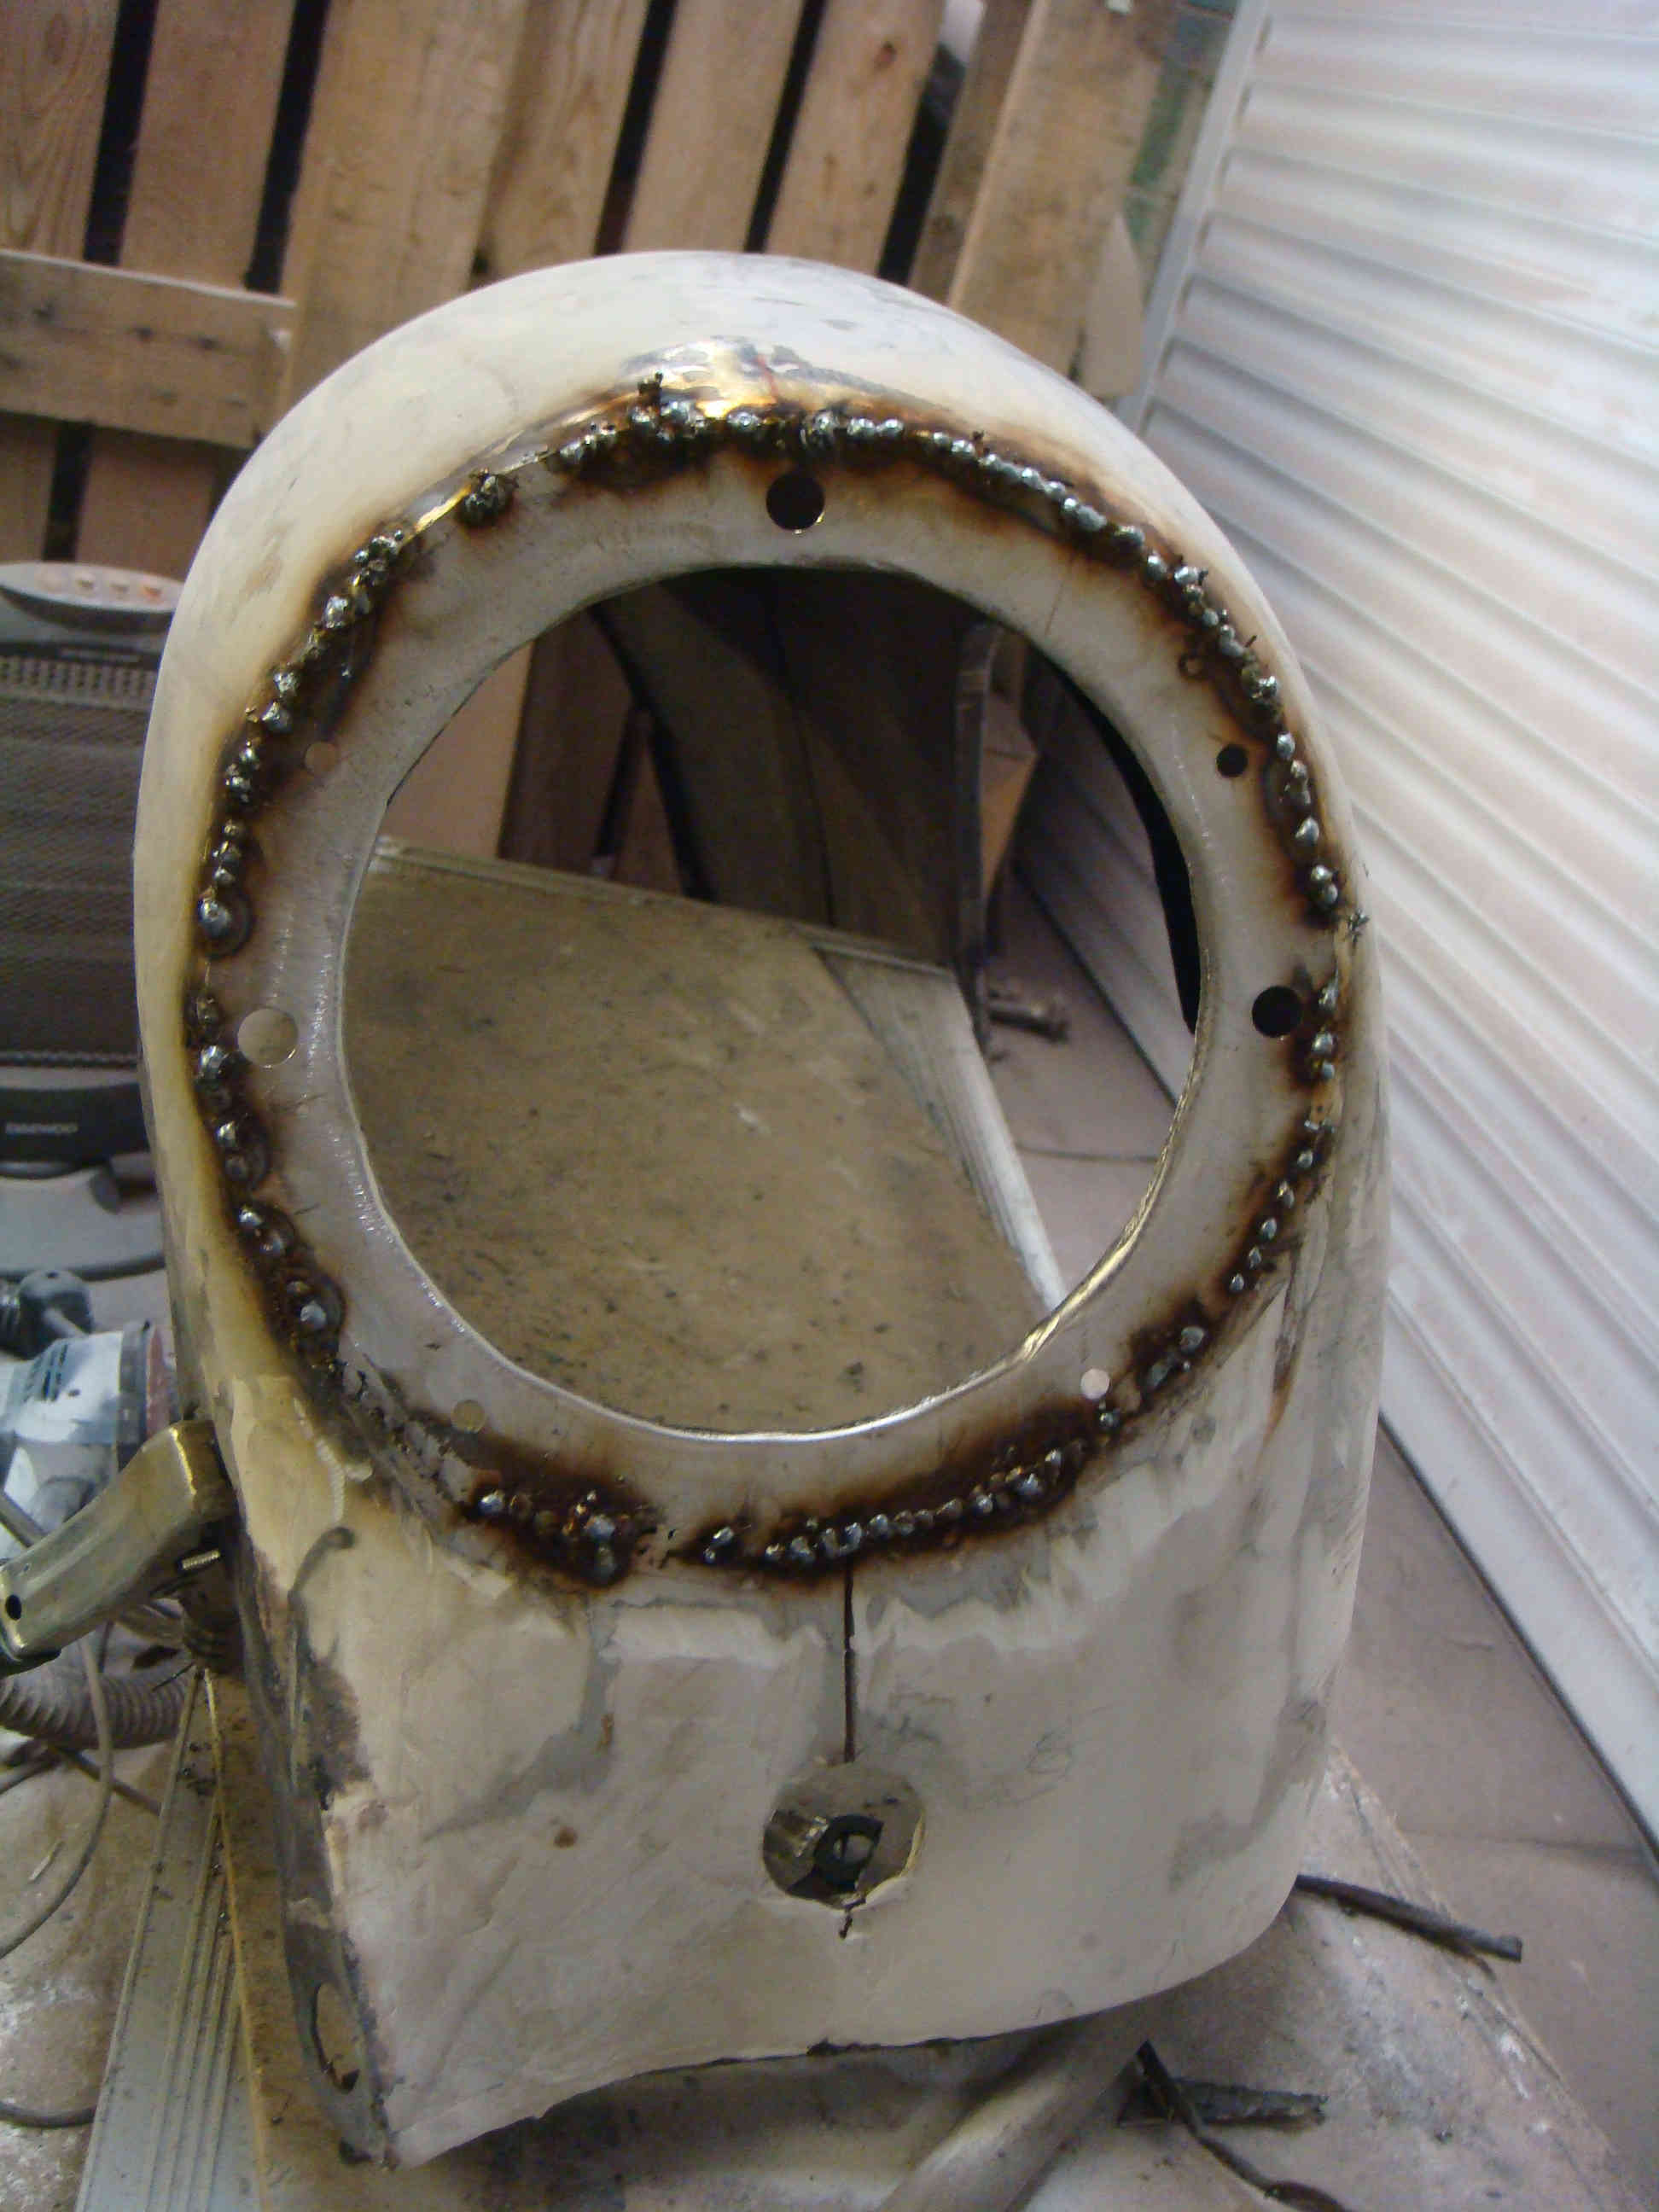
The front left was a bit more of a problem - this is where it suffered the accident damage and had previously been repaired. The bullnose end, around the headlamp, was particulary bad with wrinkled metal, filler, rust and holes. Trying to cut back to find good metal ended up by making a new headlamp ring and fabricating panels to fit. A learning curve exercise but I was pleased with the final outcome - thanks Fitzee.
Splash Panels
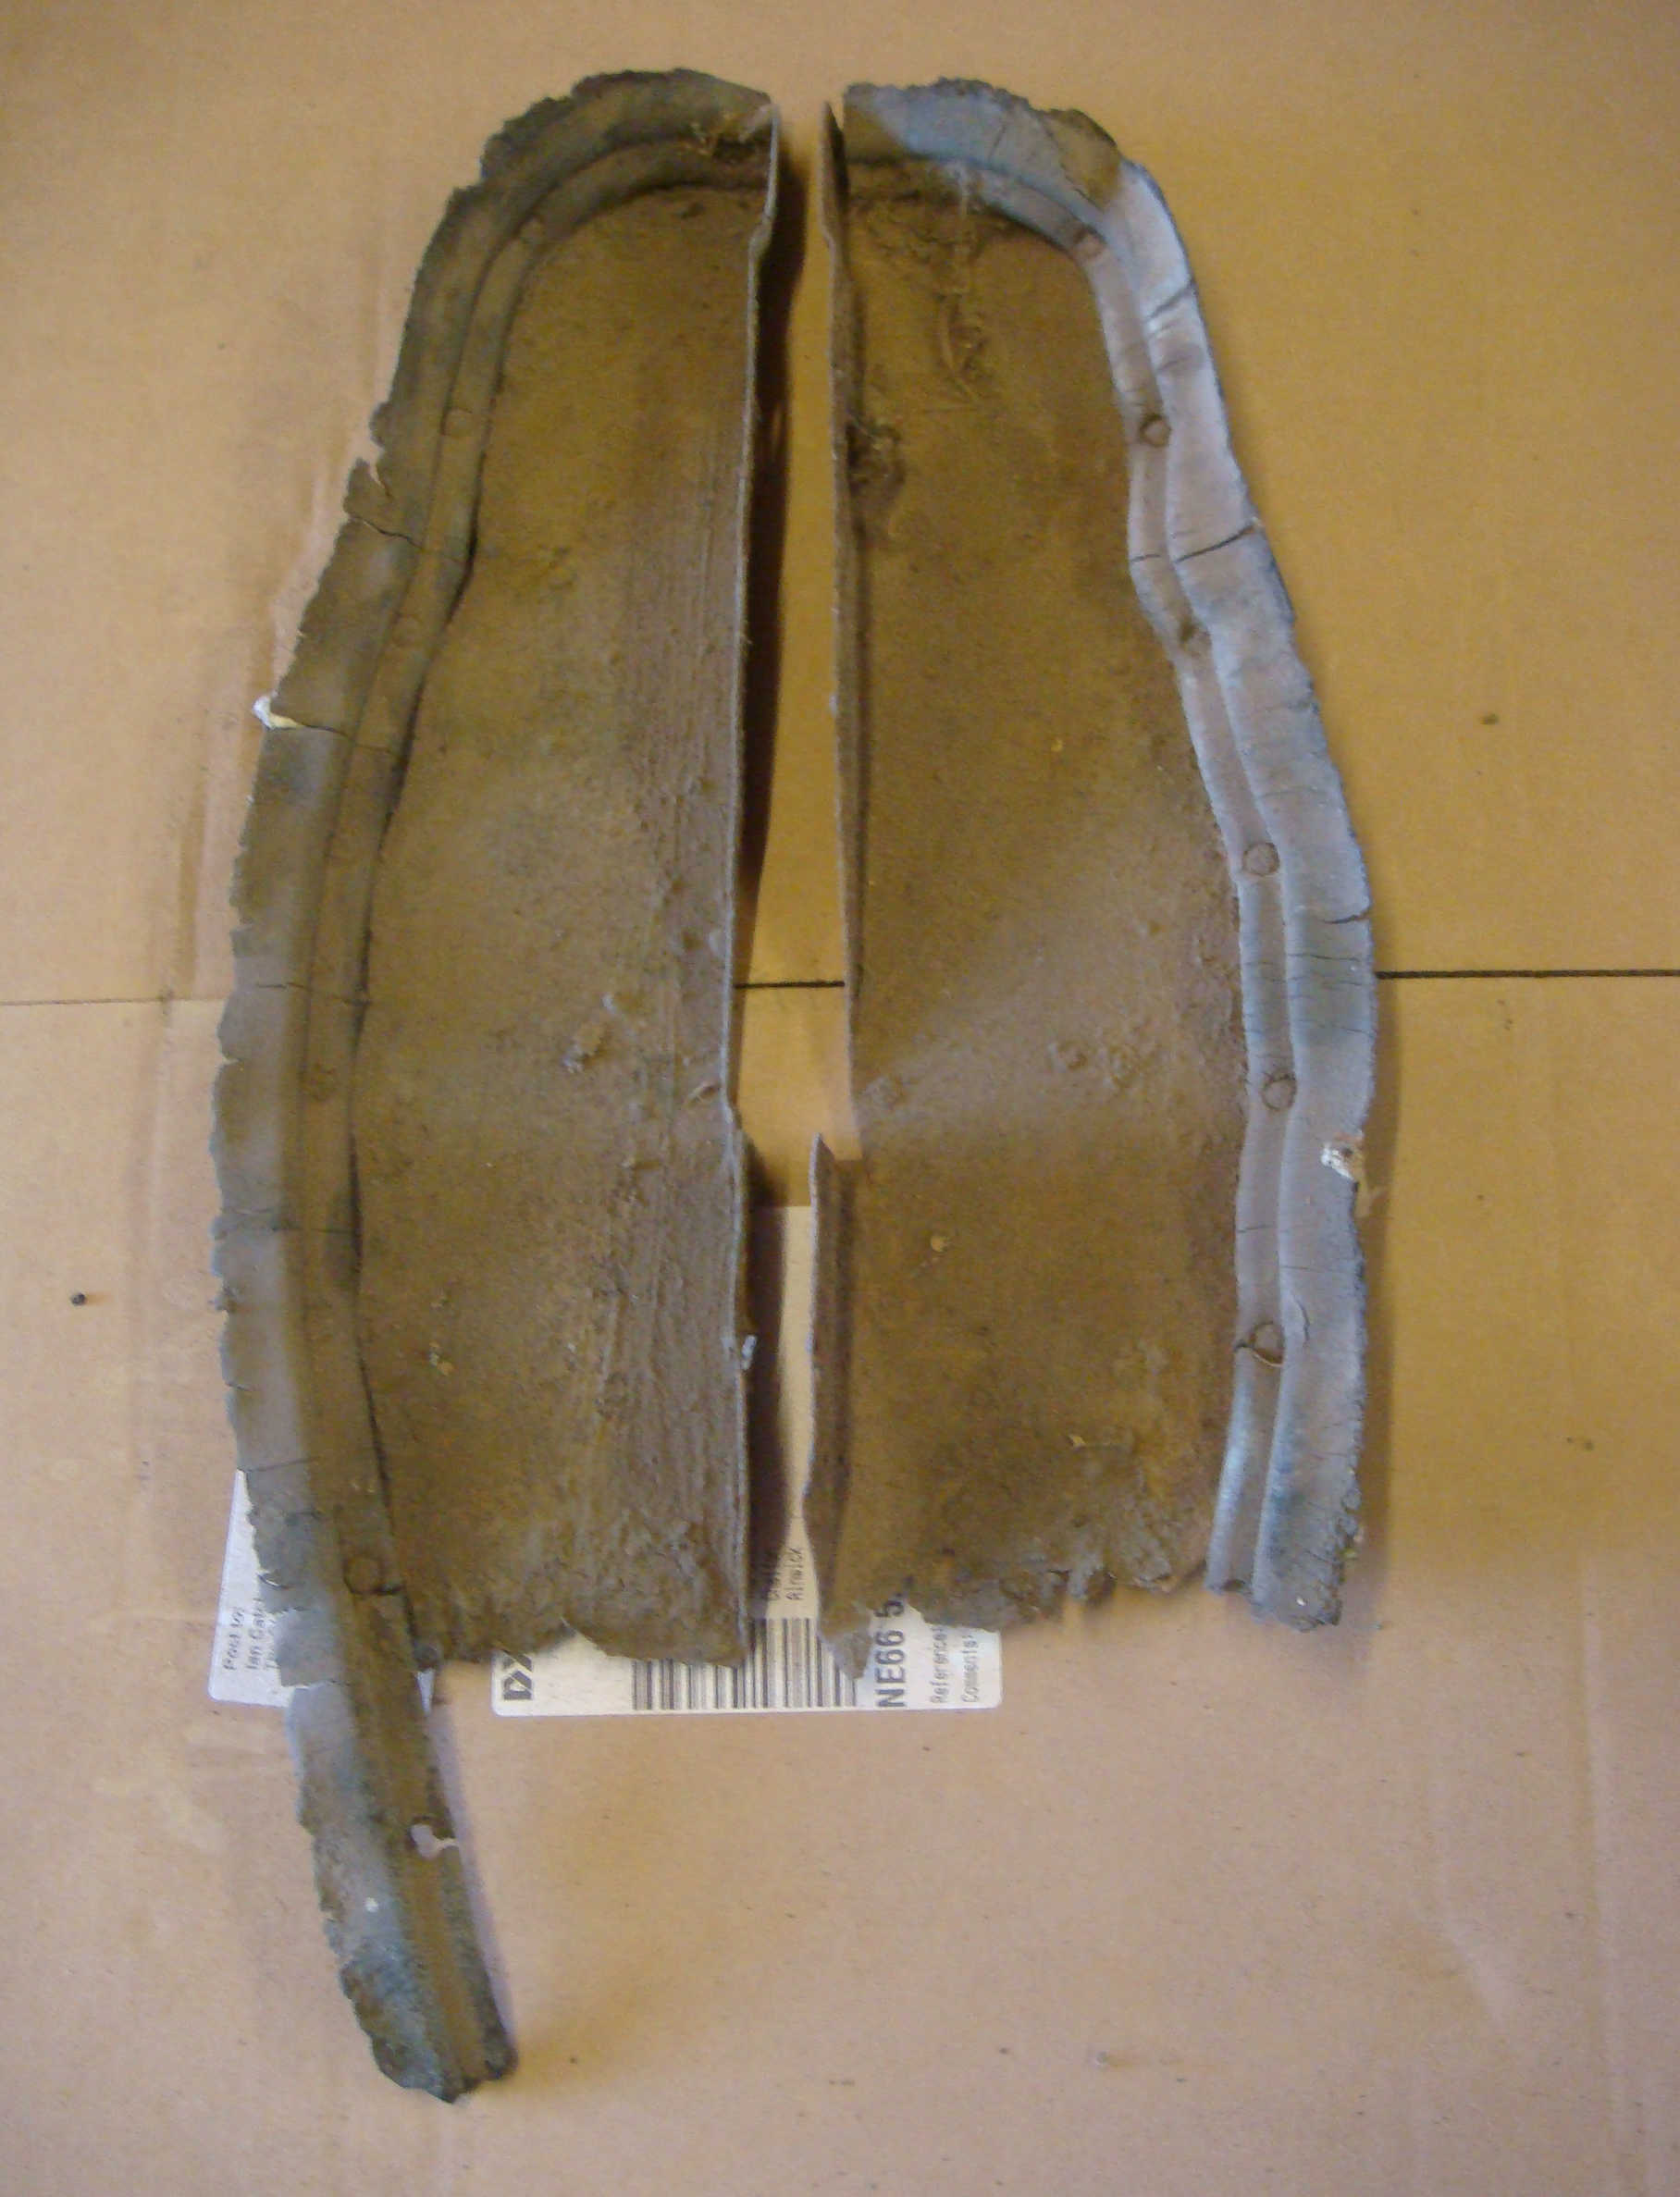
Surprisingly, the larger panels, front and rear inside the wheel arches, were in resonable condition just requiring a rub down and spray. The front panels in the rear wheel arch did not fair so well with the botton ends non-existant. Again, a common fault so easily procured, but I was enjoying fabicating panels so decided to repair these. Of course all new rubber seals will be fitted once painted.
Click thumbnail
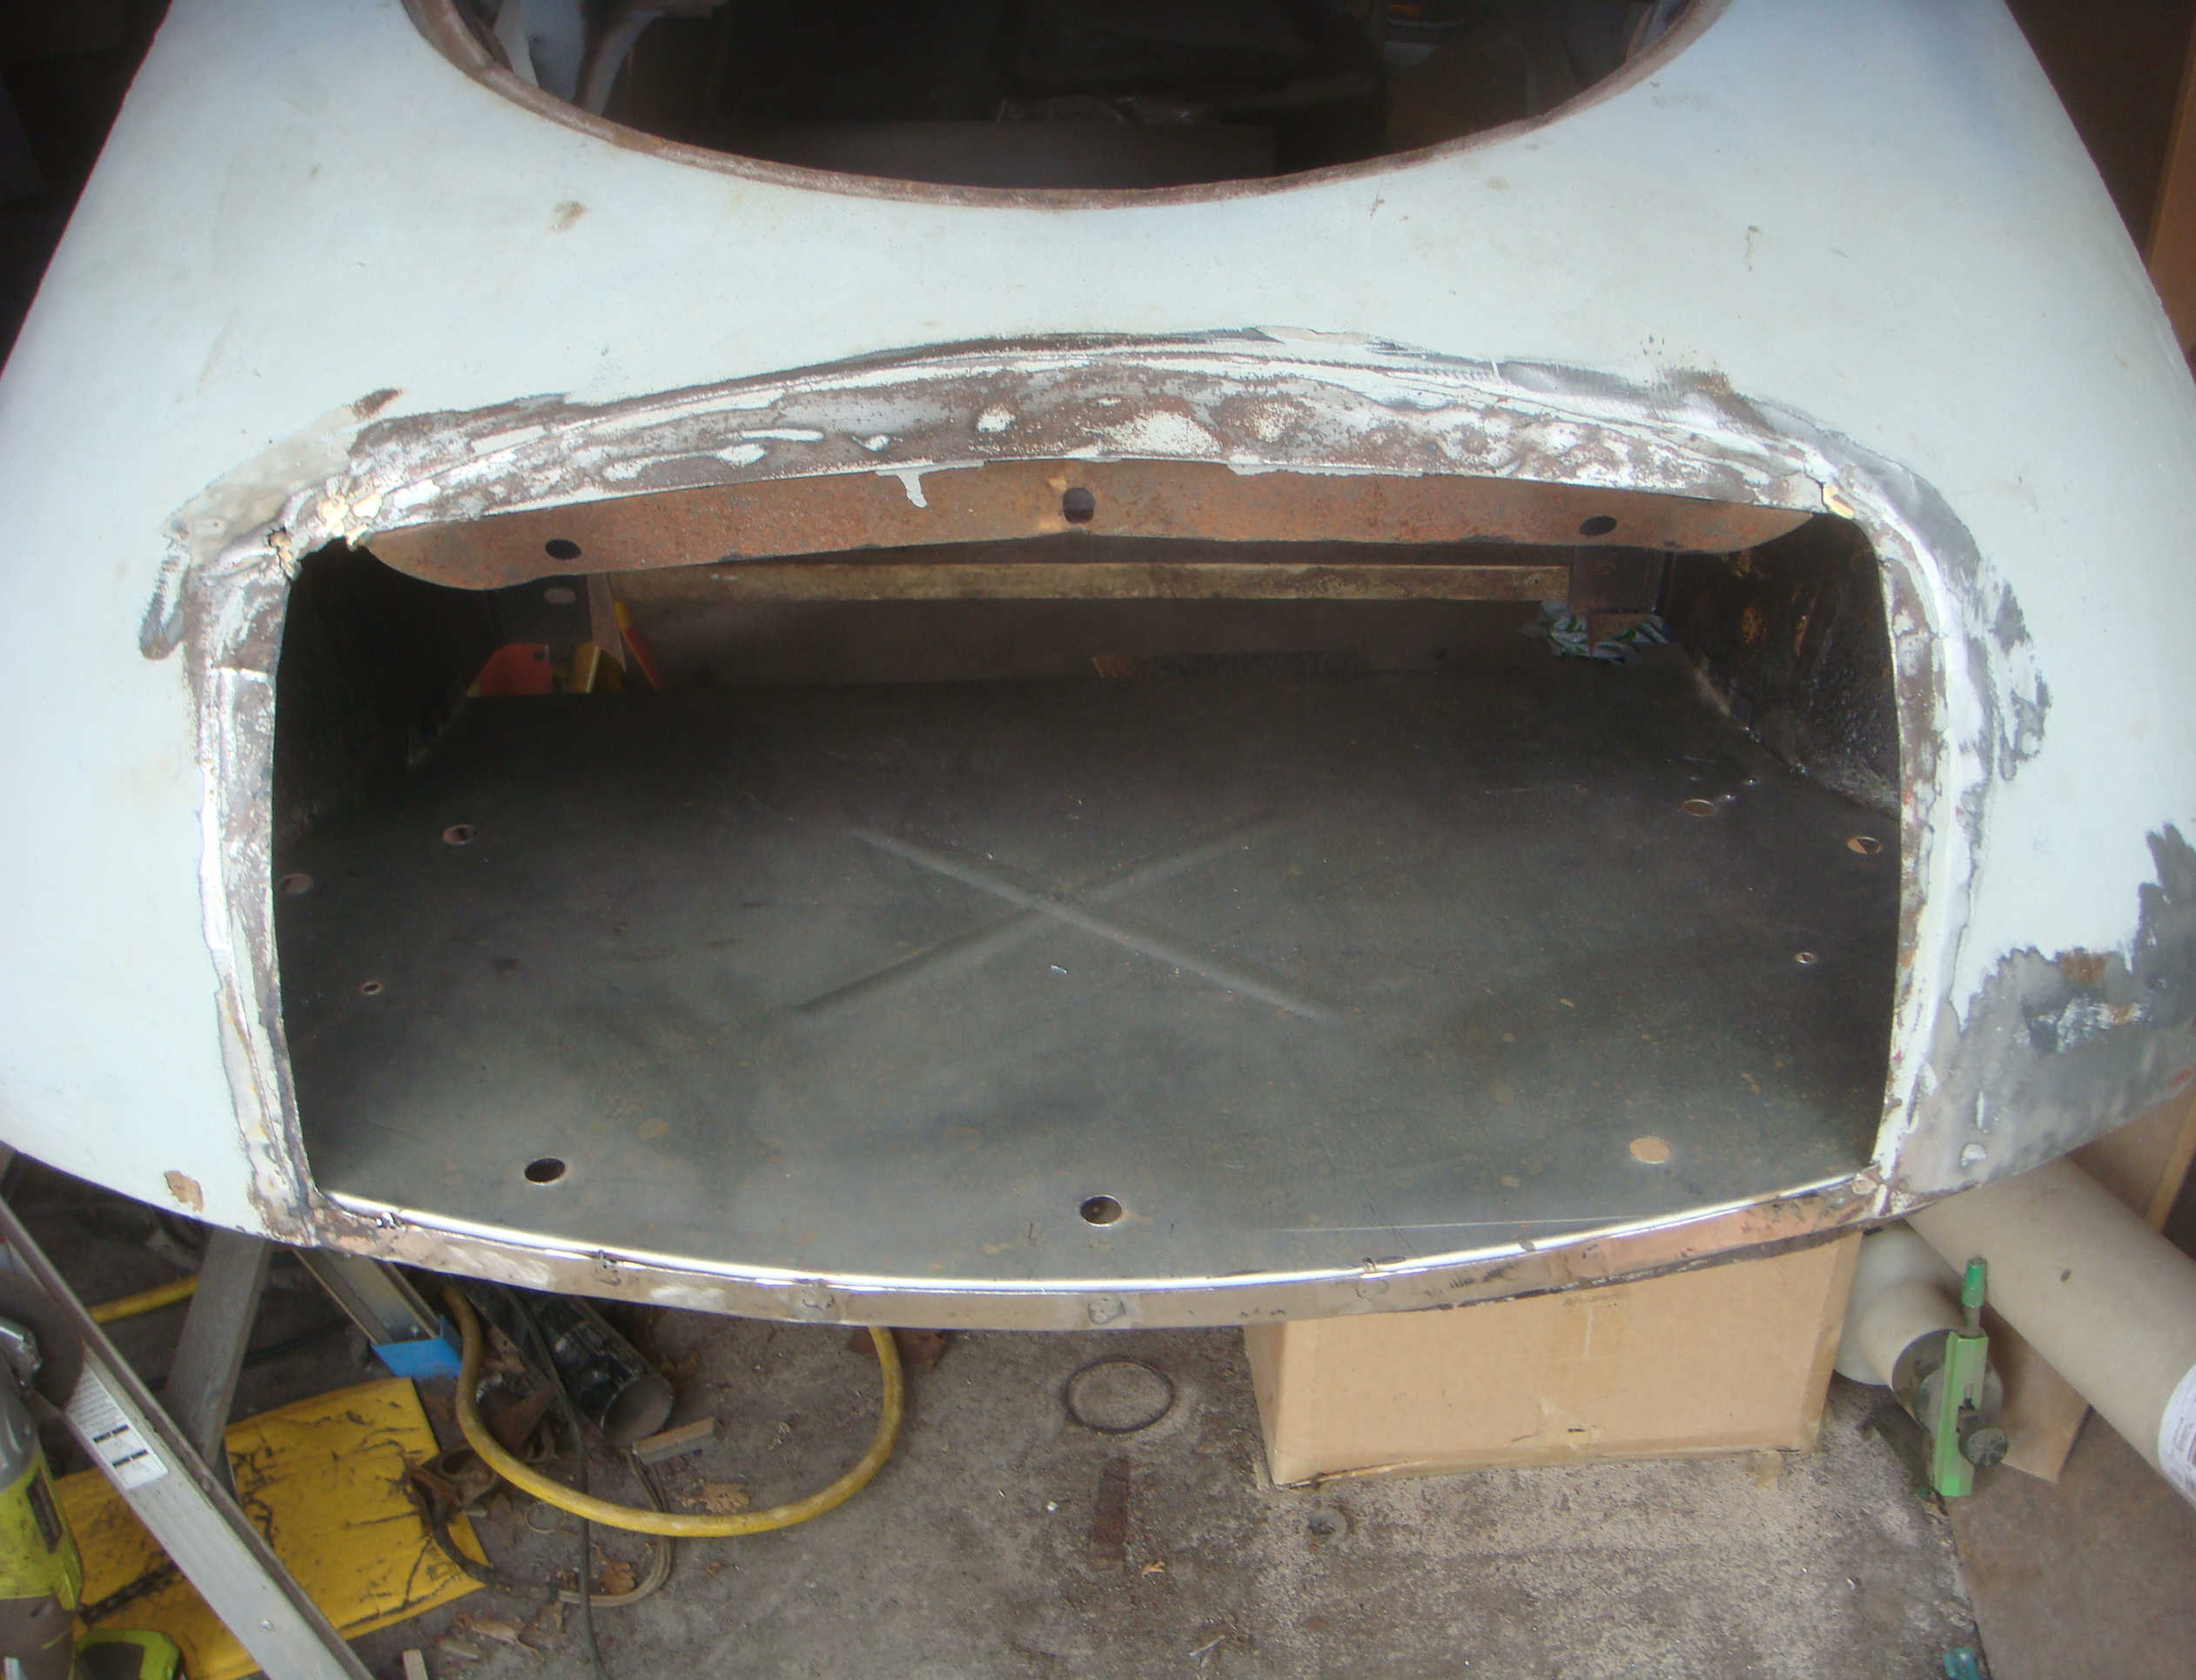
Valance
The front bumper valance had seen better days - a combination of taking all the knocks at the front of the car and, I'm sure, the front end crash did not help. New ones are availble but at £300 - £400 don't come cheap. With nothing to lose I'd have a go at bashing it back into shape and repairing some of the tears and rips in the metalwork. It didn't come up too bad and will be hidden by the front bumper - if it's too bad I have the option at a later date of procuring a new one and may even go for a fibre glass replacement.
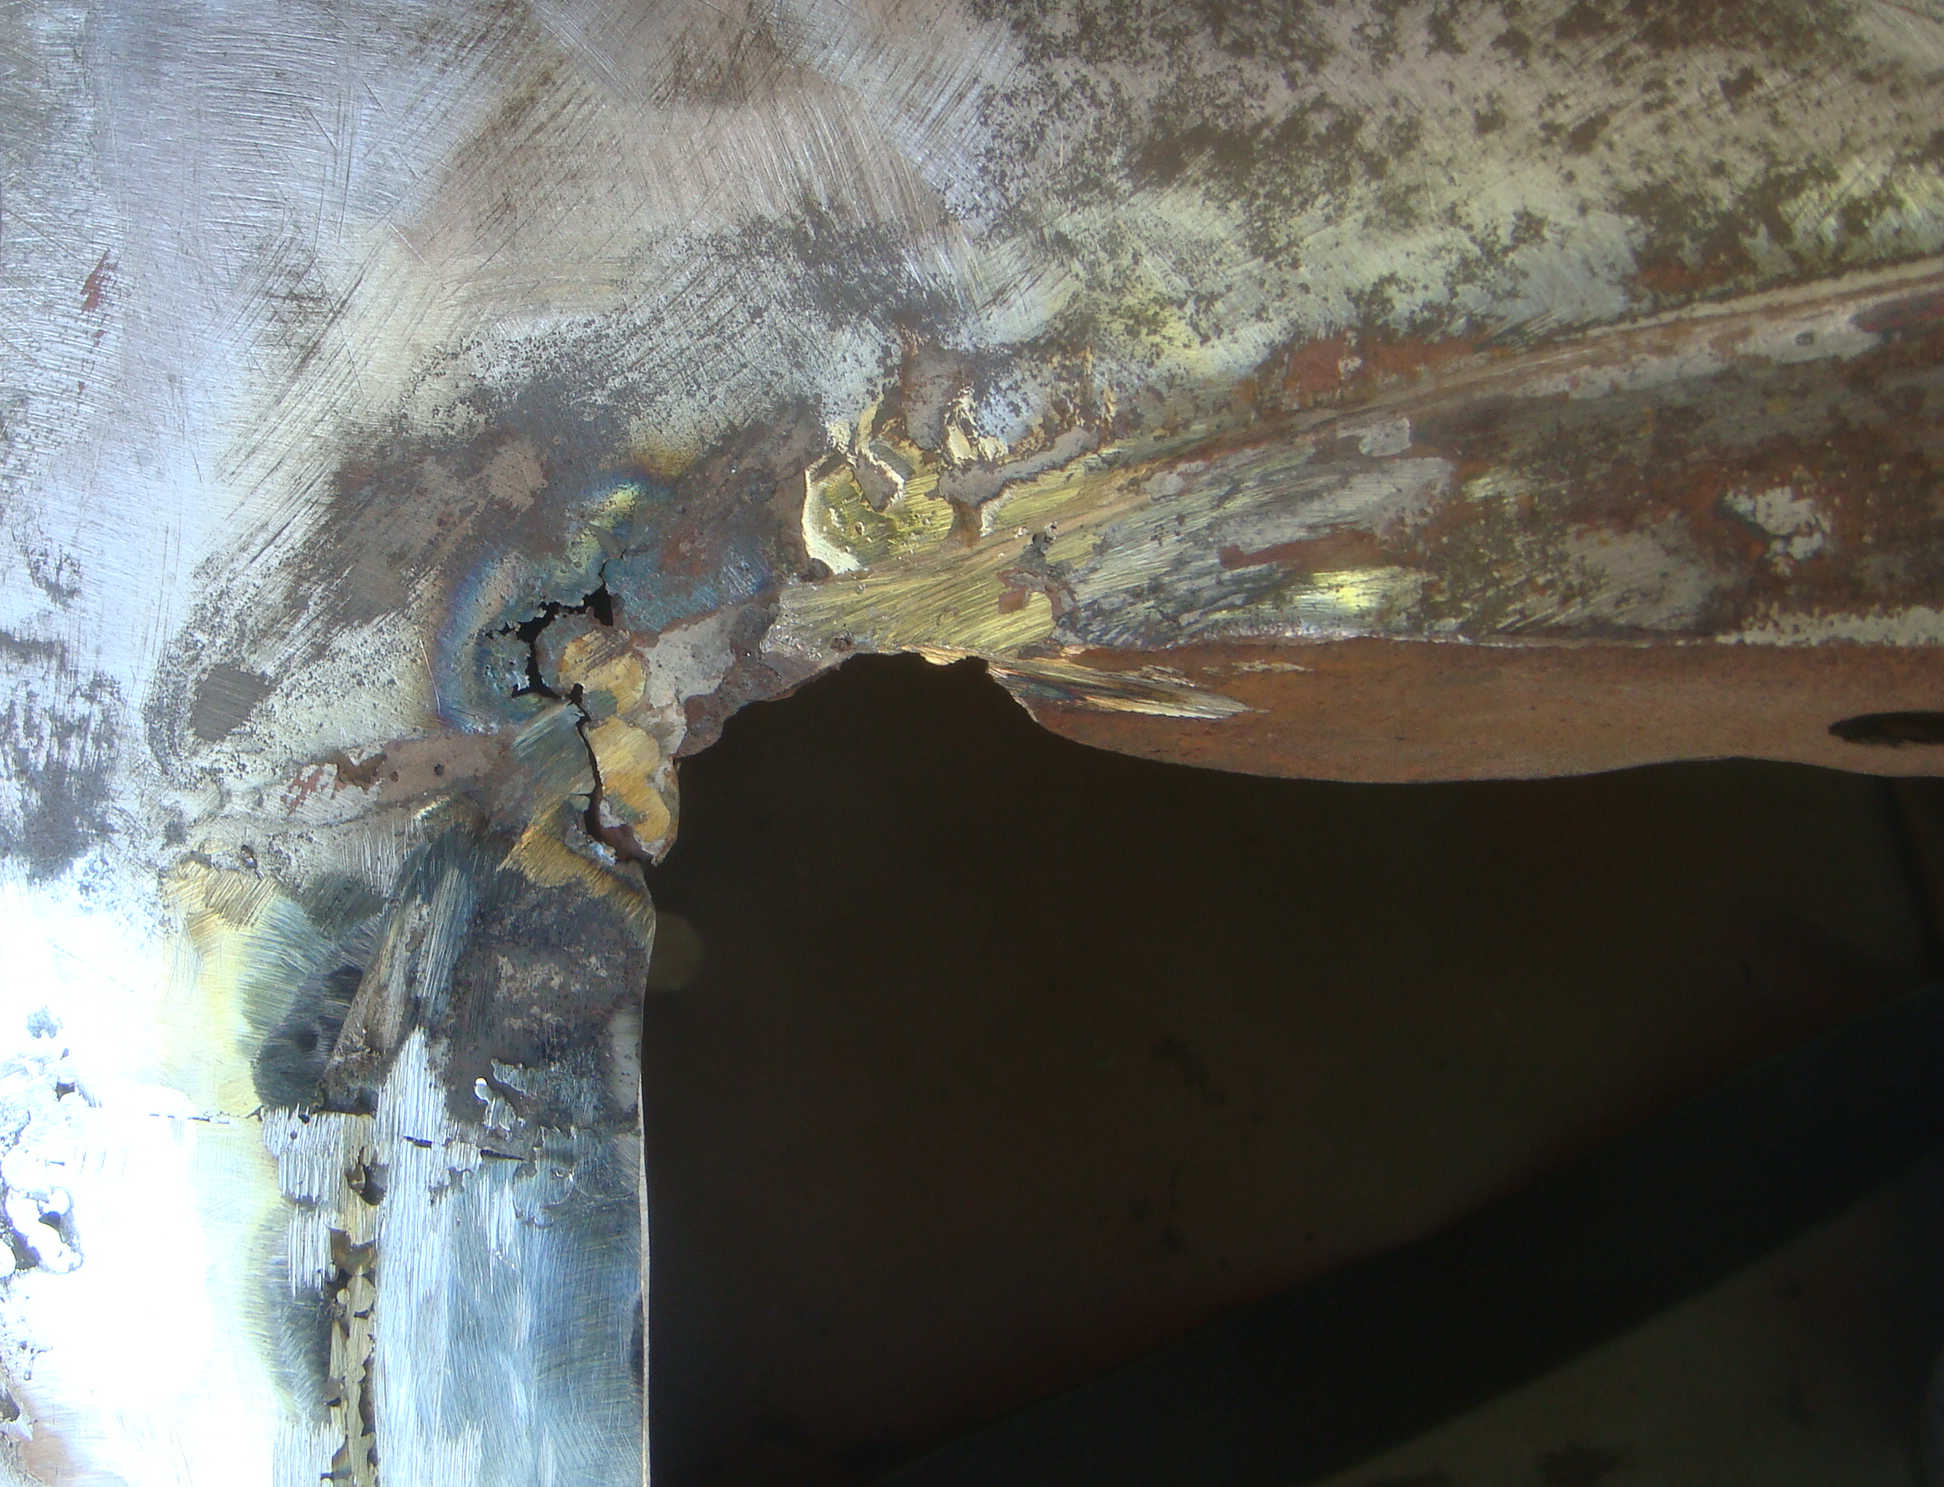
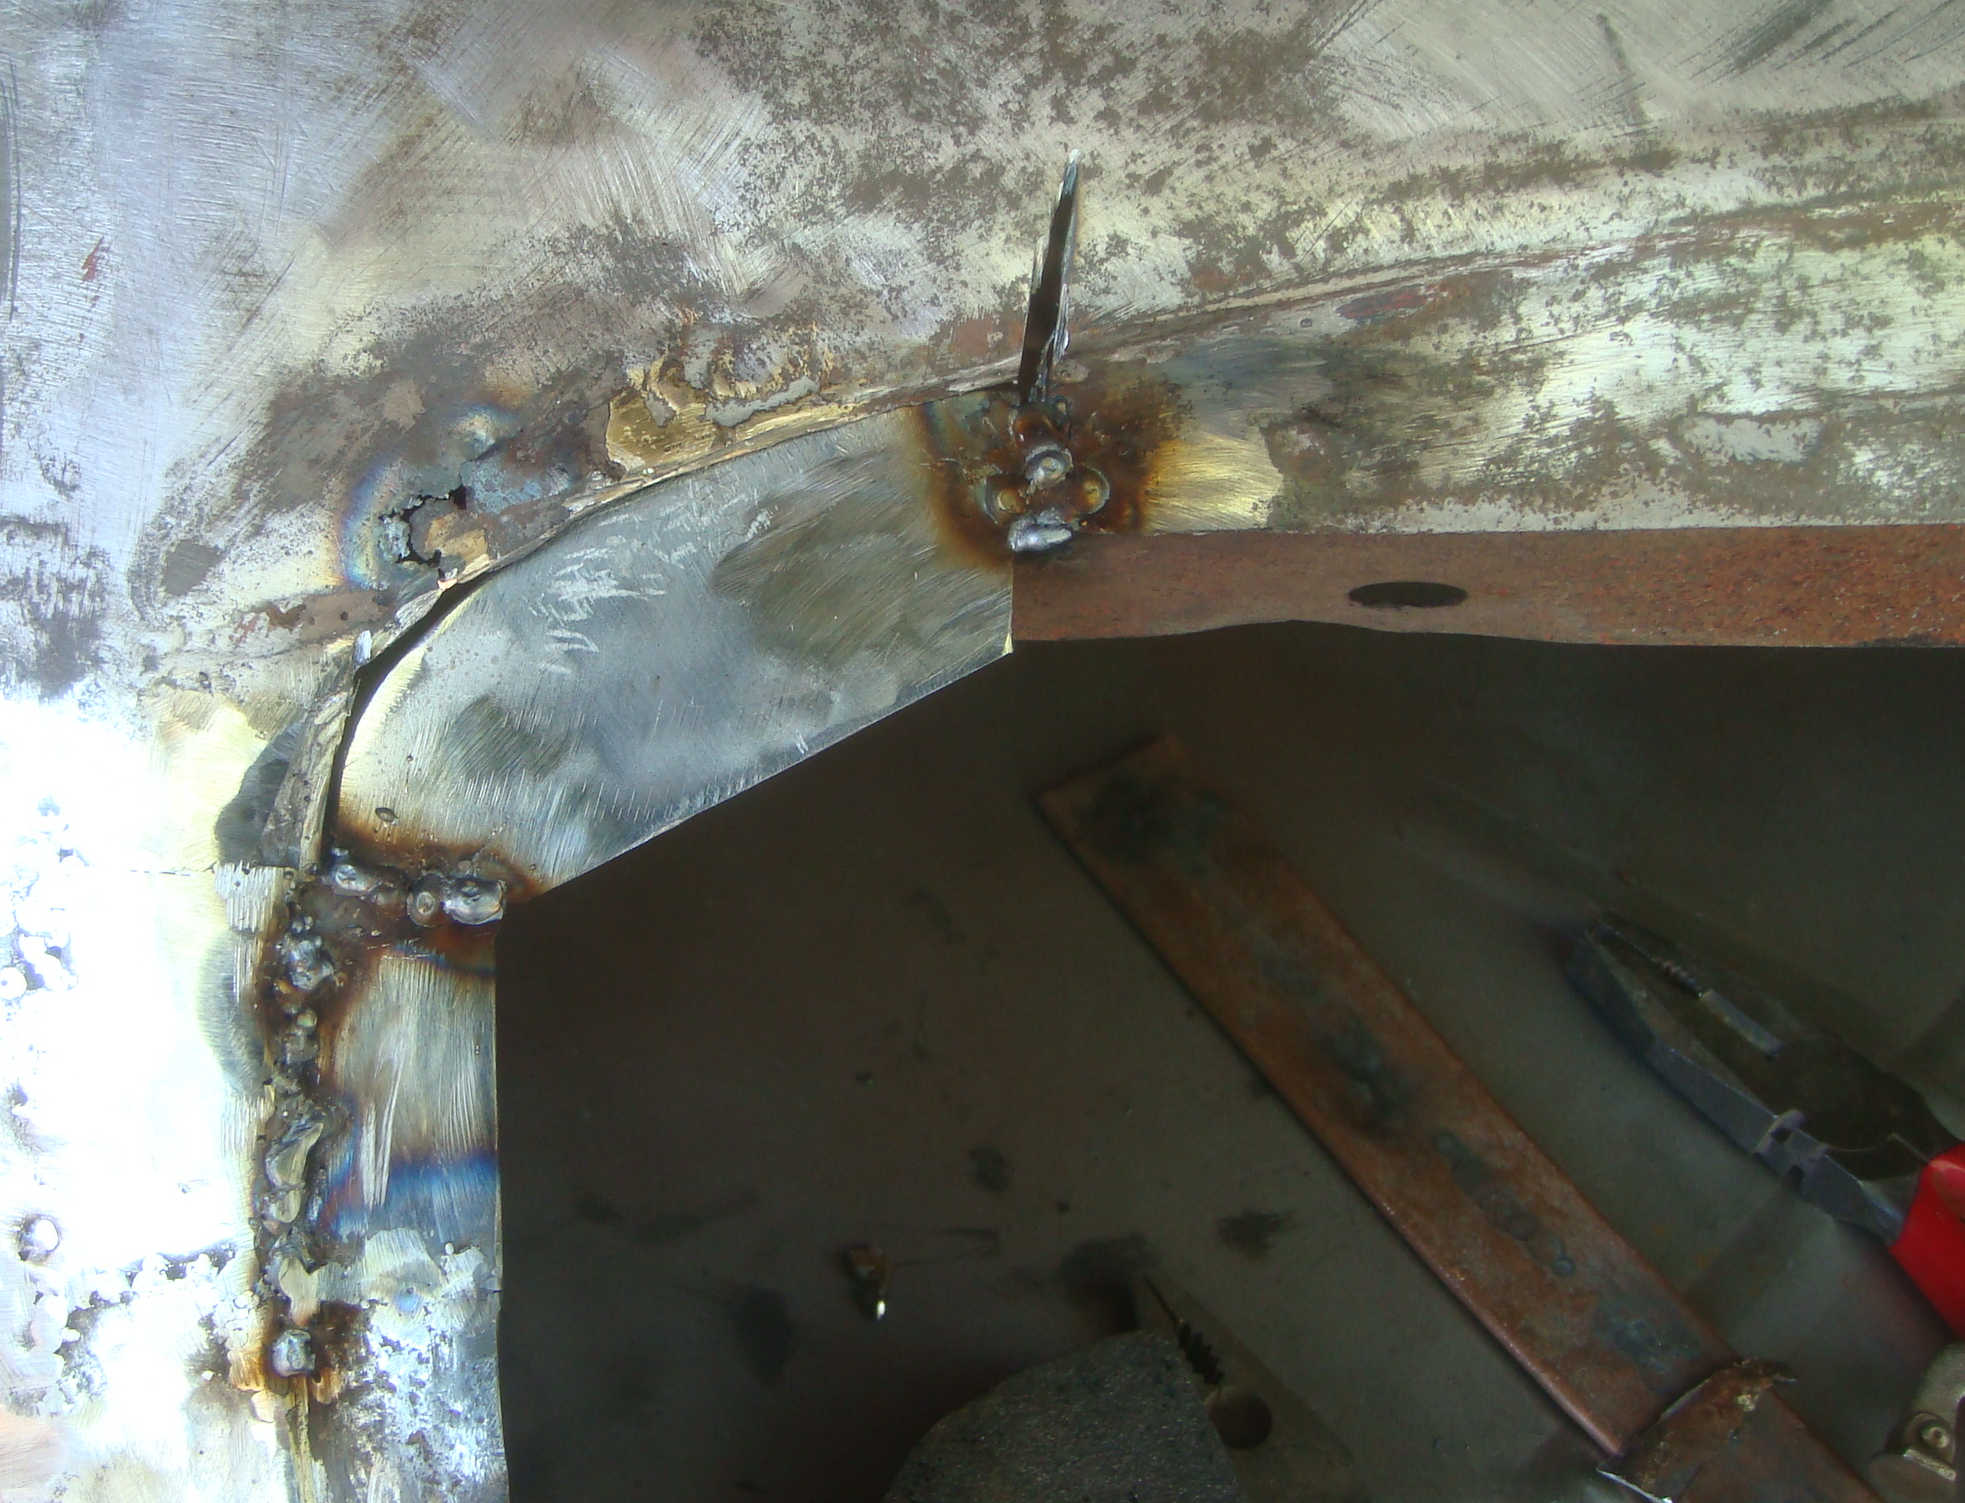
Front End
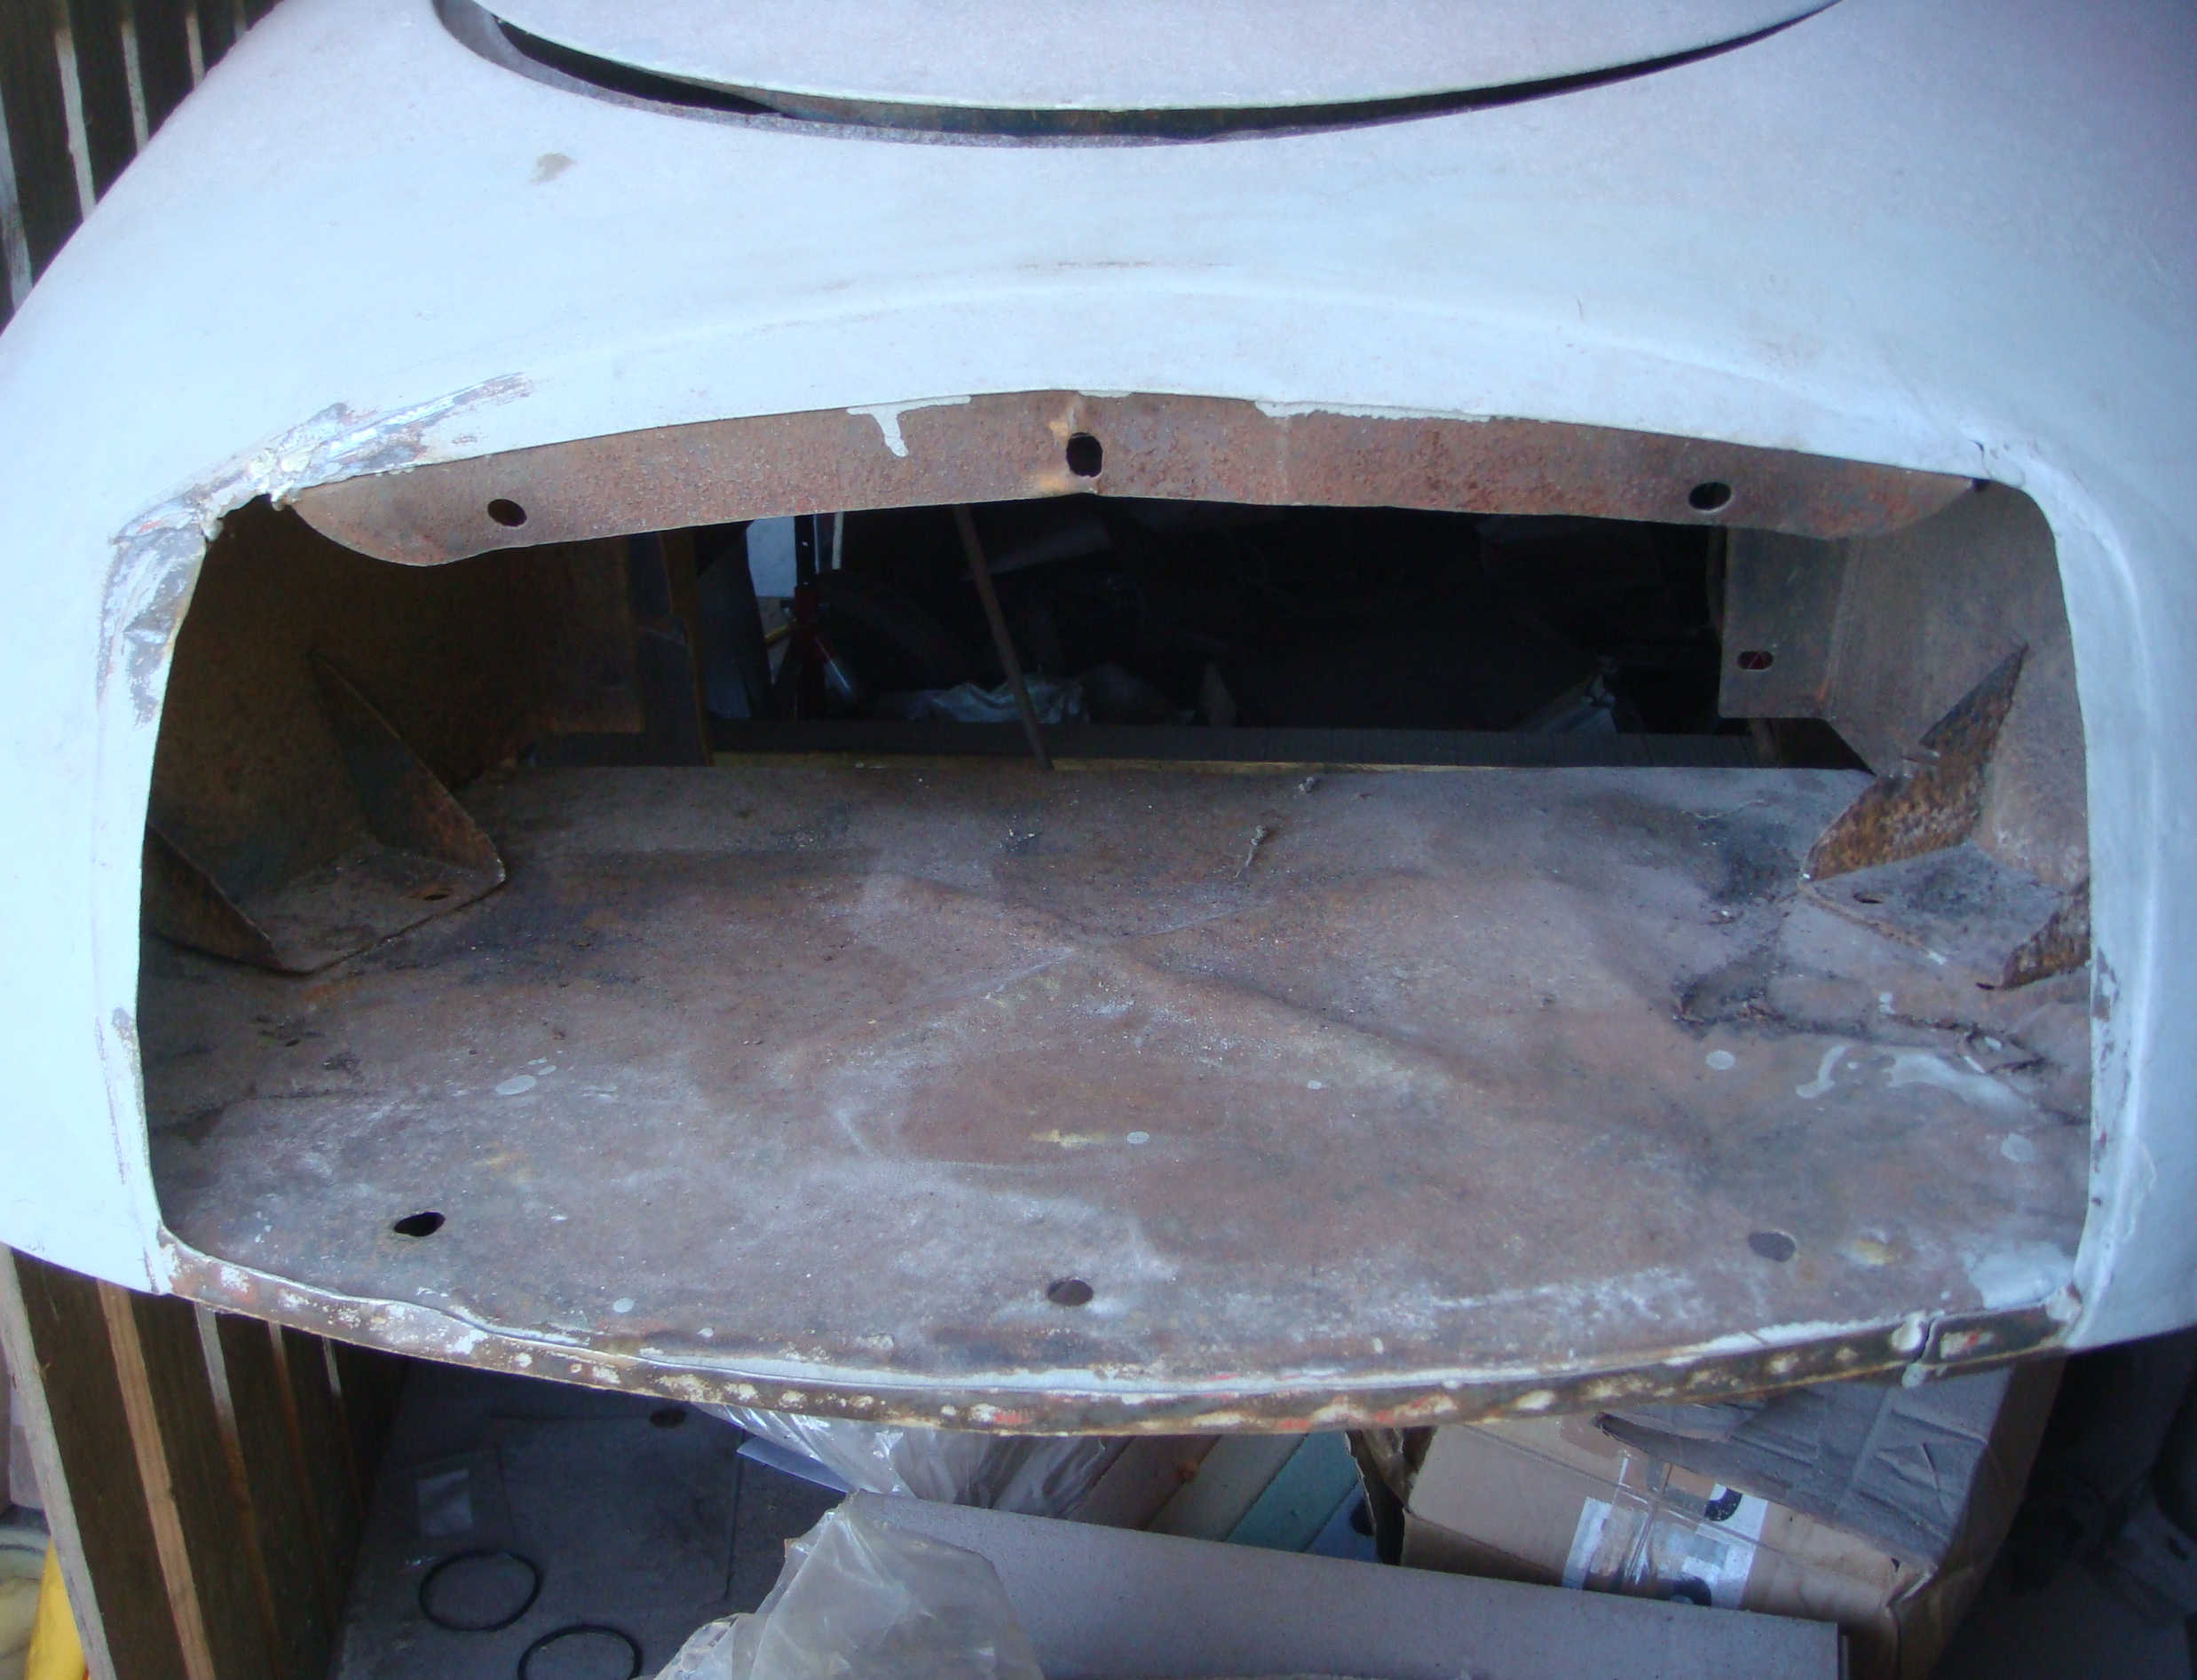
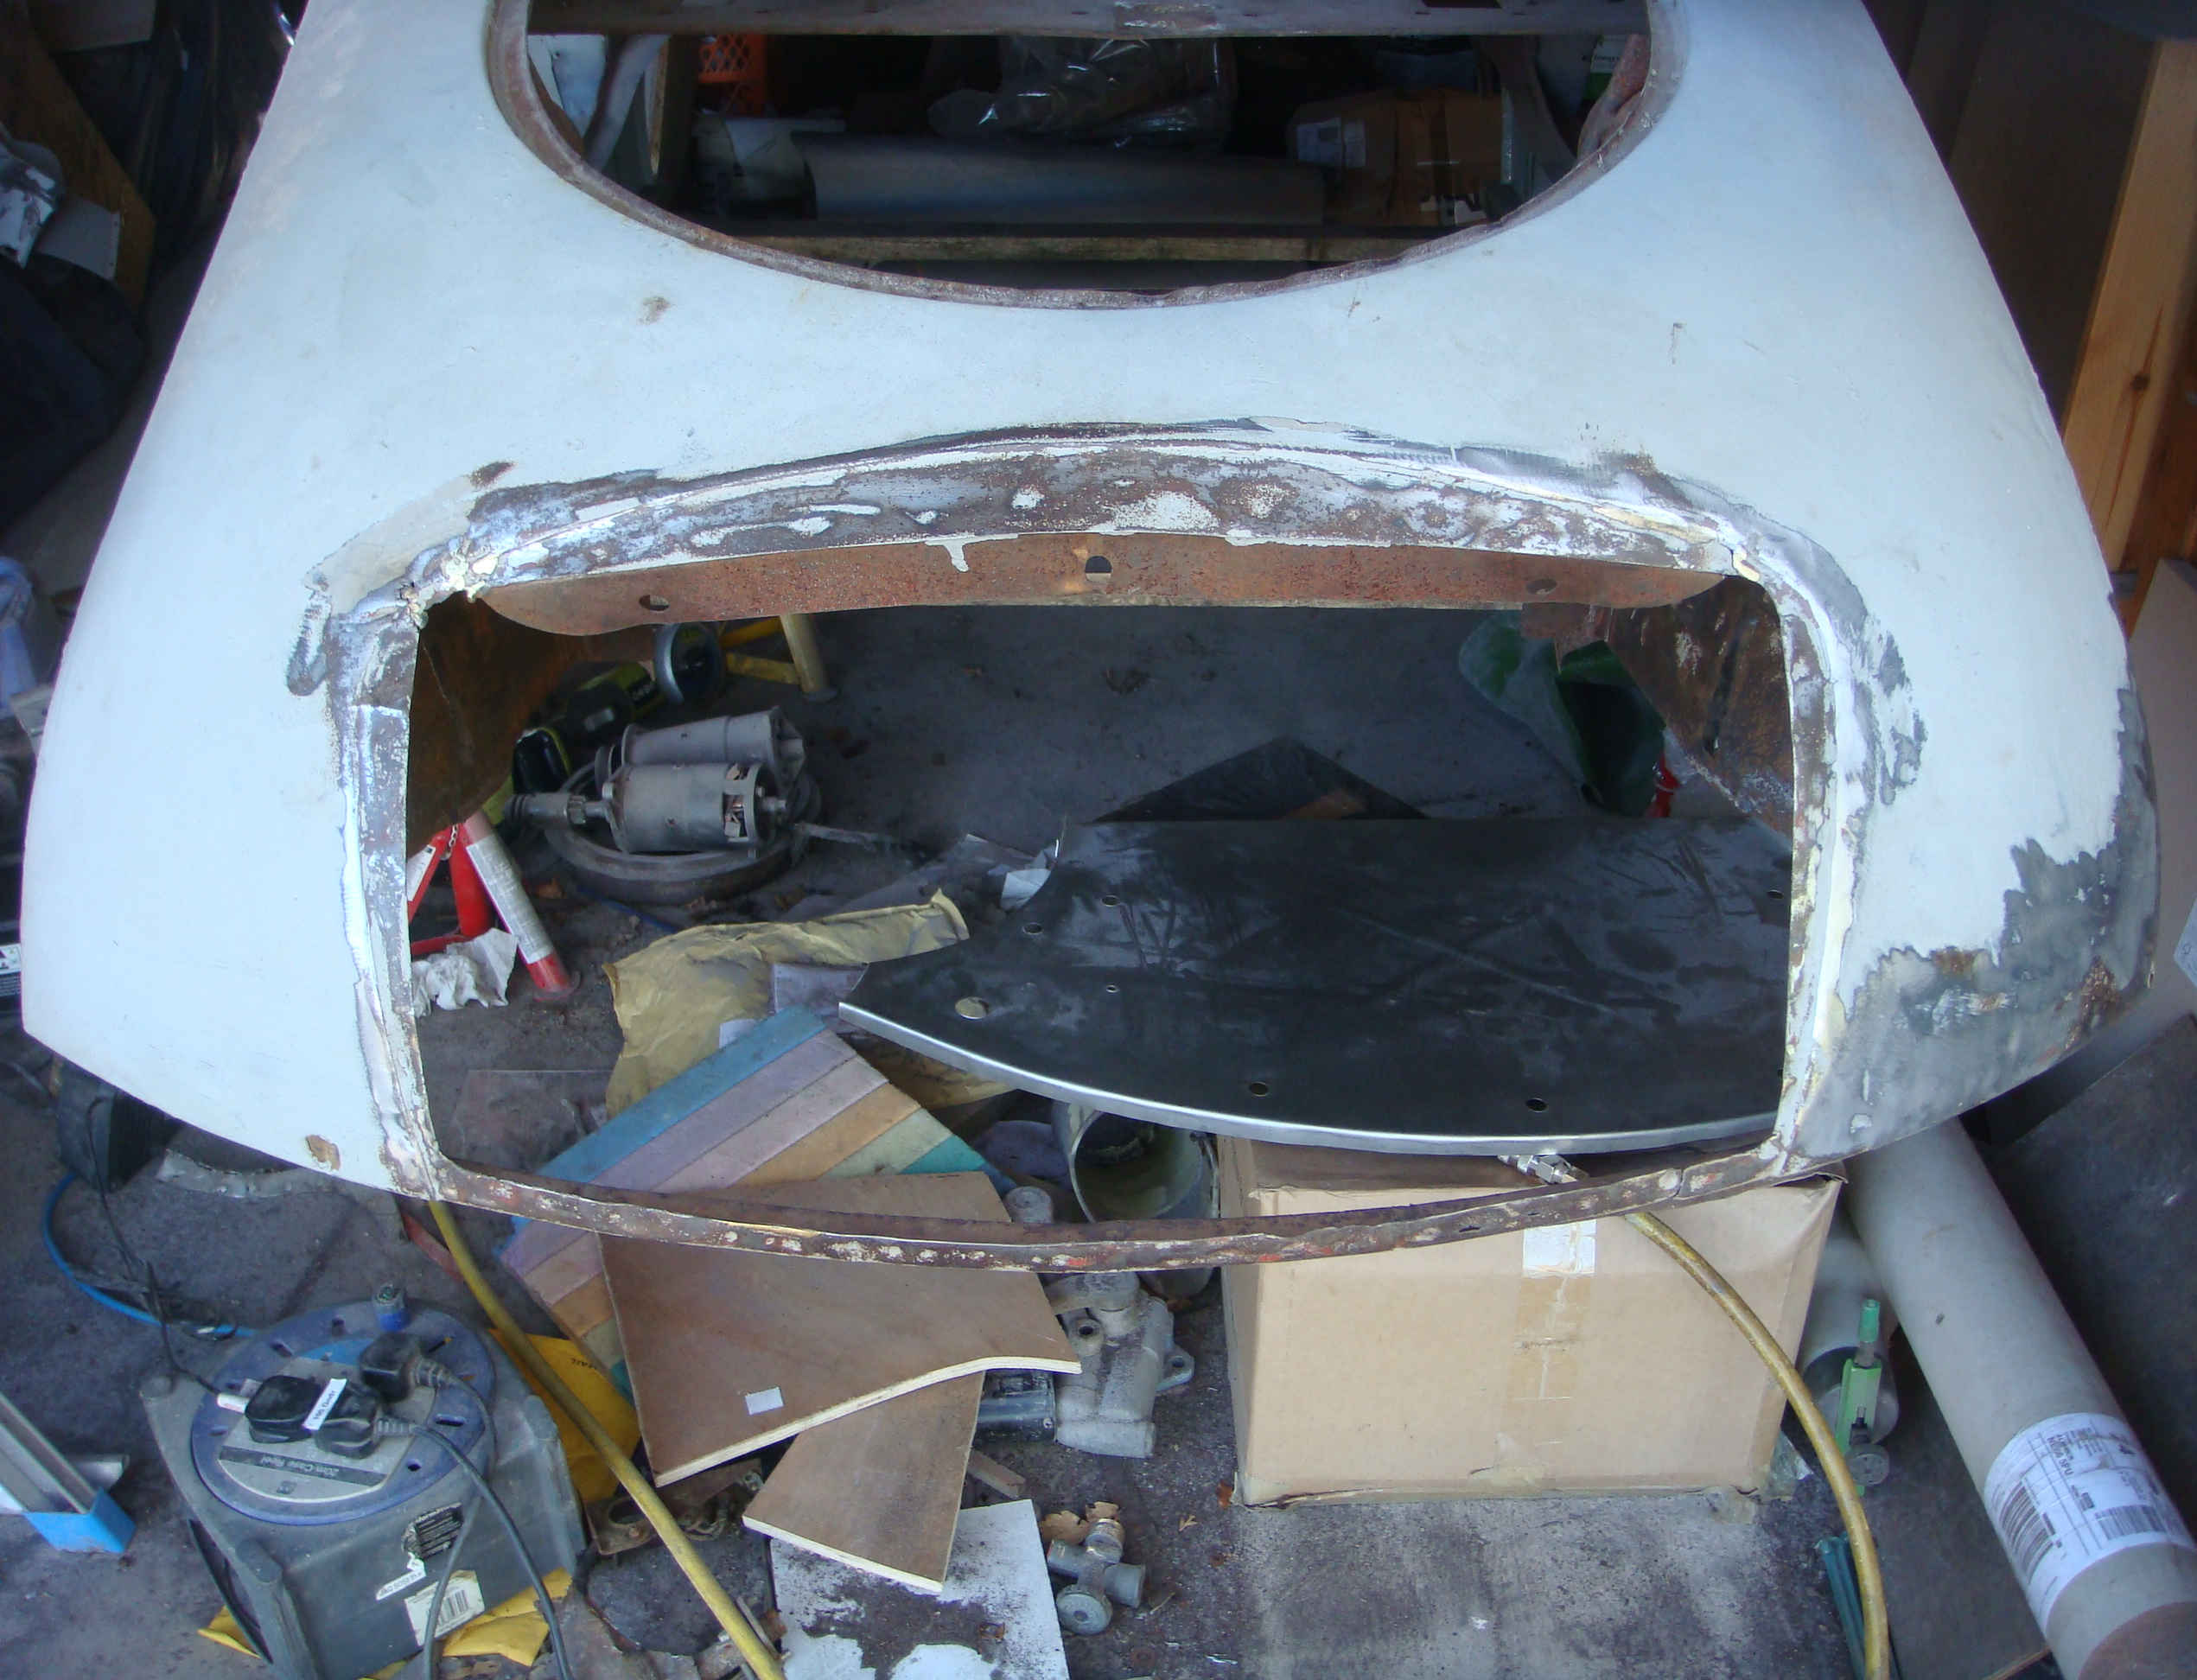
The Duct Panel does not normally fair too well on these cars as they do get hit with the elements. In this case, that accident damage repair did not help either. Readily available at a resonable price so a new one was procured. Fitting it was not so easy as I beleive these were in place before the inner wings were welded to them at the time of manufacture. I ended up by cutting the old one out in sections as it was easier to remove in smaller pieces. Fitting the new presented it's own problems as it was not easy to get the new (stiff) panel into the corners where the curved inner wing meets the curved shroud. I ended up cutting a slit each side where the inner wing meets the shroud (the left hand side needed replacing anyway) to allow sufficient leverage to slot the panel in. Now a tight interference fit it was plug welded in place.
Click thumbnail
The shroud nose around the grille needed a little bit of work, mainly to improve on the accident repair that appears to have been accomplished by brazing and lead loading. The latter was in good fettle but the brazed repairs were cut out and repair sections MIG welded in.
Click thumbnail
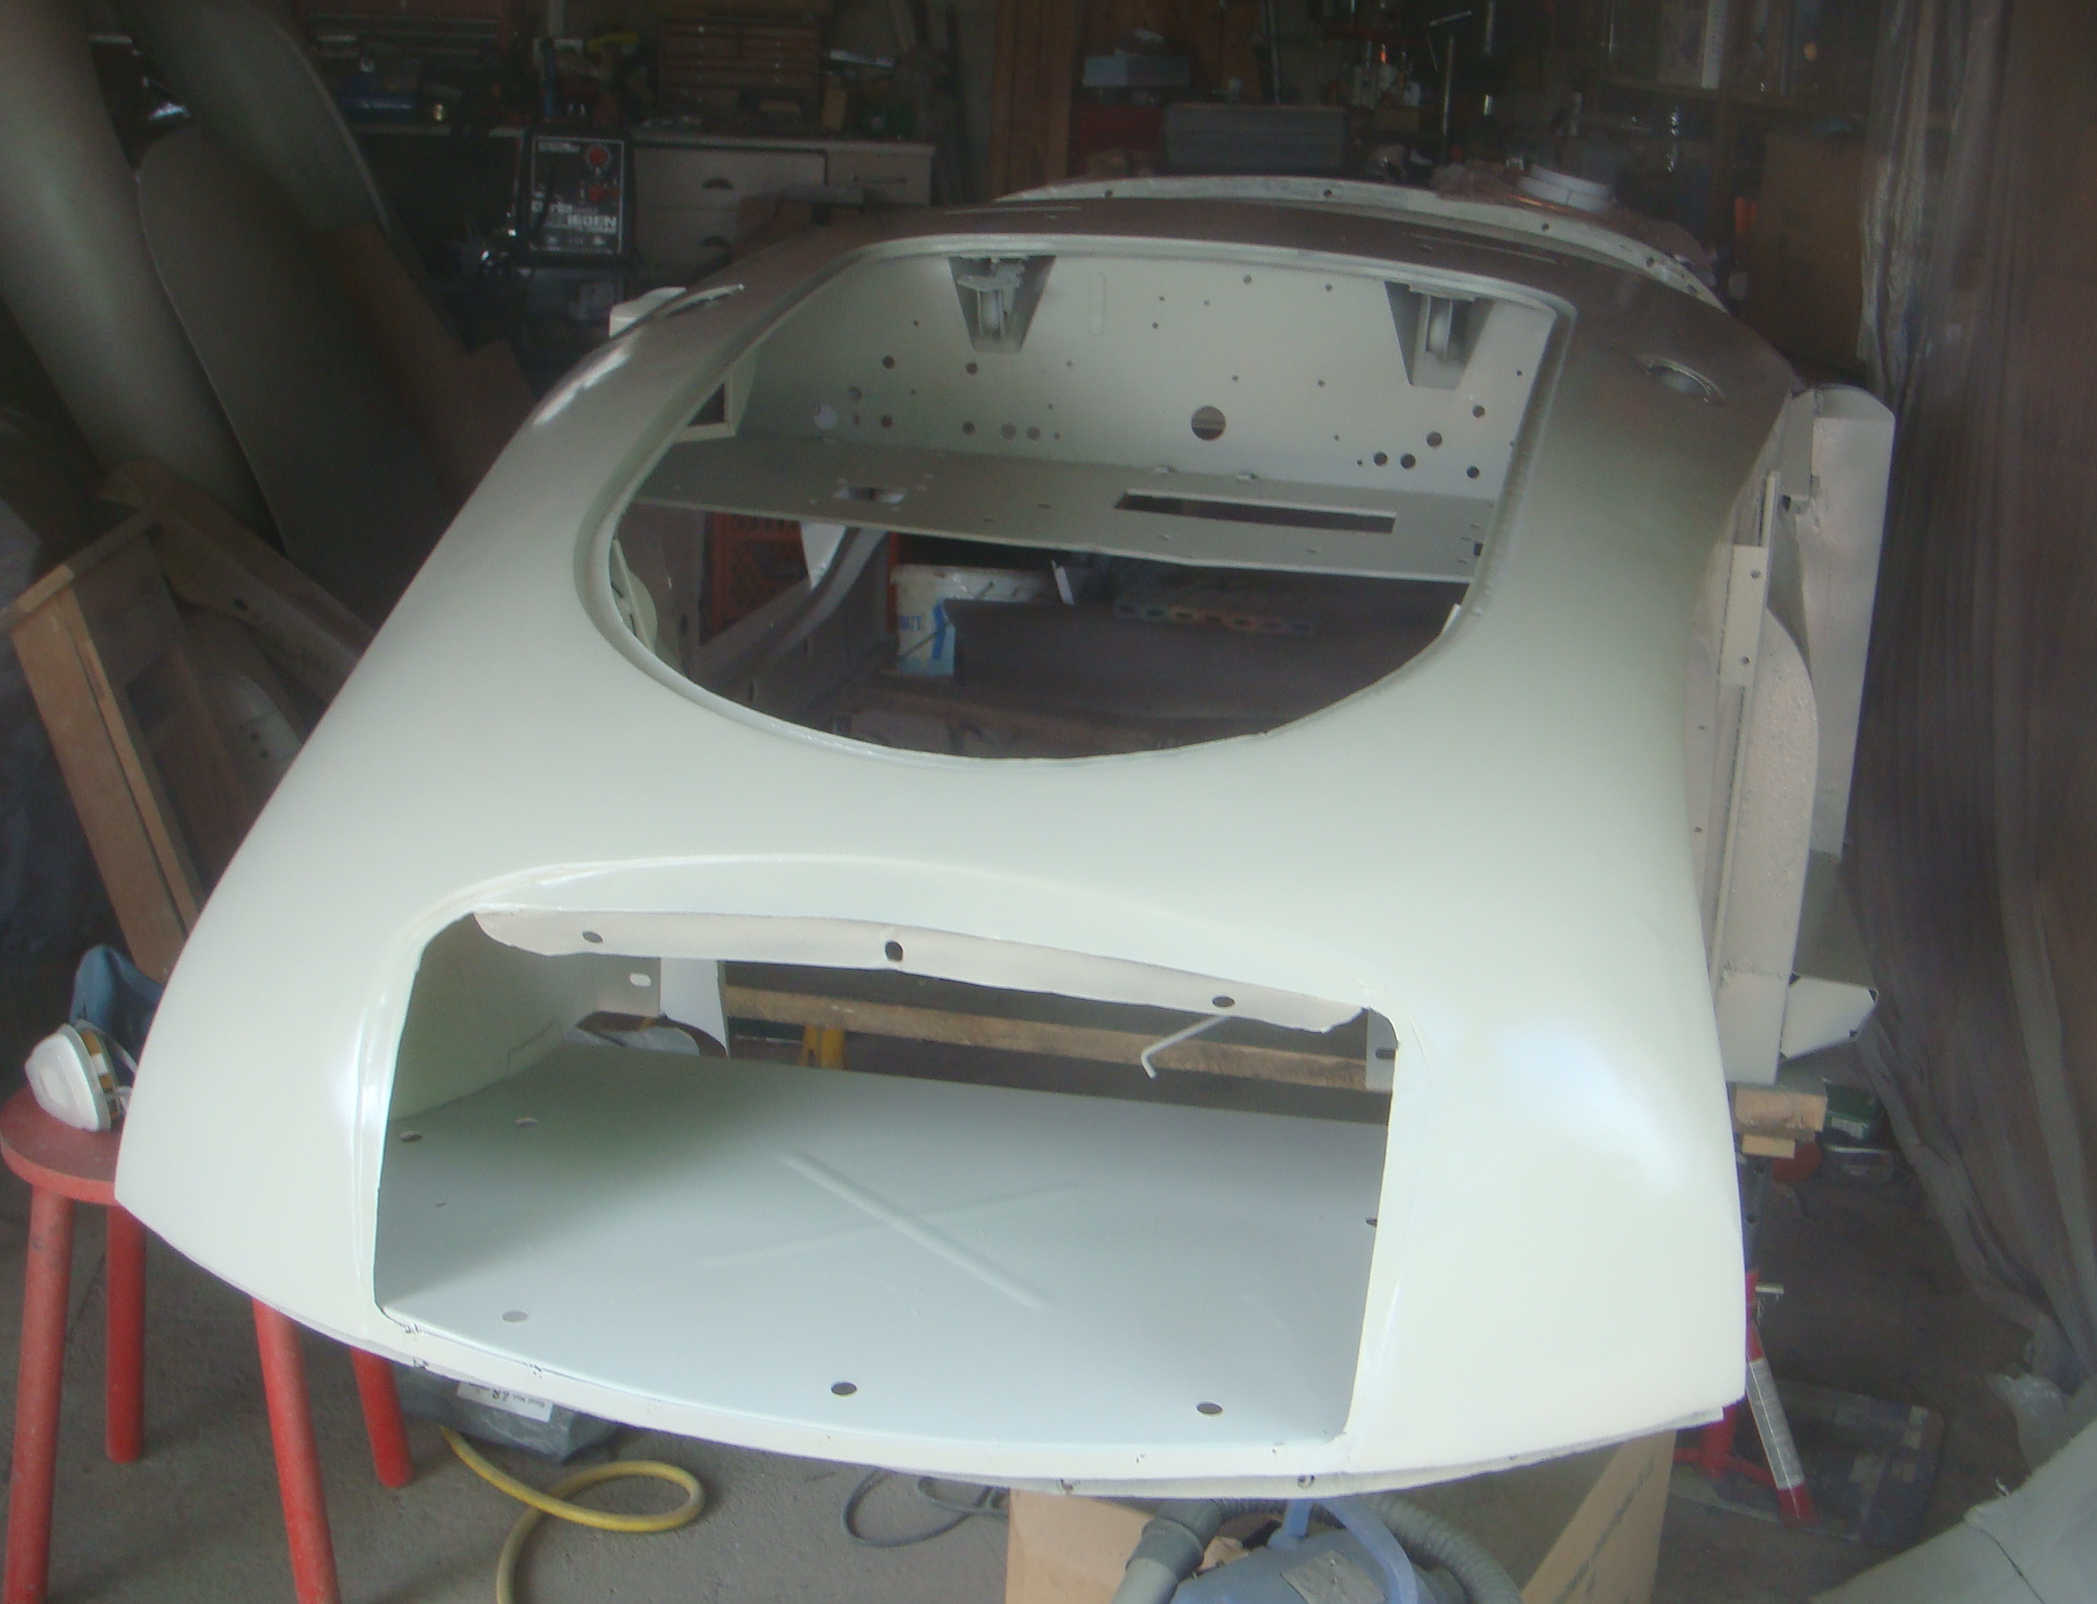
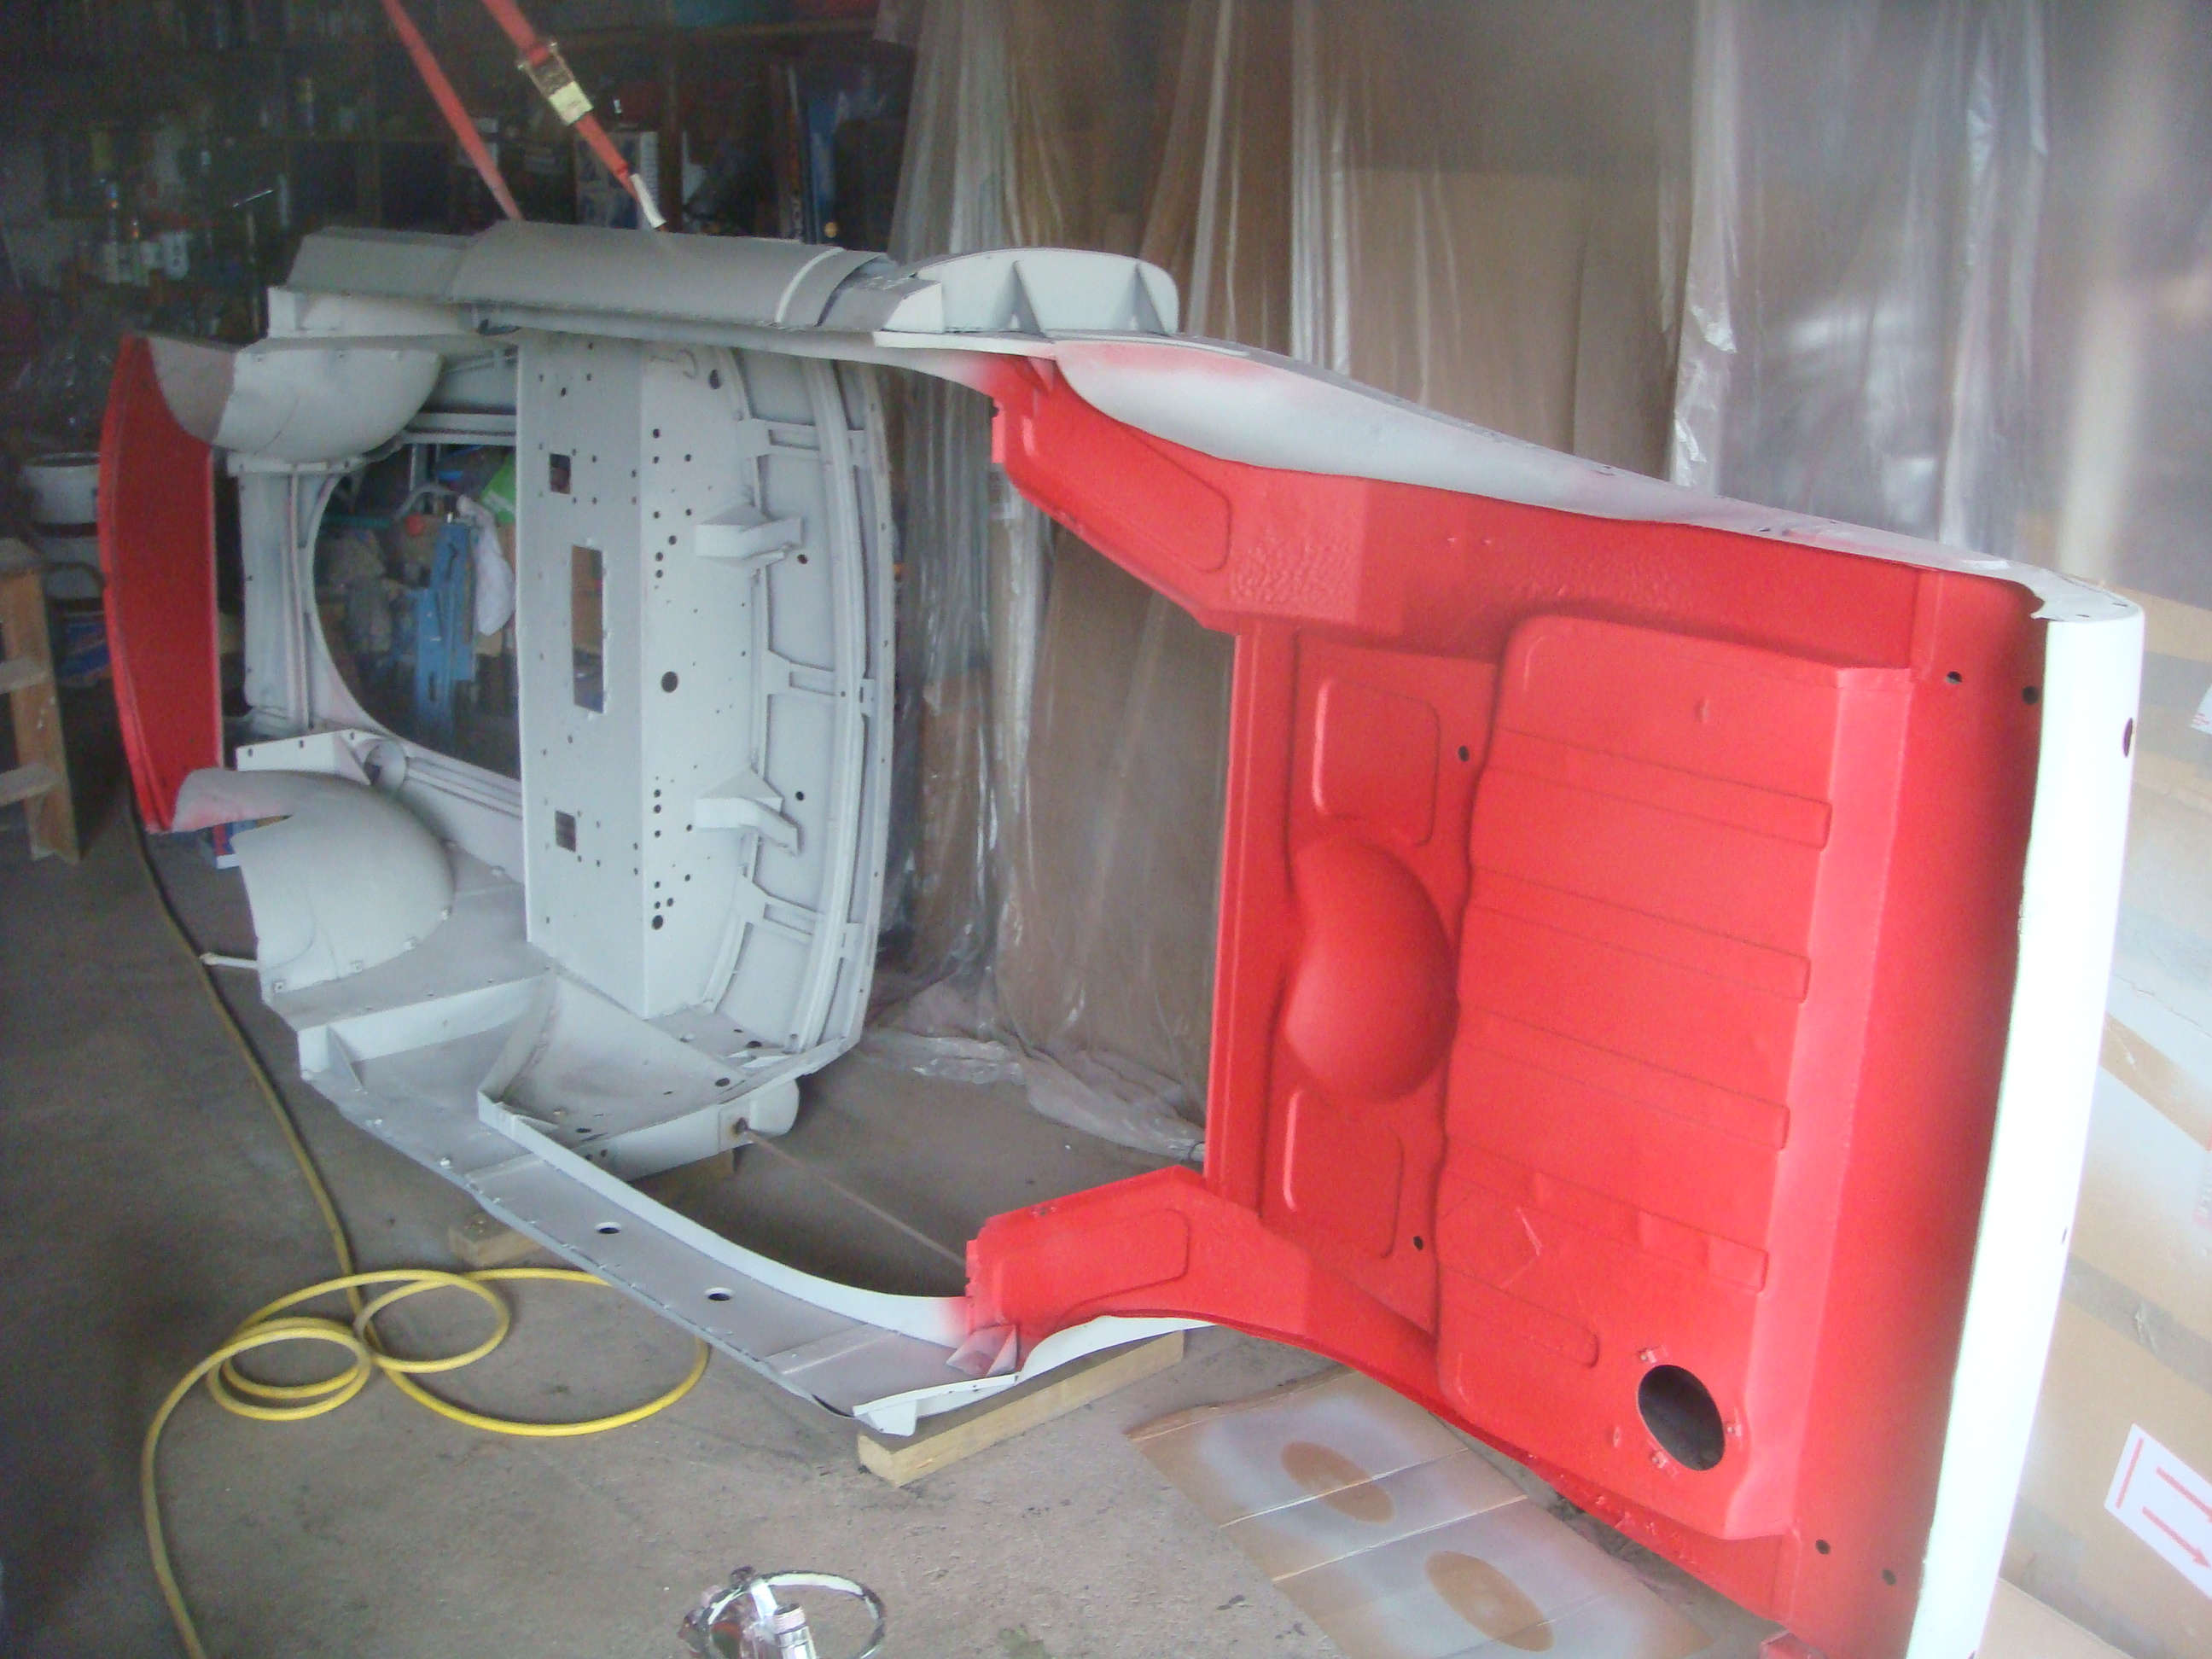
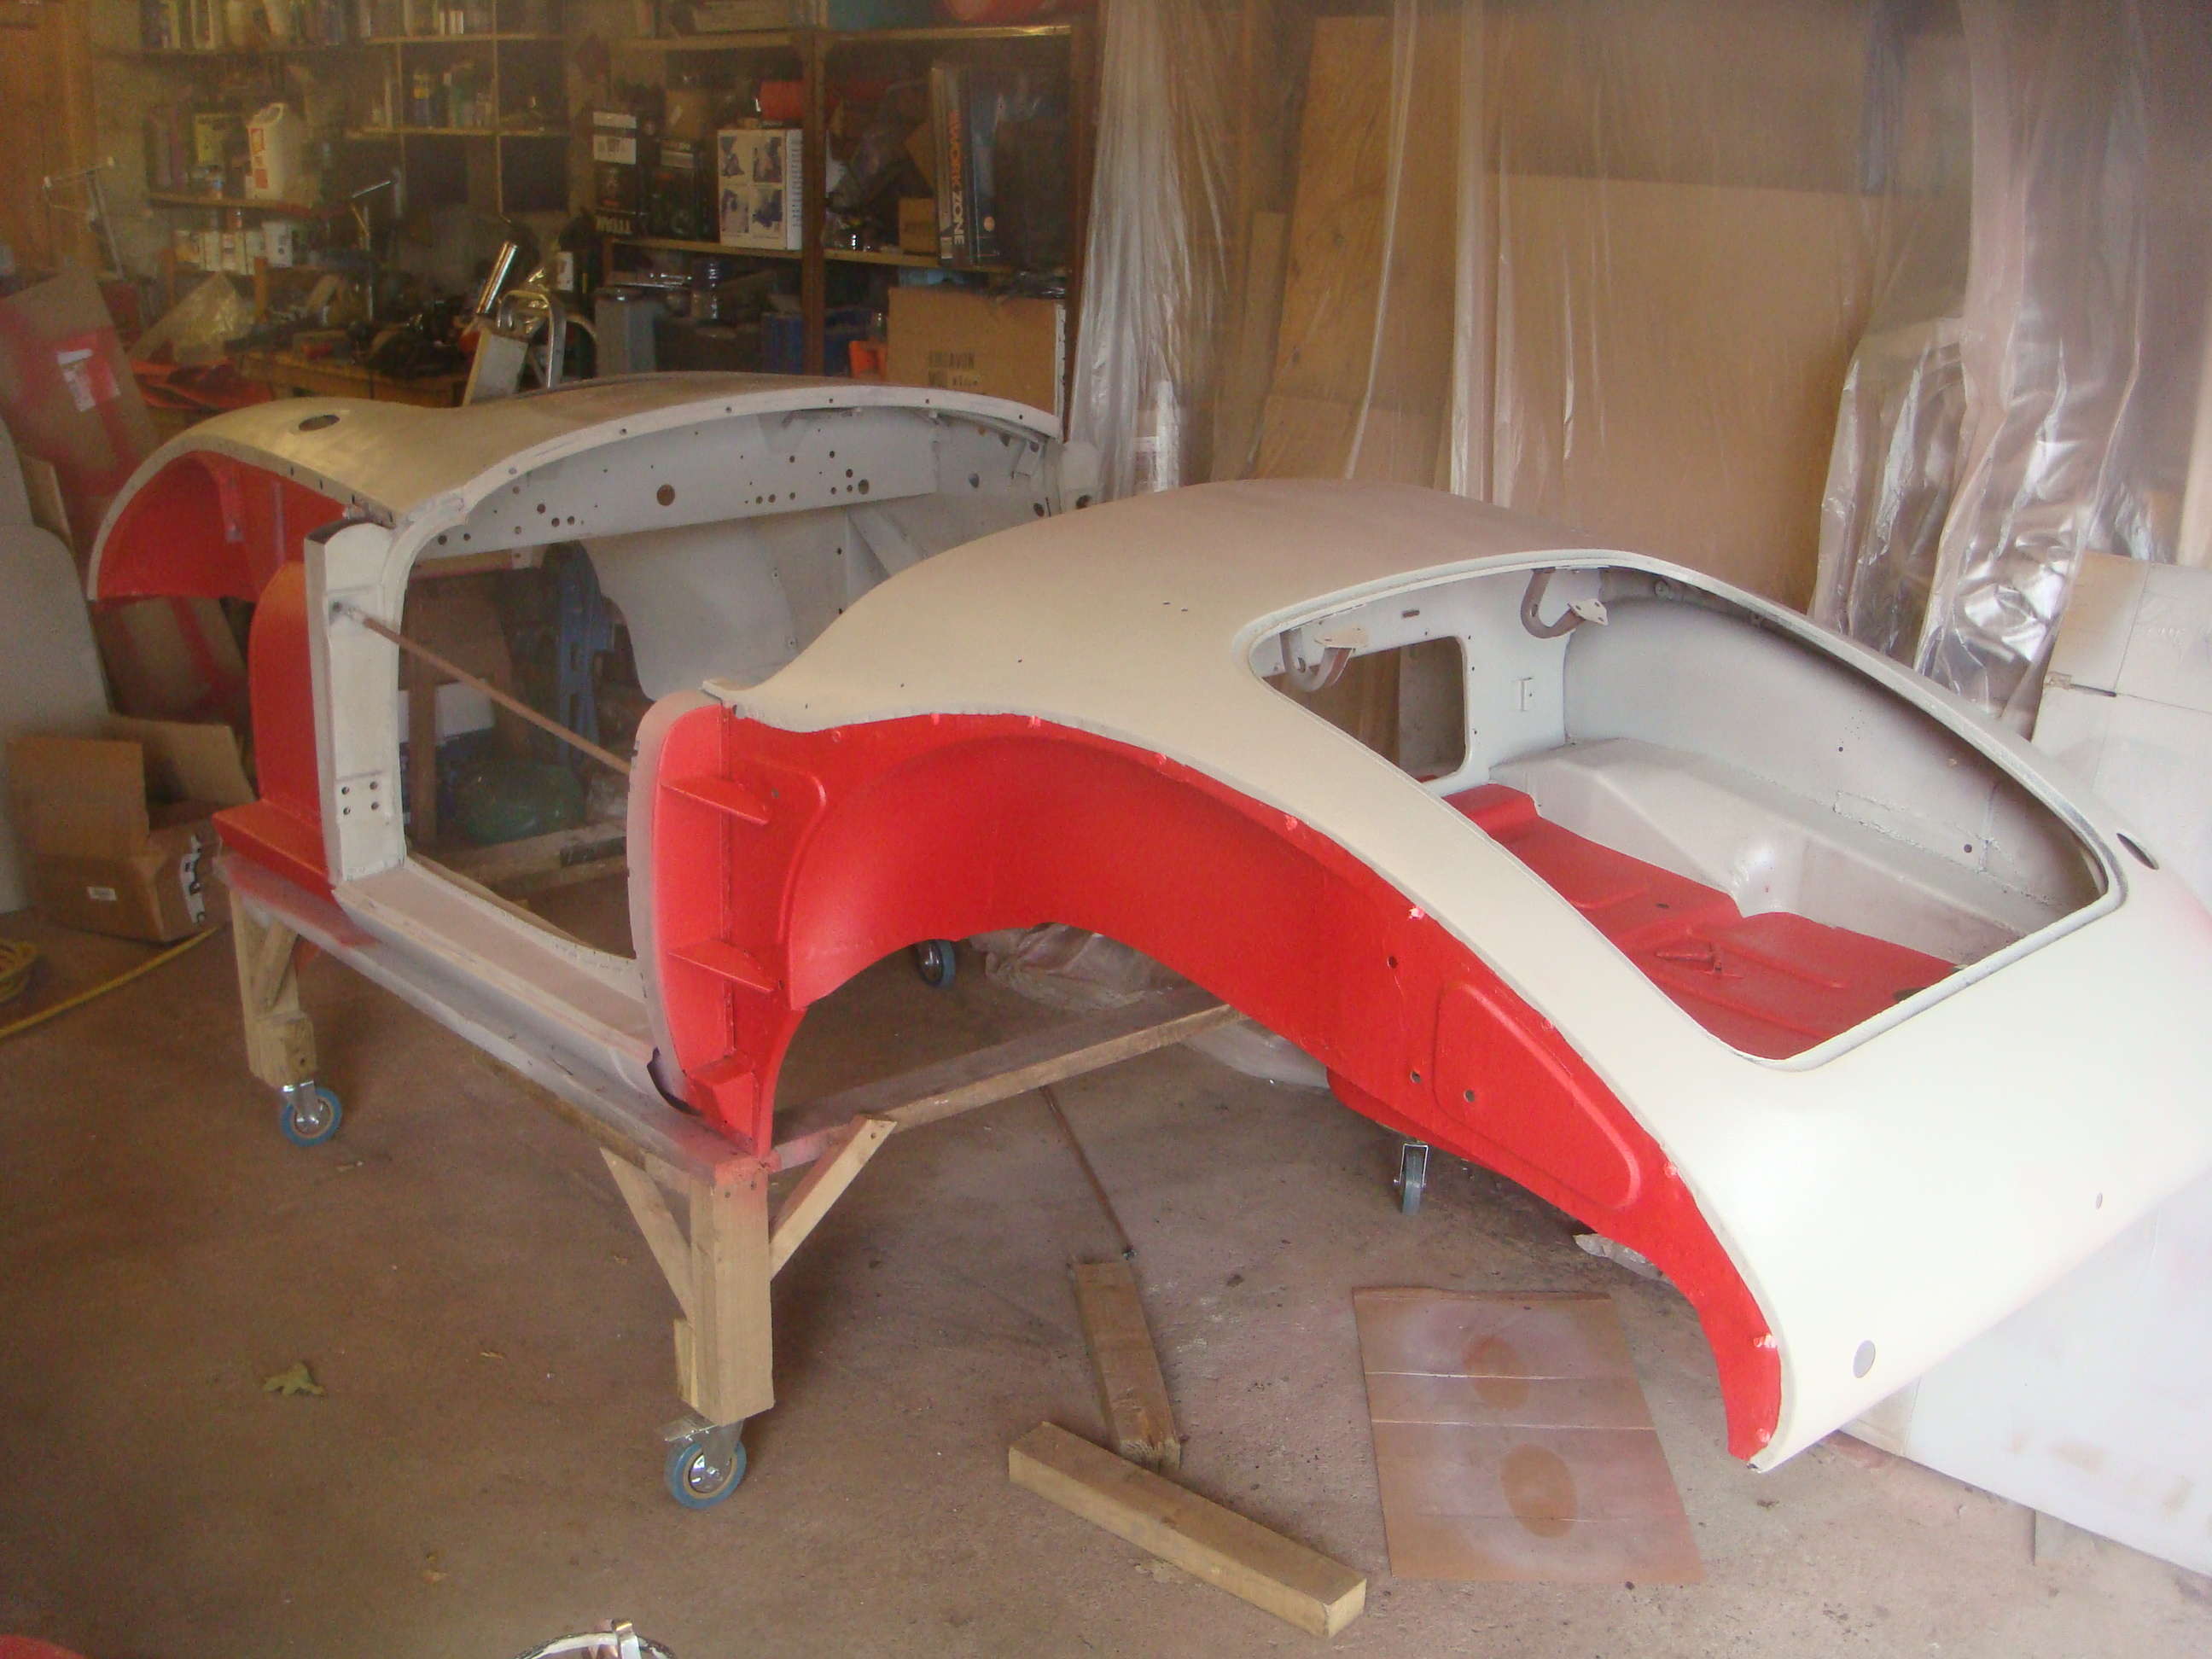
Two coats of epoxy primer and the front end is definately taking shape. I added some castors to the dolly that the body tub was supported on so that I can easily turn it around and work begins on the rear end, before turning the whole thing on its side to work on the underside. Again, this was rubbed down, given two coats of expoxy primer plus two more coats of tinted HB 955 Tough Liner. The Tough Liner was also applied to the wheel arches and inside the boot too. Now off to the paint shop to be beautified whilst I get on with some other jobs
Click thumbnail