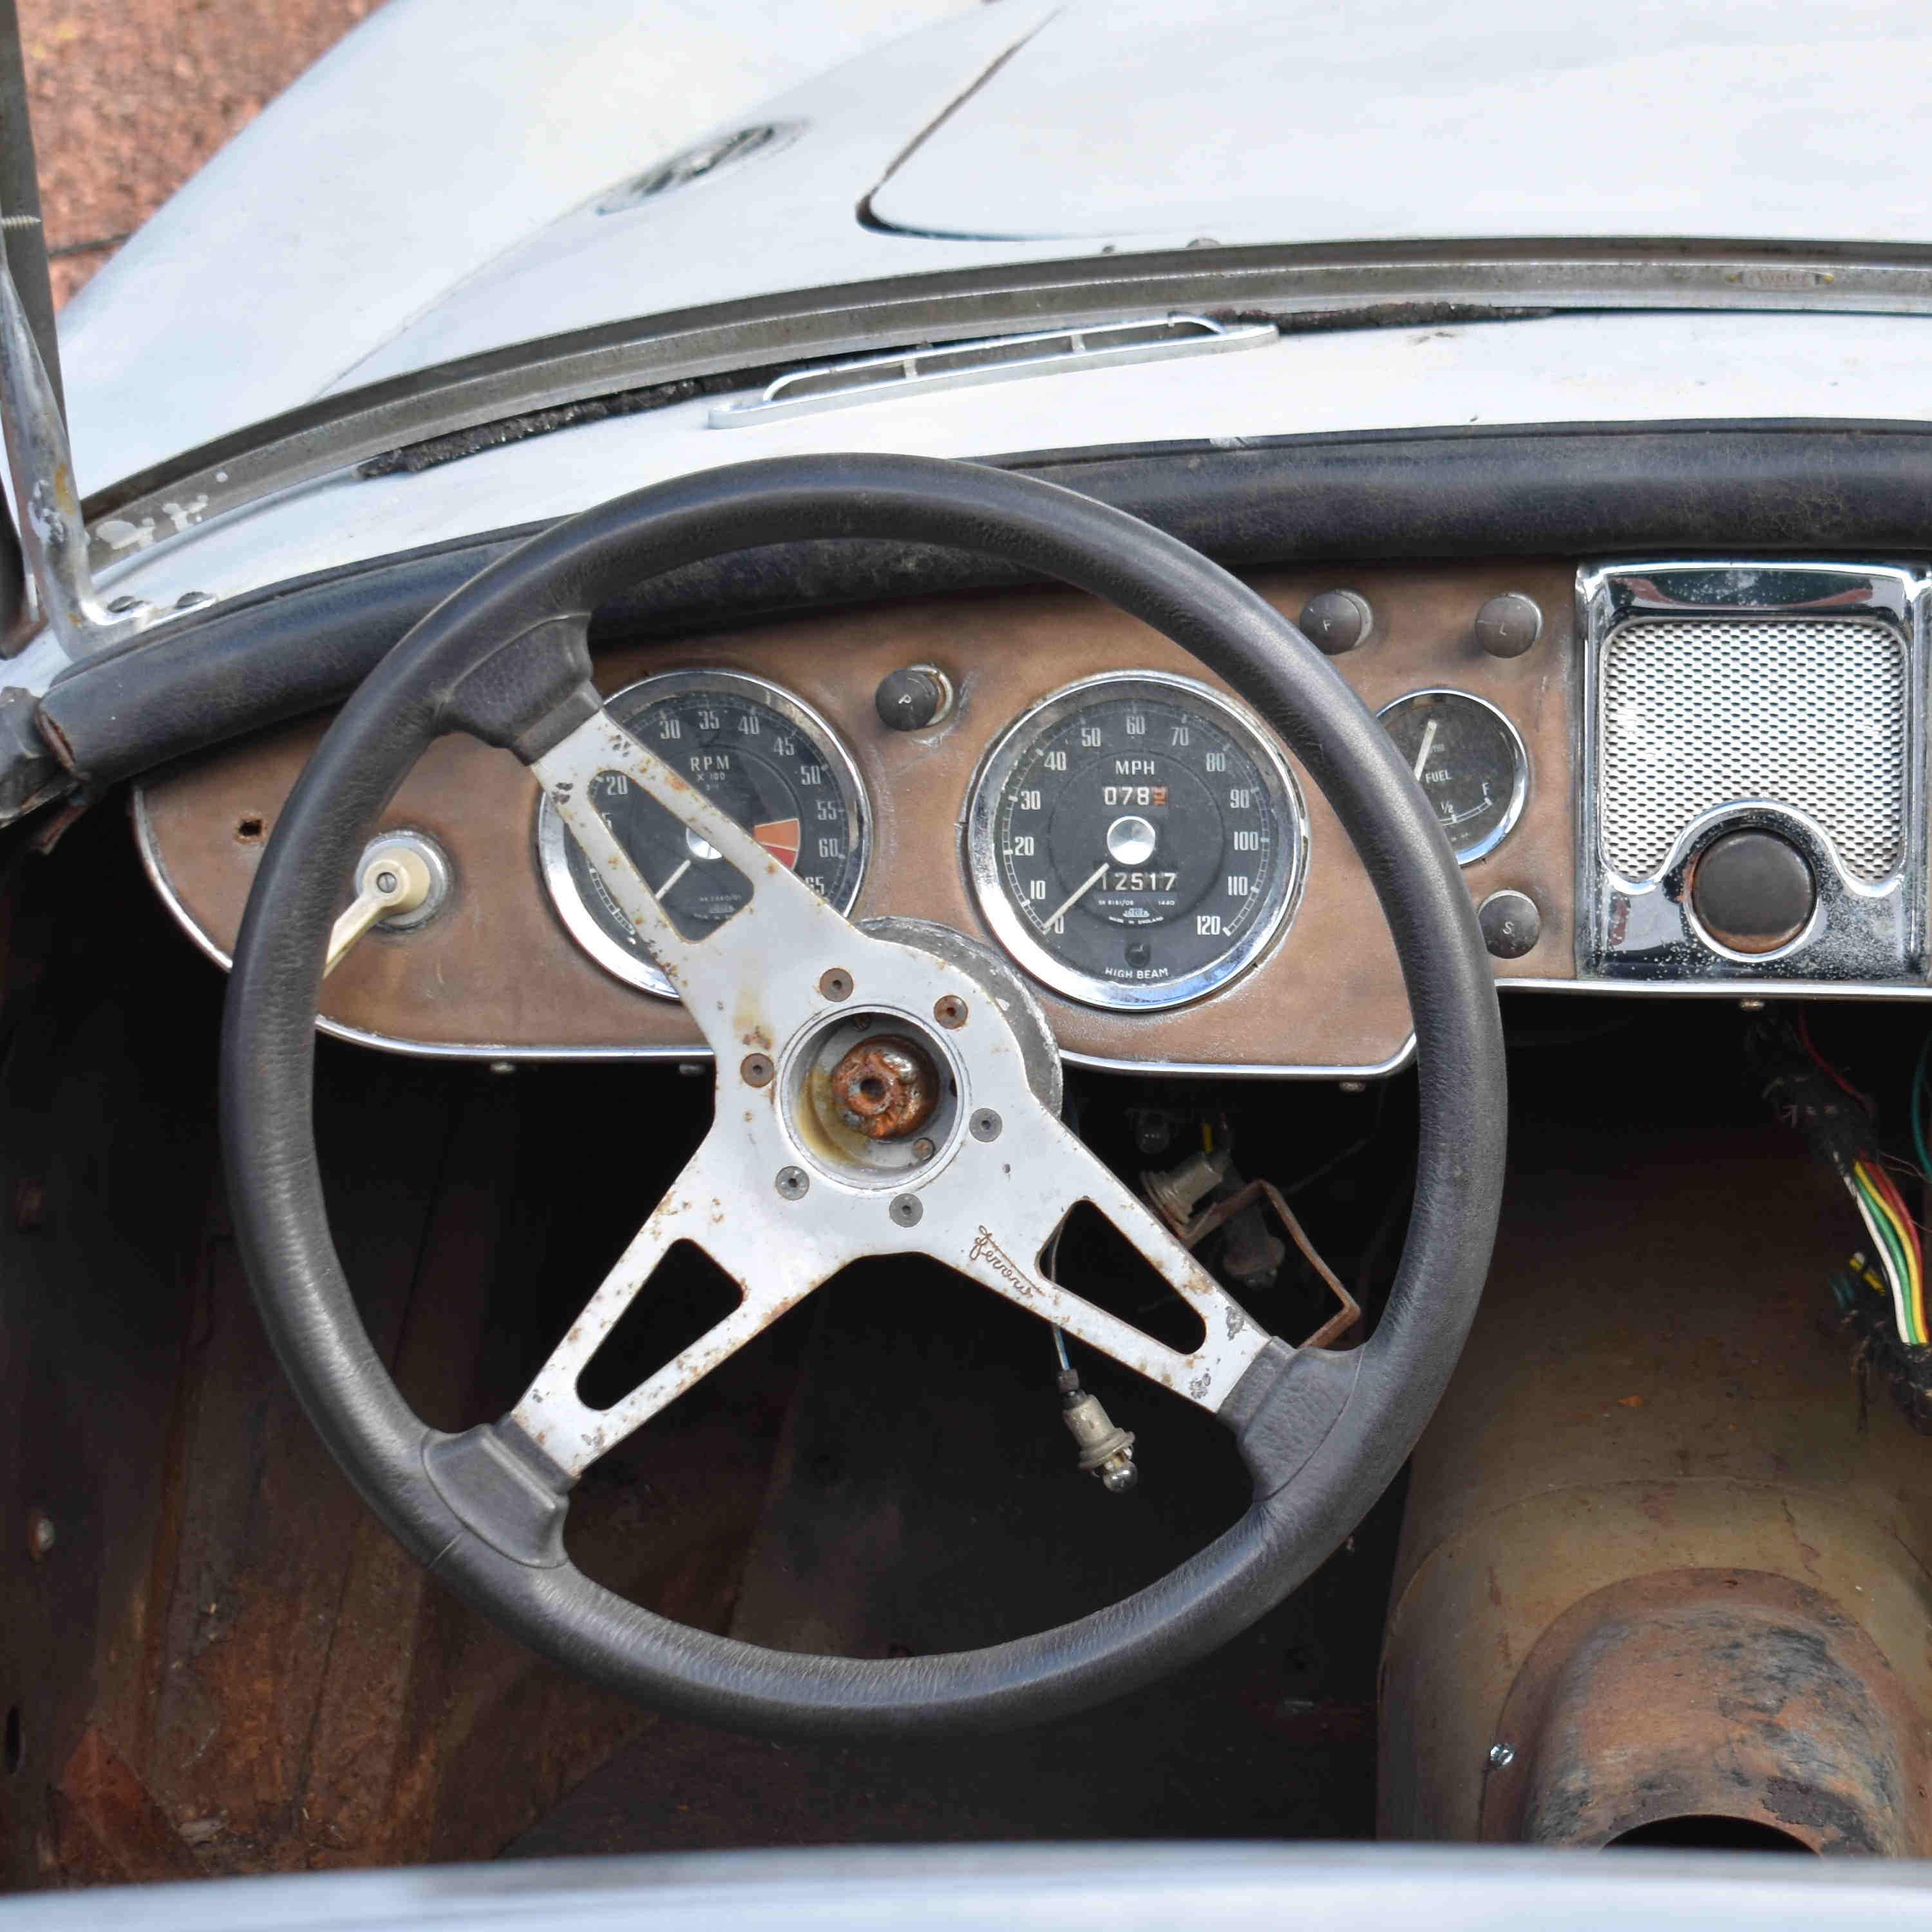
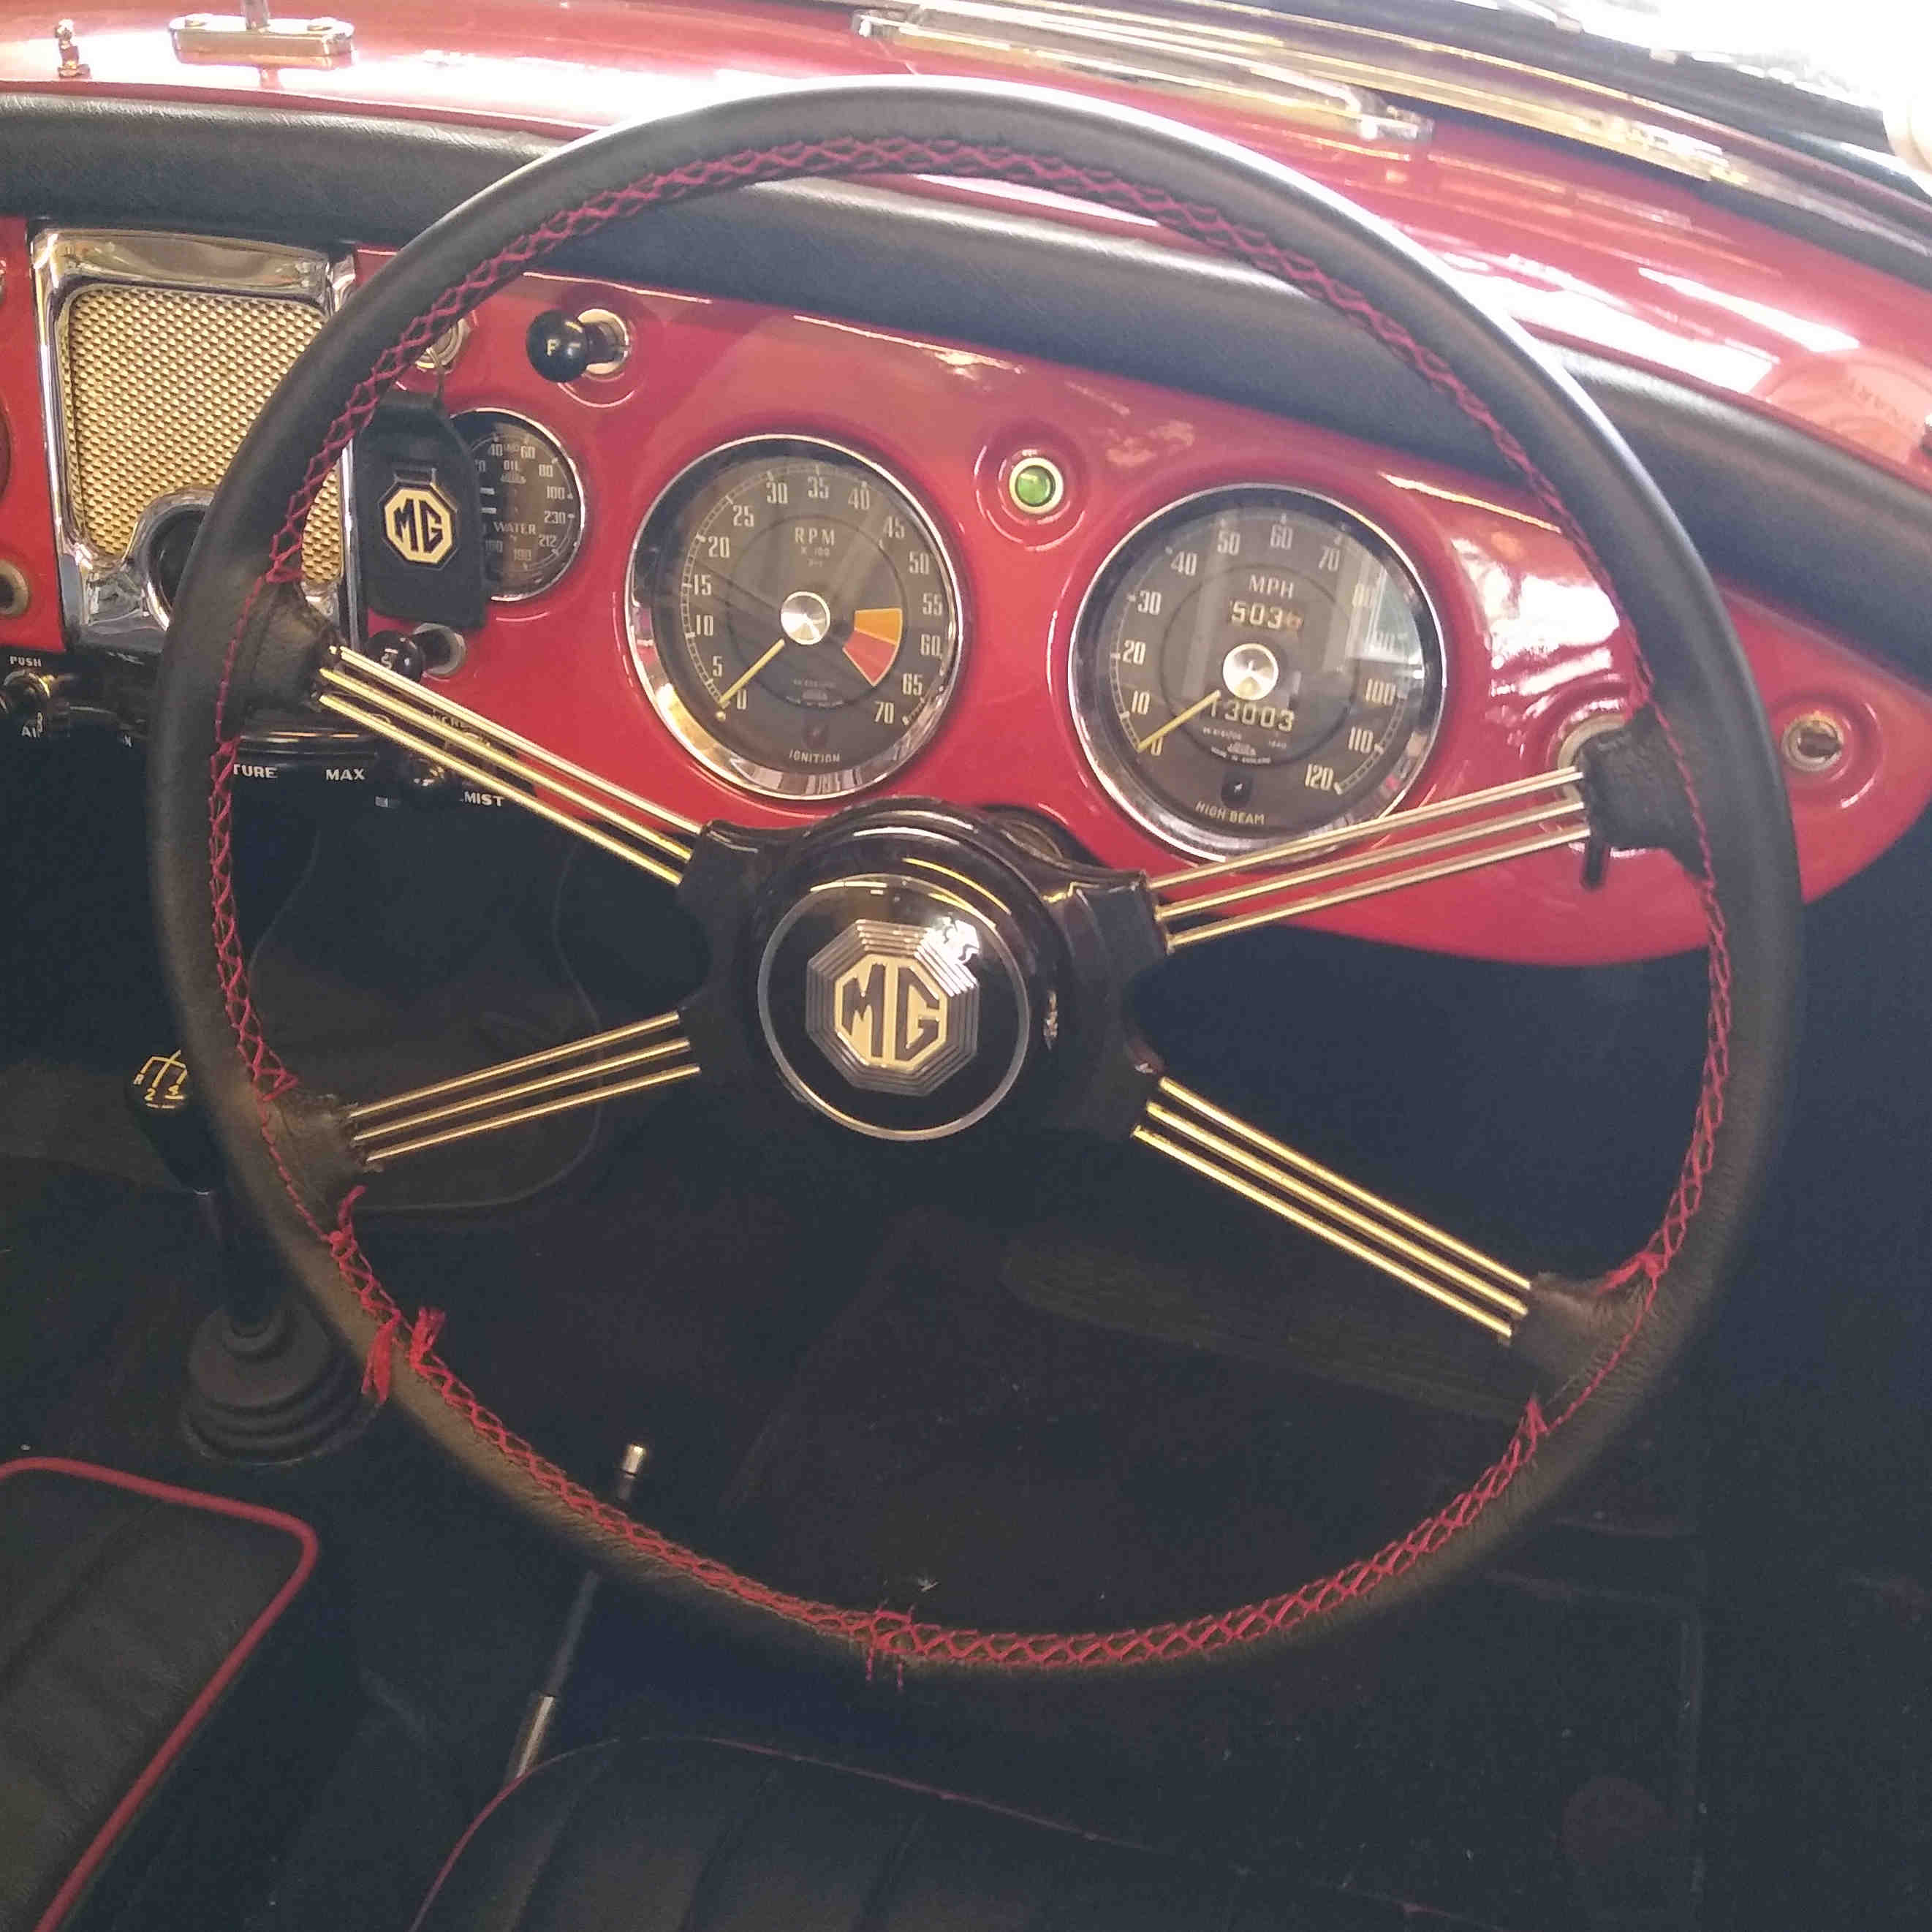
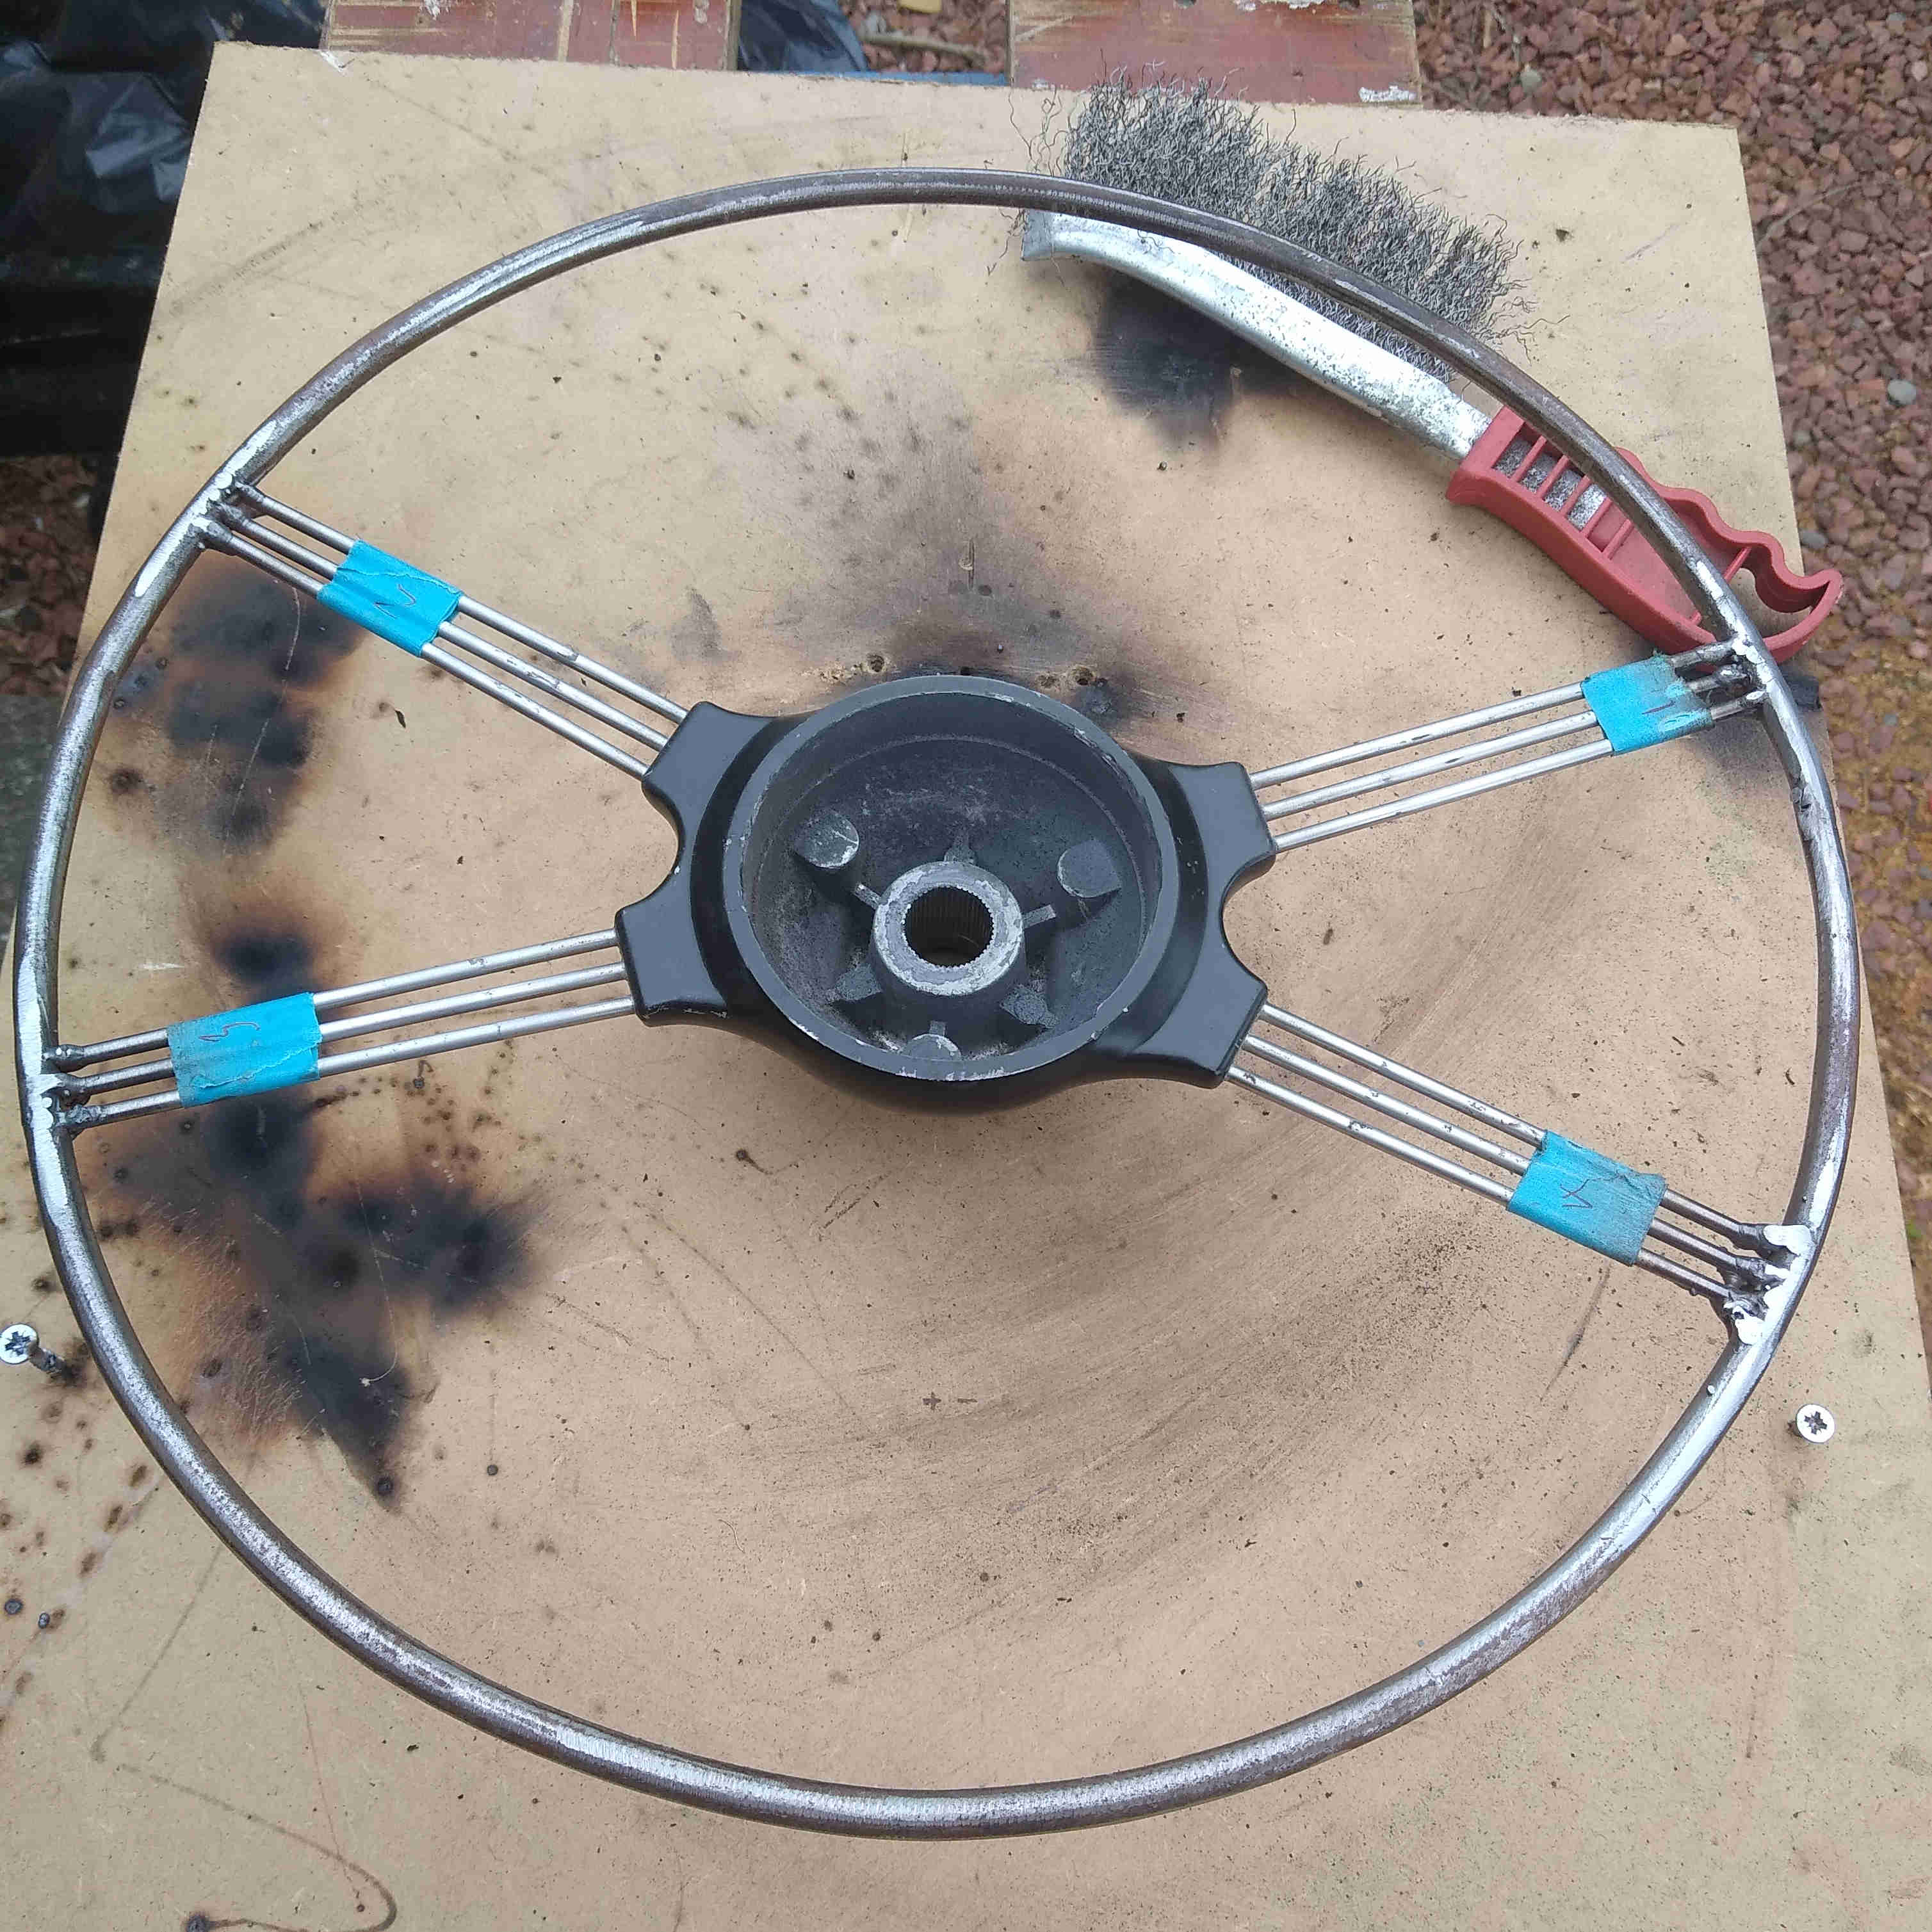
The MGA has a very distinctive 'Bat Wing' steering wheel which (to my knowledge) was not fitted to any other car. It comprises four sets of wire spokes in a bat wing formation supporting a 16½" steel rim covered in a plastic material which, in time, always cracks particulalry at the ends of the spokes. The original wheel on my car had been replaced with an after market 15" wheel many years ago, but I was able to procure a secondhand original batwing wheel, albeit with the usual cracks. I filled the cracks with epoxy coloured with deactivated charcoal (purchased from a health food shop) then fitted a leather cover.
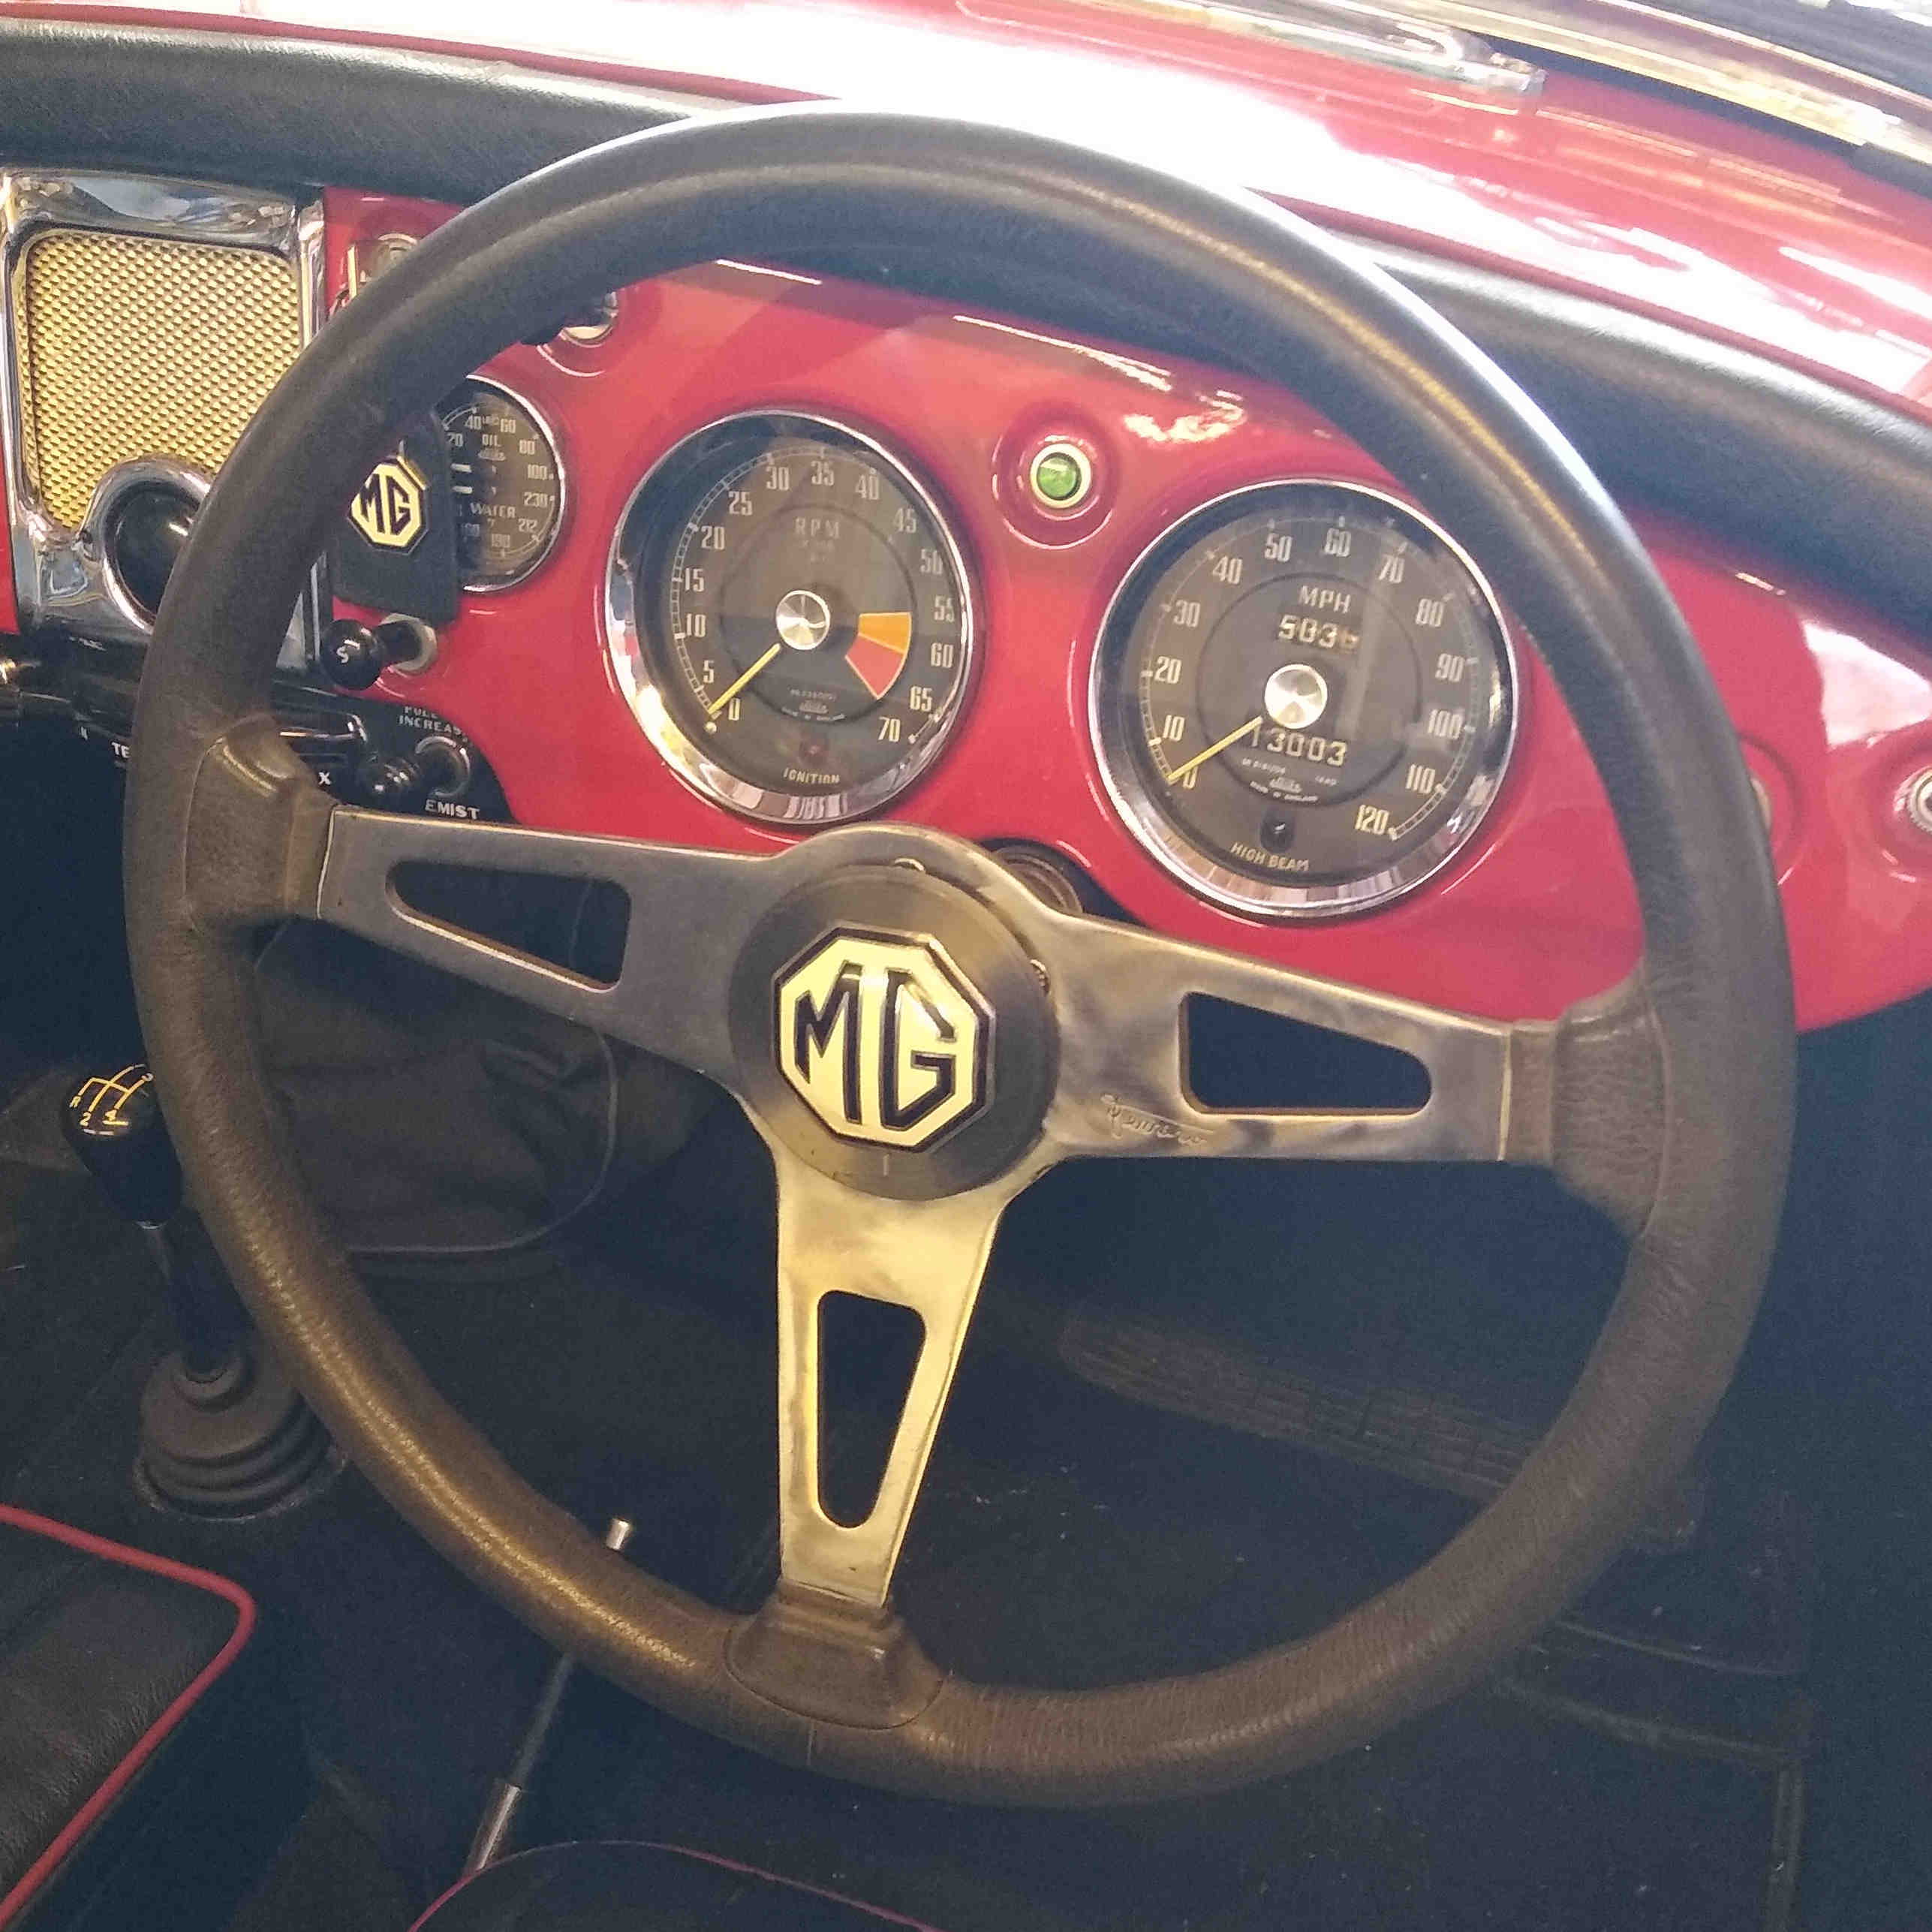
This looked a lot better than the existing aftermarket wheel and befitting the car, but 16½" was too big (with my height and girth) to comfortably get my legs under, and getting in & out of the vehicle virtually required dislocating my hip and other leg joints too - it was particularly difficult turning left in 3rd gear as the steering wheel, gear stick and my knee all wanted to occupy the same space at the same time. I was able to resurrect the aftermarket wheel but the boss had been butchered so I 3D printed a replacement. This proved that a 15" rim was better for my driving experience but this was not befitting a 1950's car. A friend loaned me a 15" Les Leston wheel which is more contemporary of the age of the car but I still missed the uniqueness of the bat wing. Also, the rim was only ½" thick which was too delicate for my big hands. Nothing more to it than make my own.
Click thumbnail
This how I did it.
| Material: I was able to source some antique mahogony. It was actually parquet flooring from a Victorian school but nice wood that is not available nowadays | 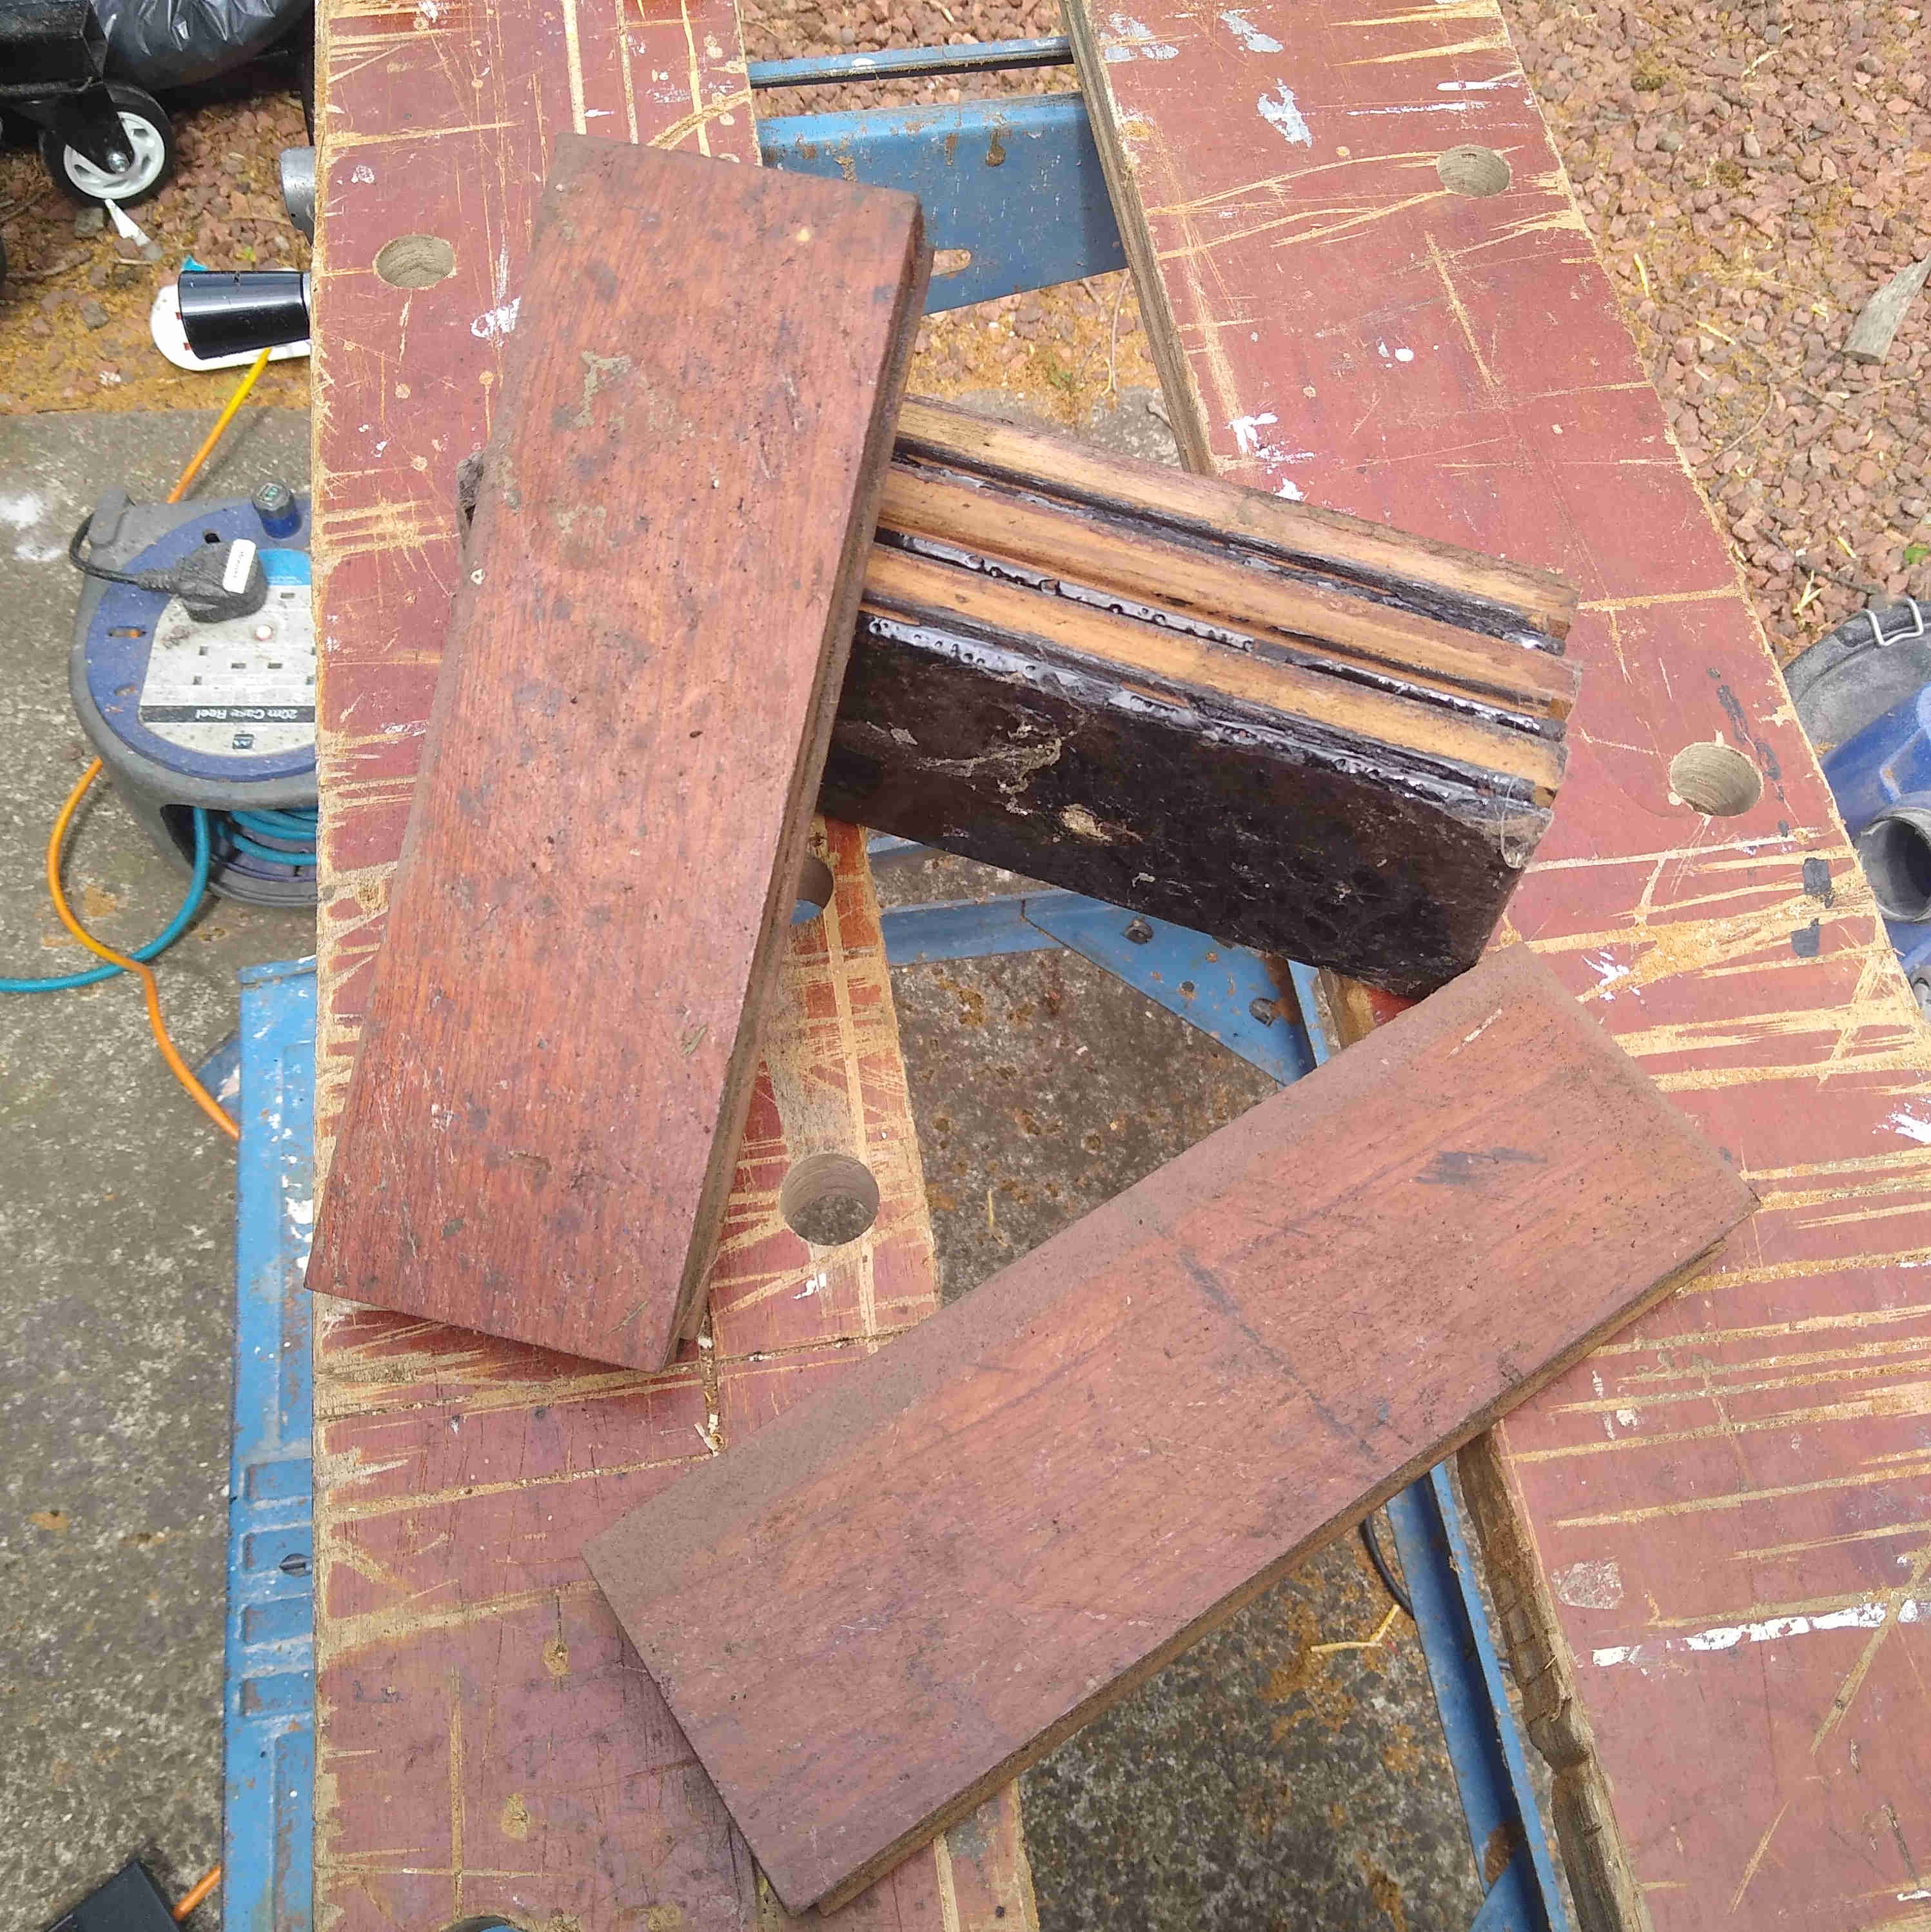 |
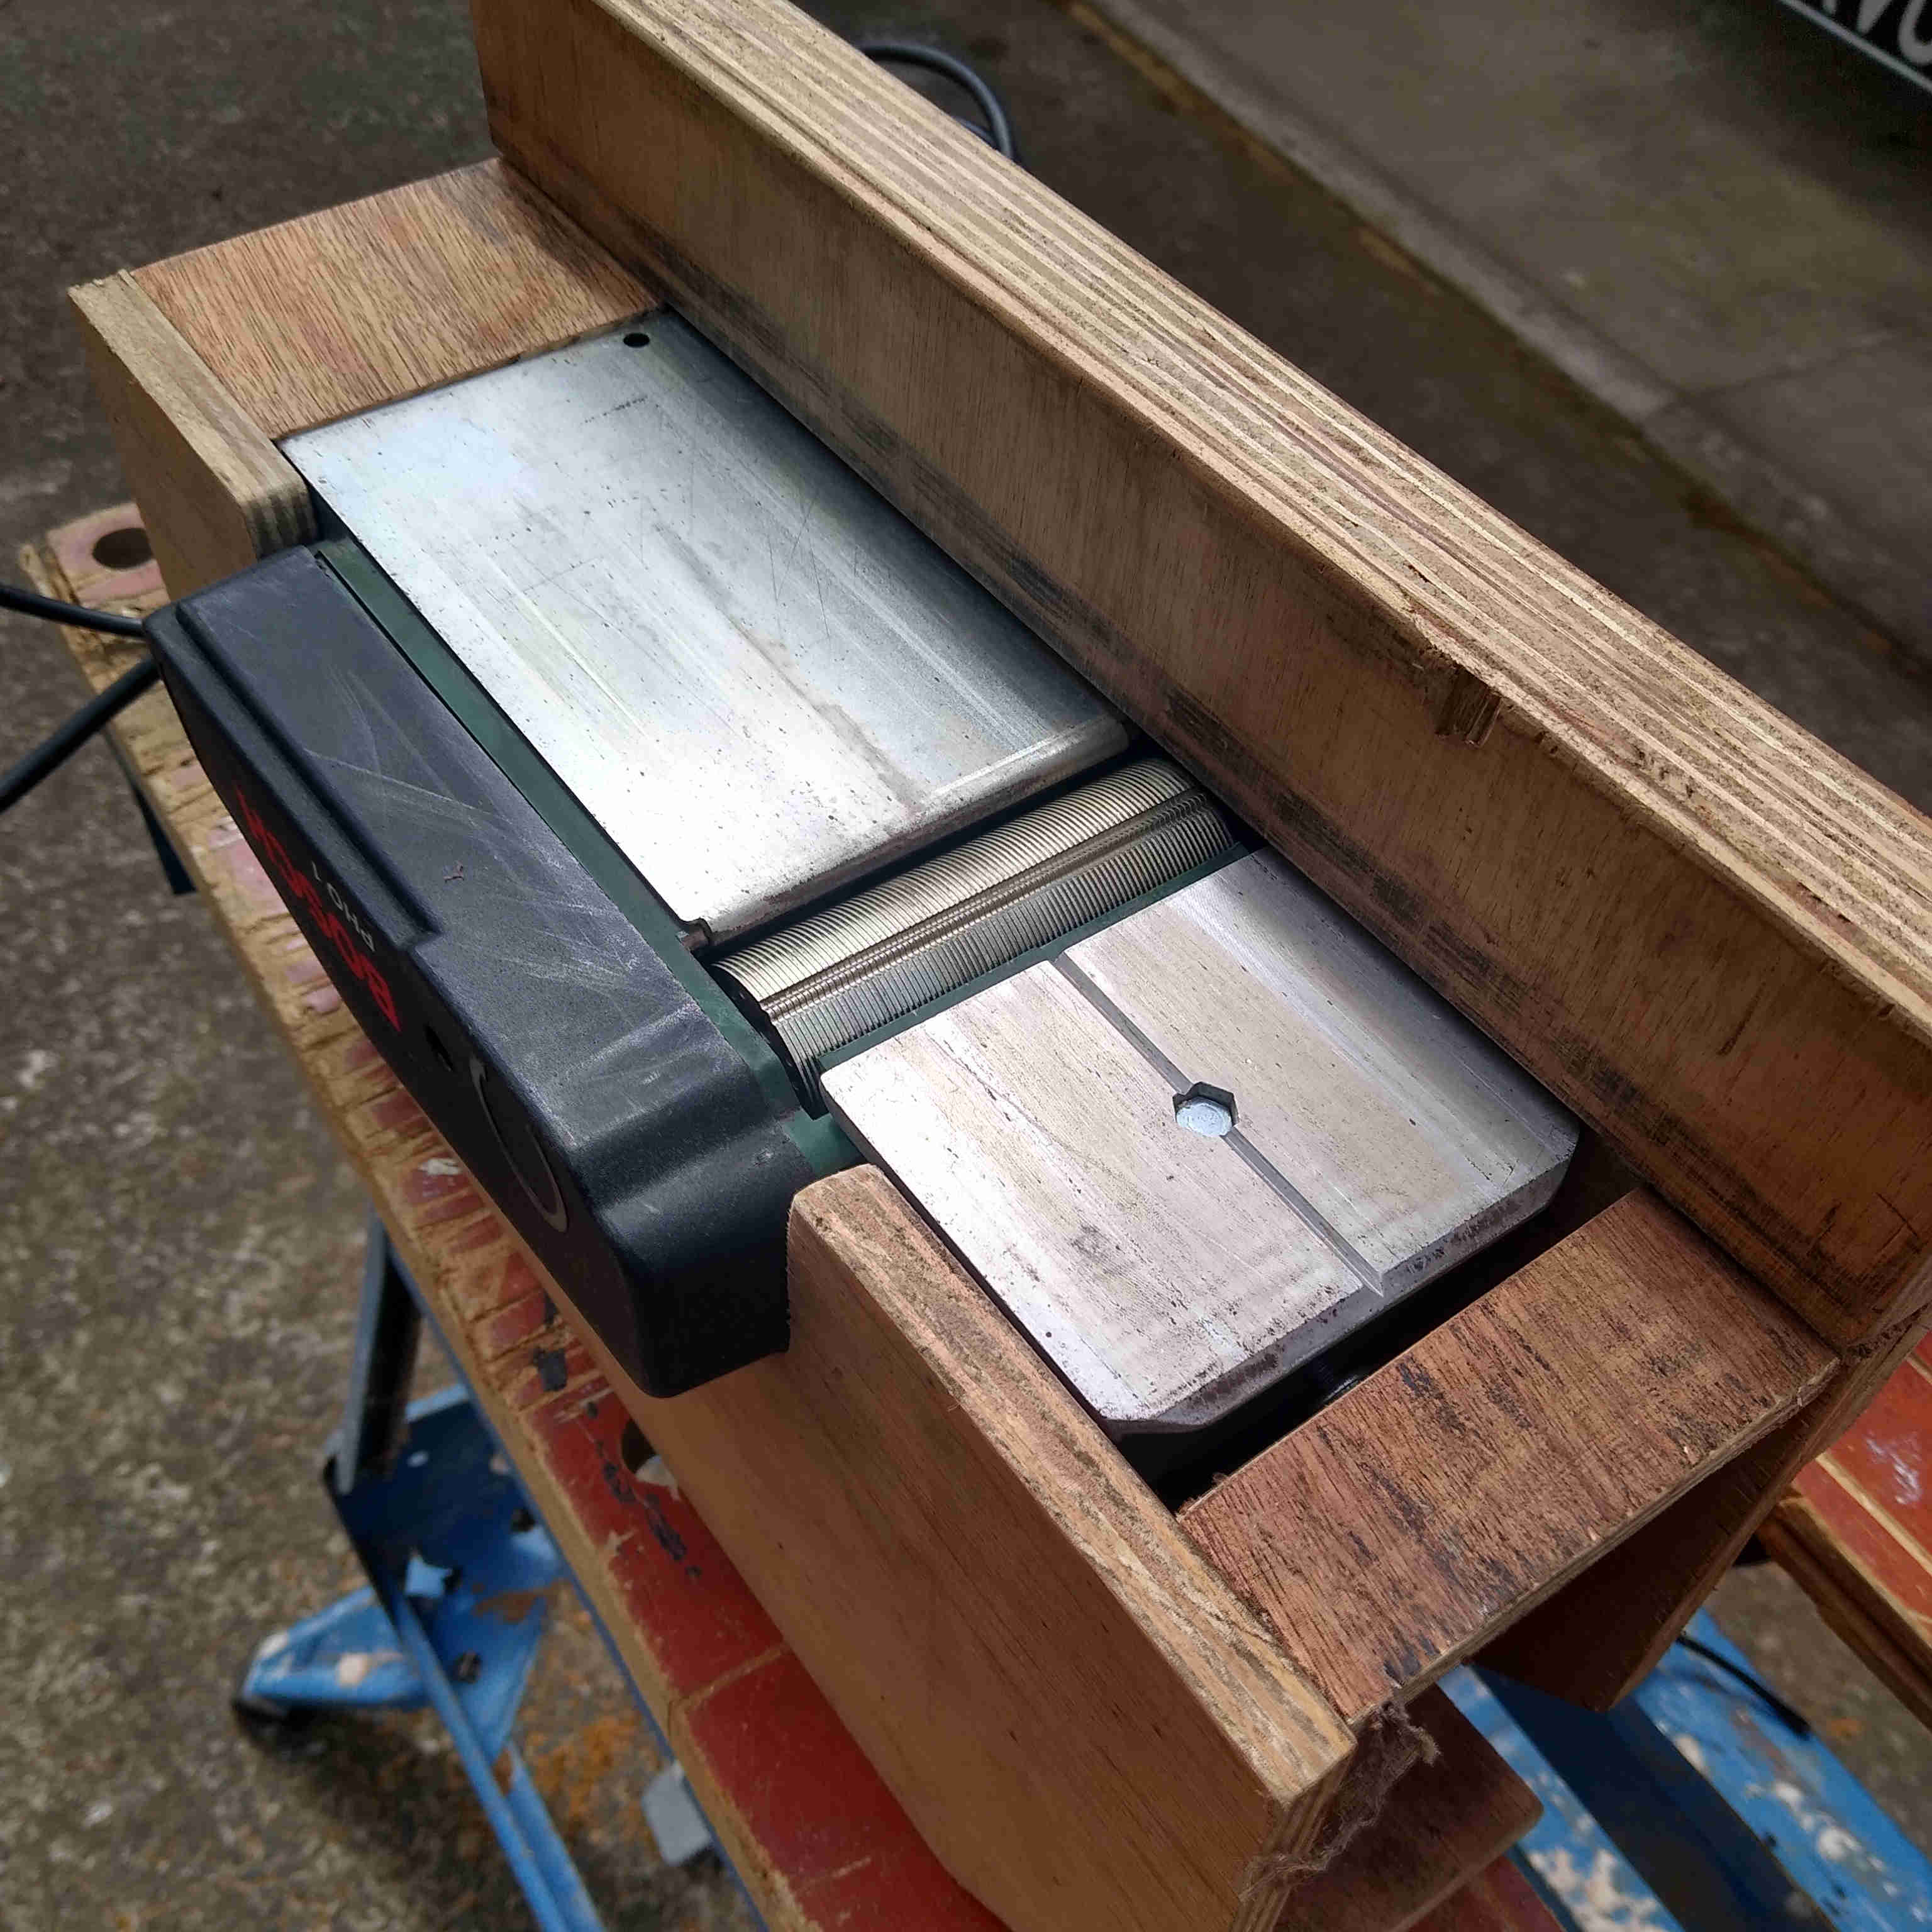 | The blocks had been vanished & polished for 150 years and had bitumen on the underside - I needed a jointer. So, I made one by mounting my electric planer upside-down. Each block was planed down on both sides to the same thickness of ~16mm |
| 16 blocks were required to make two octagonal rings (how appropriate for an MG) so each block was cut with a 22½° end on my mitre saw. The blocks were then glued together to make the octagons. At this stage the octagons would not have much structural strength just glued at the ends but each will be glued together and overlapping - actually they were quite resilient at this stage. | |
| Continuing with the 'adapting tools' theme, I then mounted my hand router to a piece of board to make a router table. This I used to cut out a template for the wooden part of the wheel. | 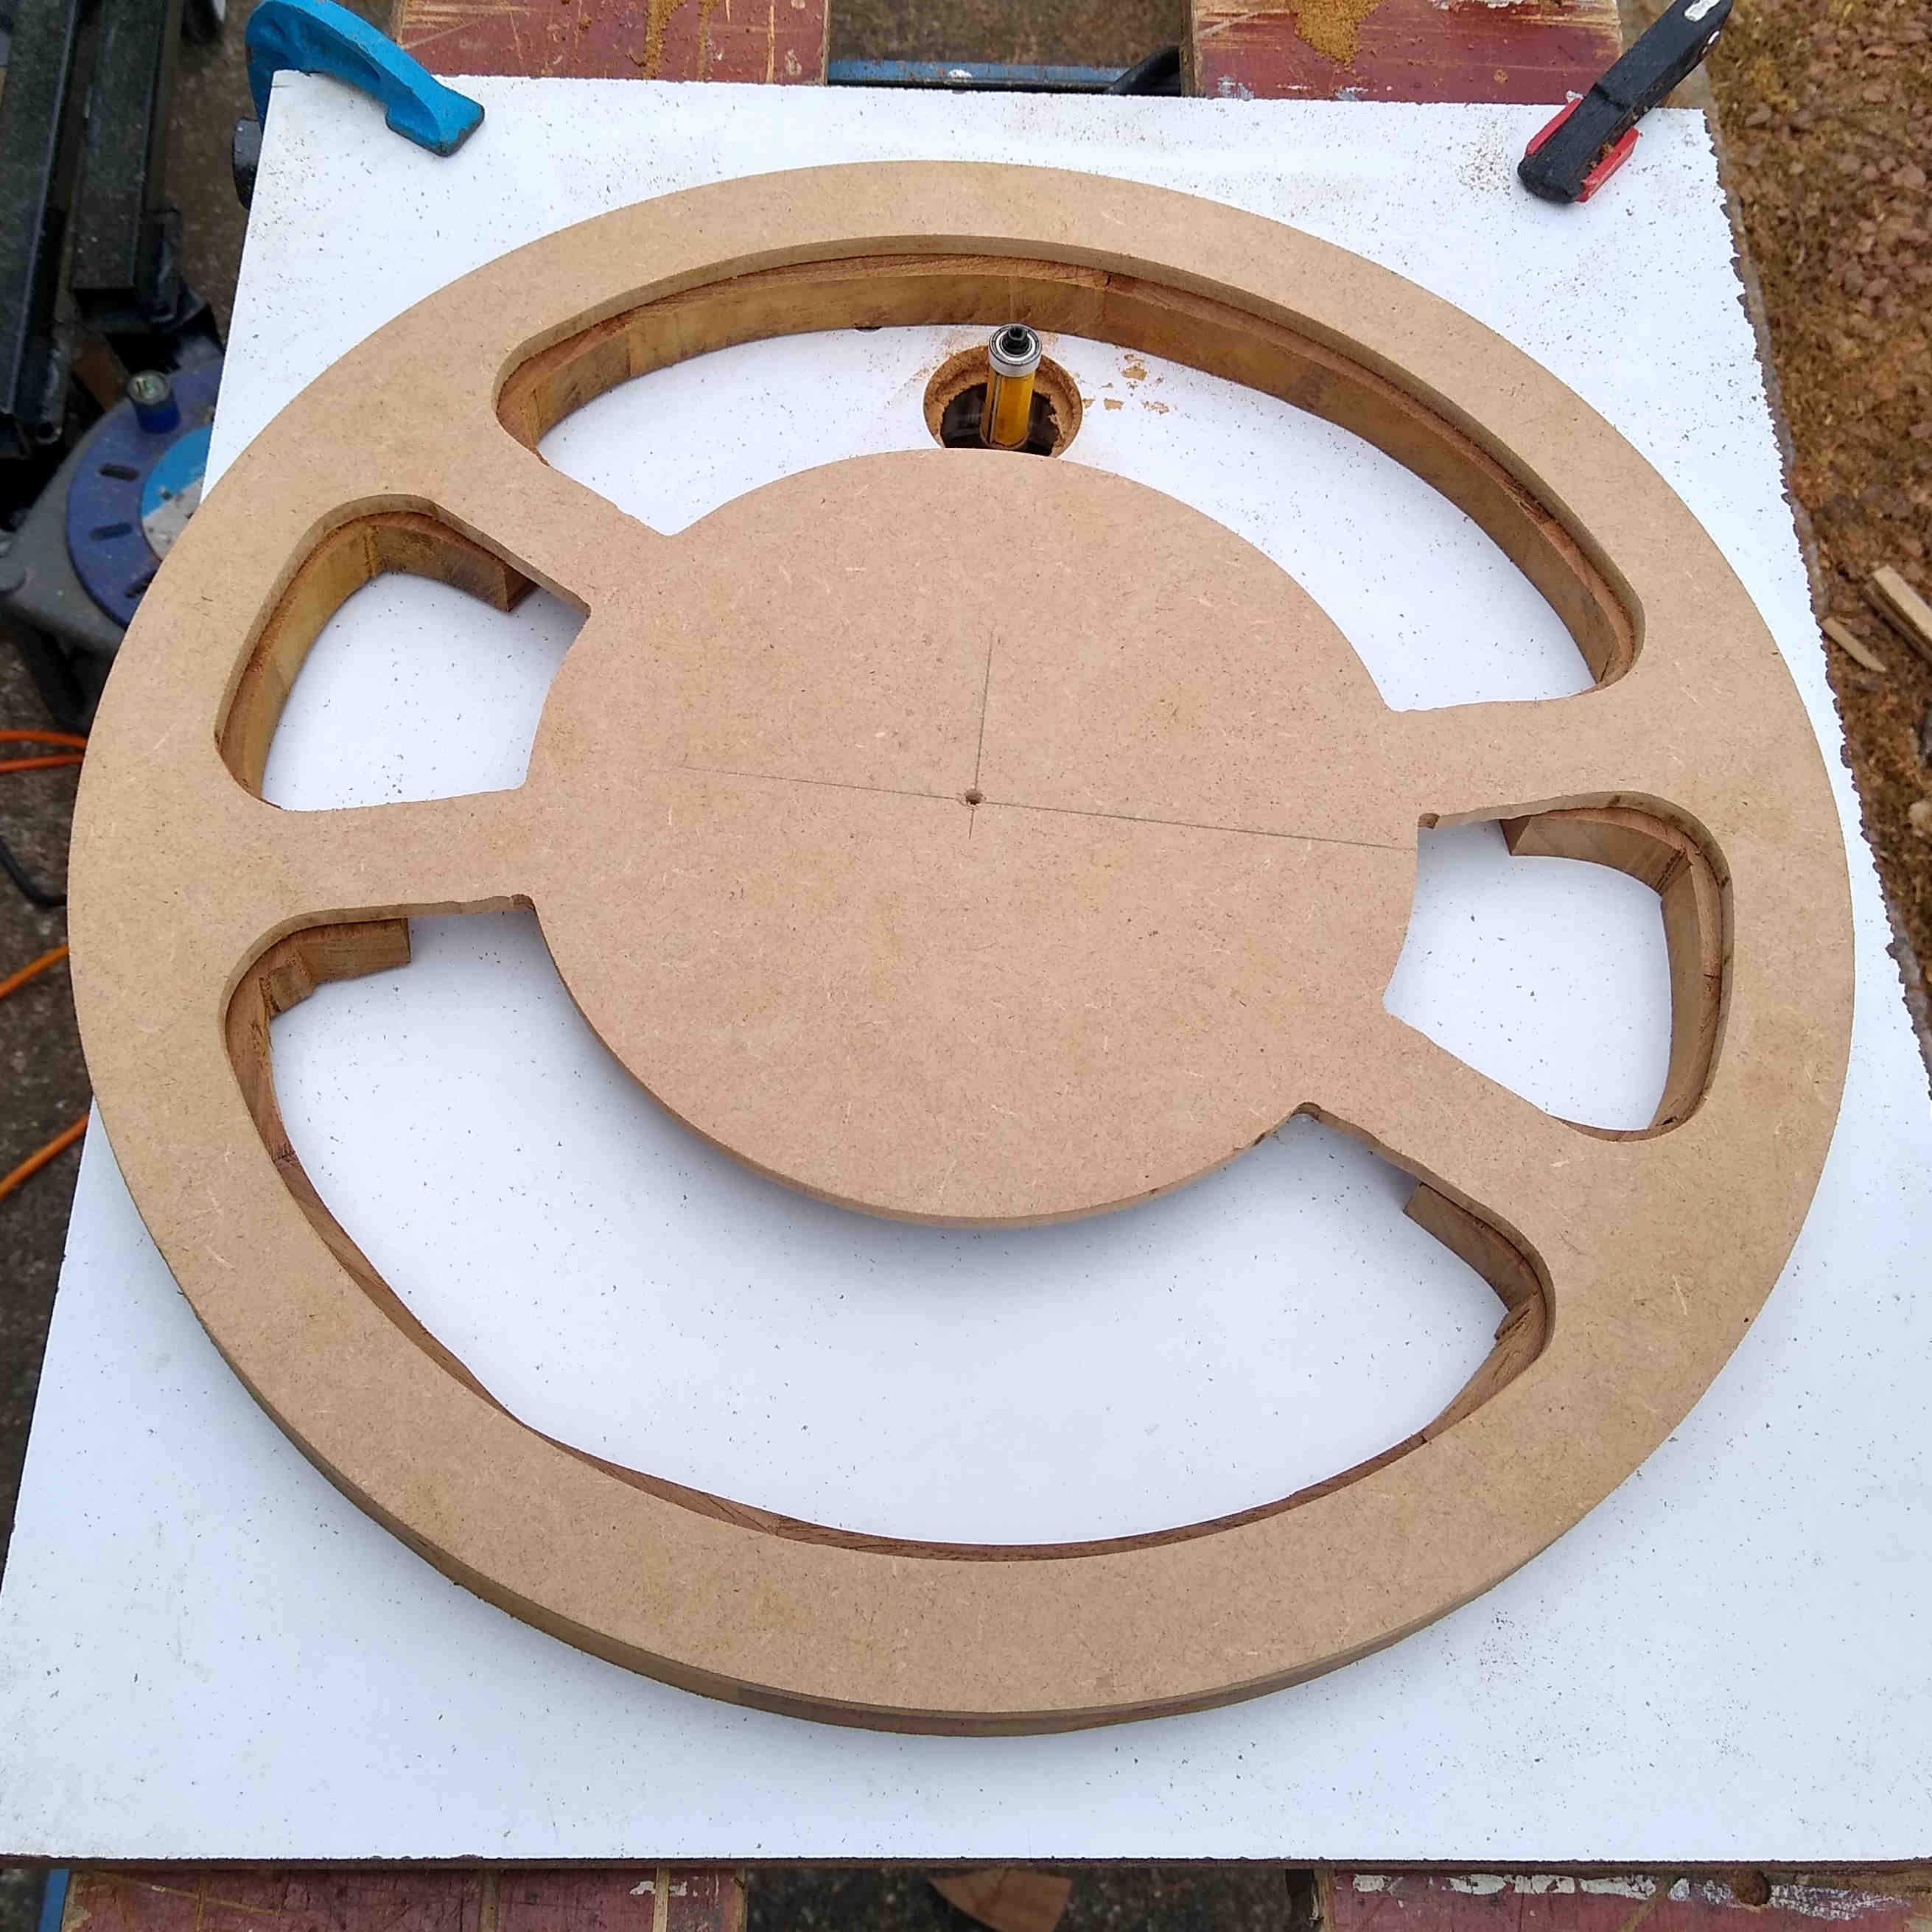 |
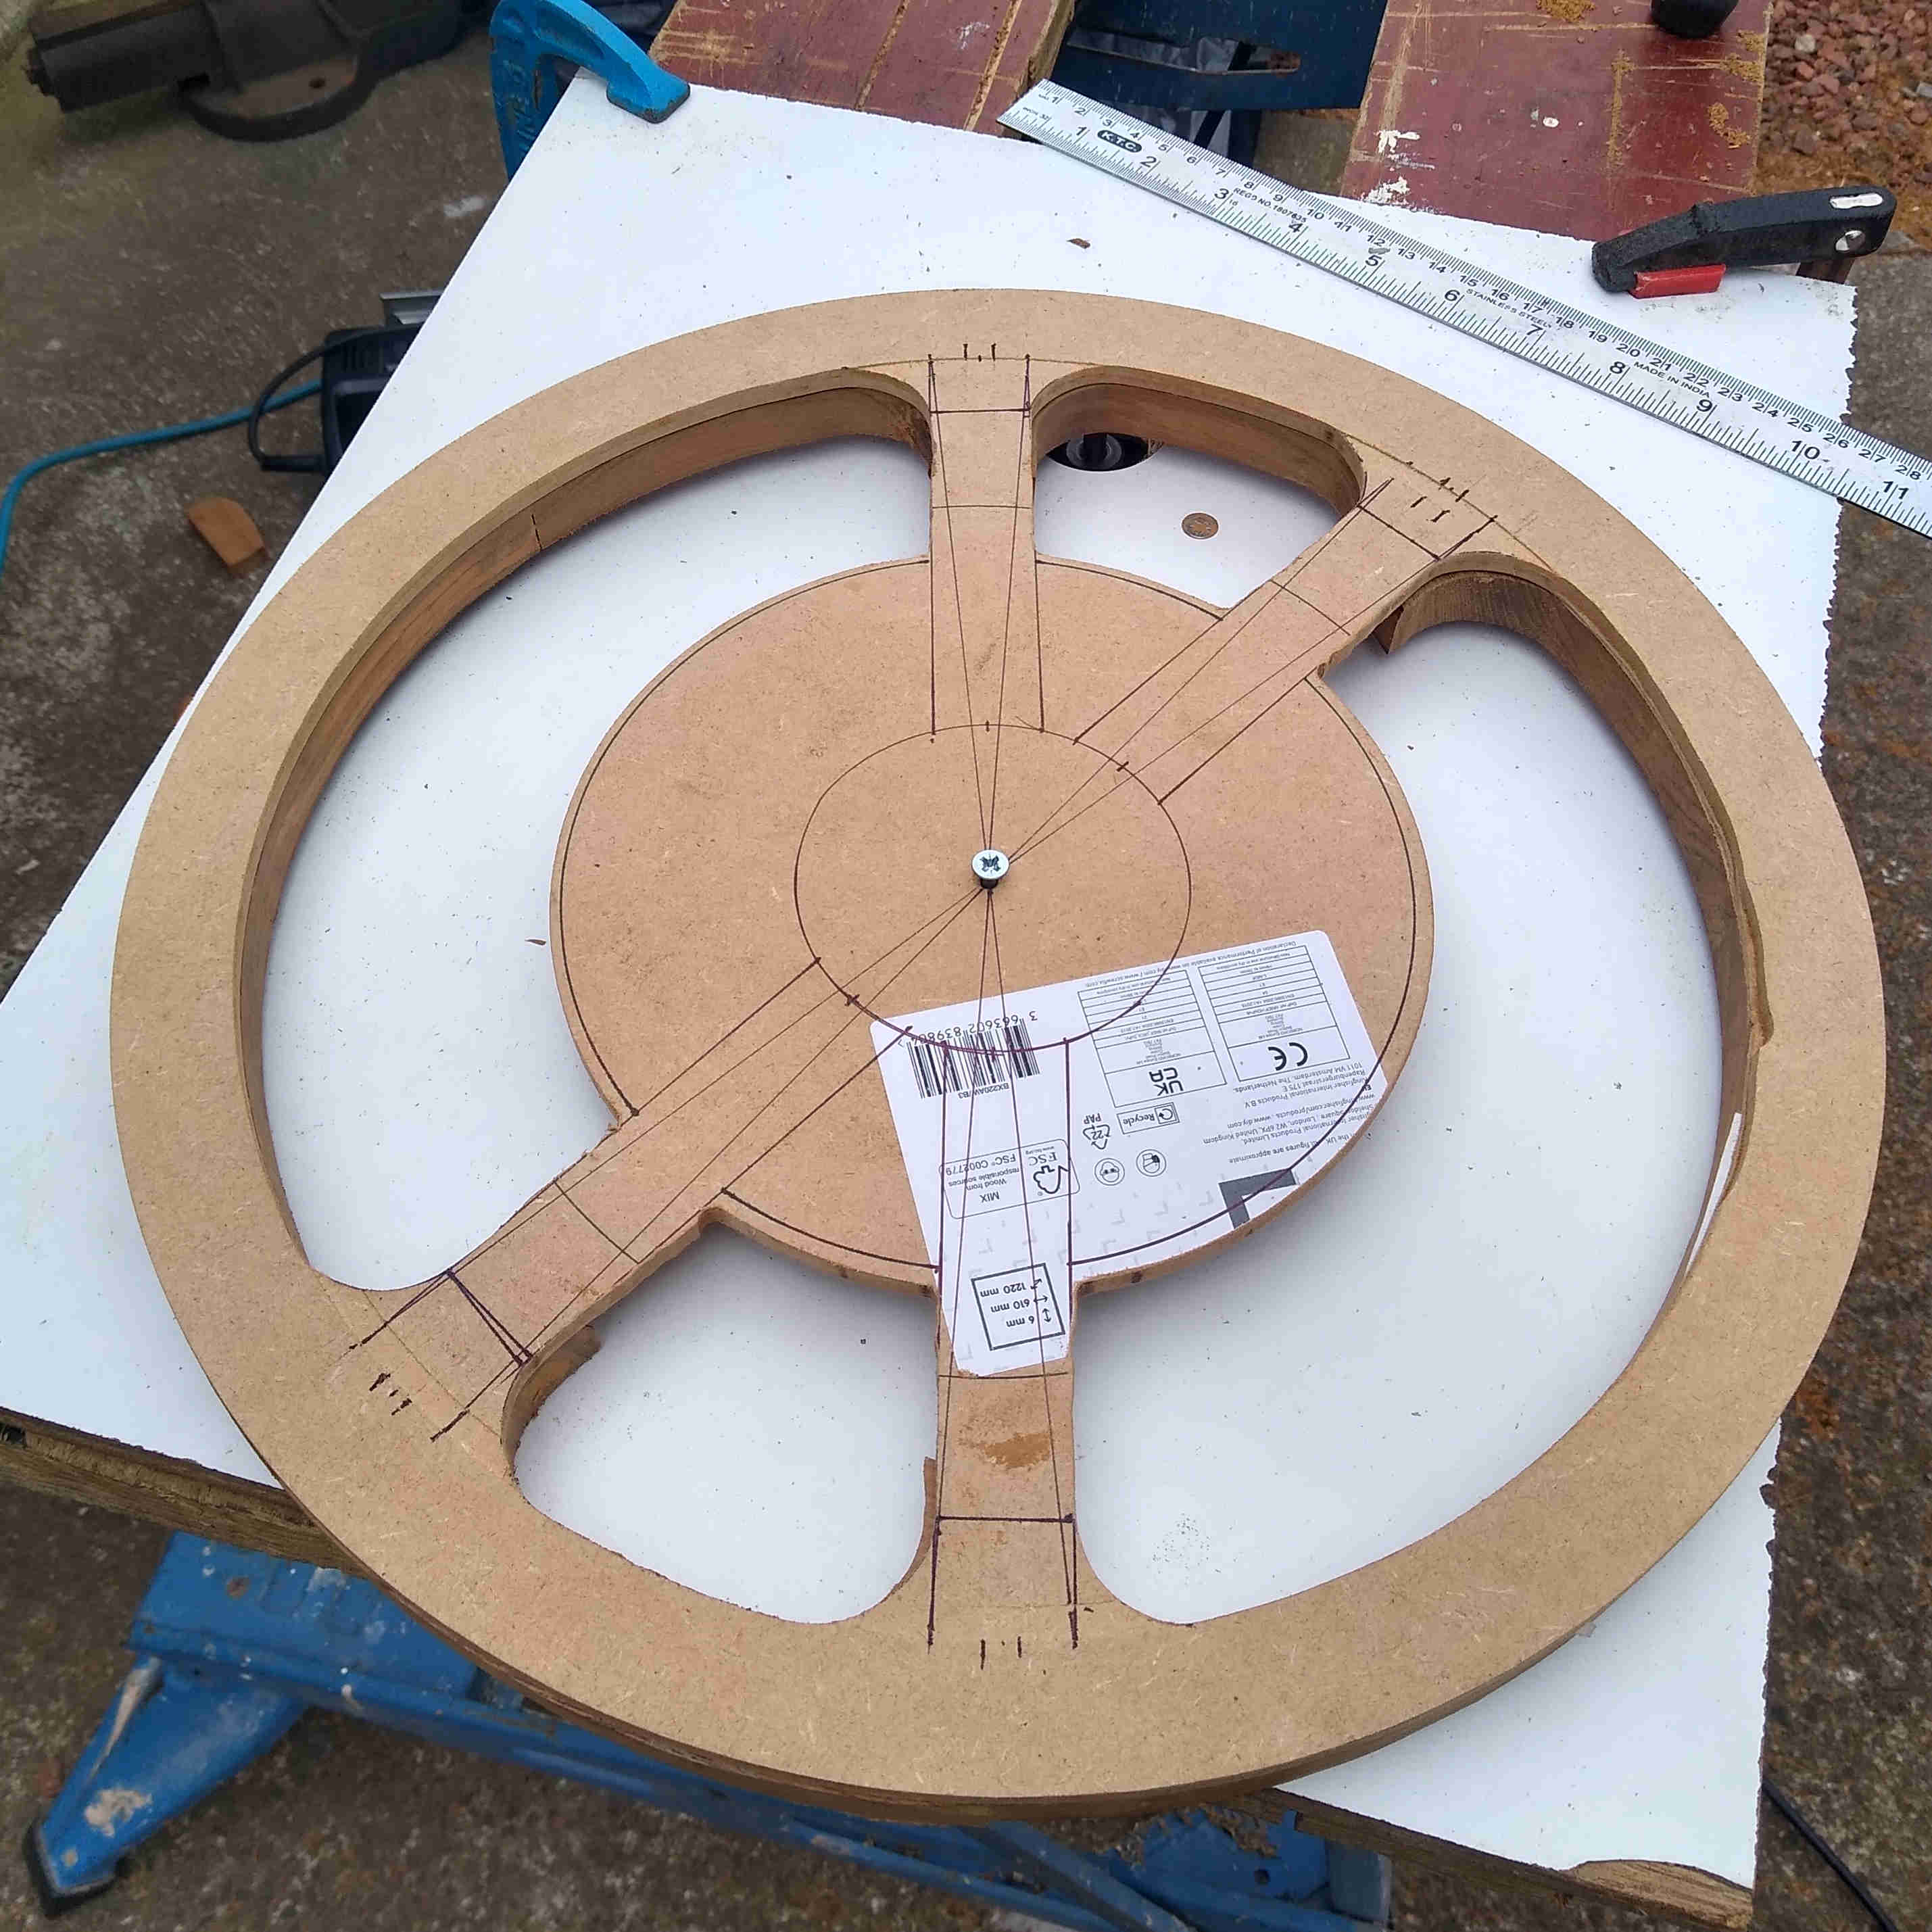 | Sticking the template to the octagon with double sided tape enabled me to cut out the shape on the router table with a flush trim router bit (one with a bearing that runs round the template as a guide whilst the blade cuts the material). |
| Setting the template on a centre pin (screw) and using a round bit set to 5mm depth, I cut the groove in each half for the steel ring. | 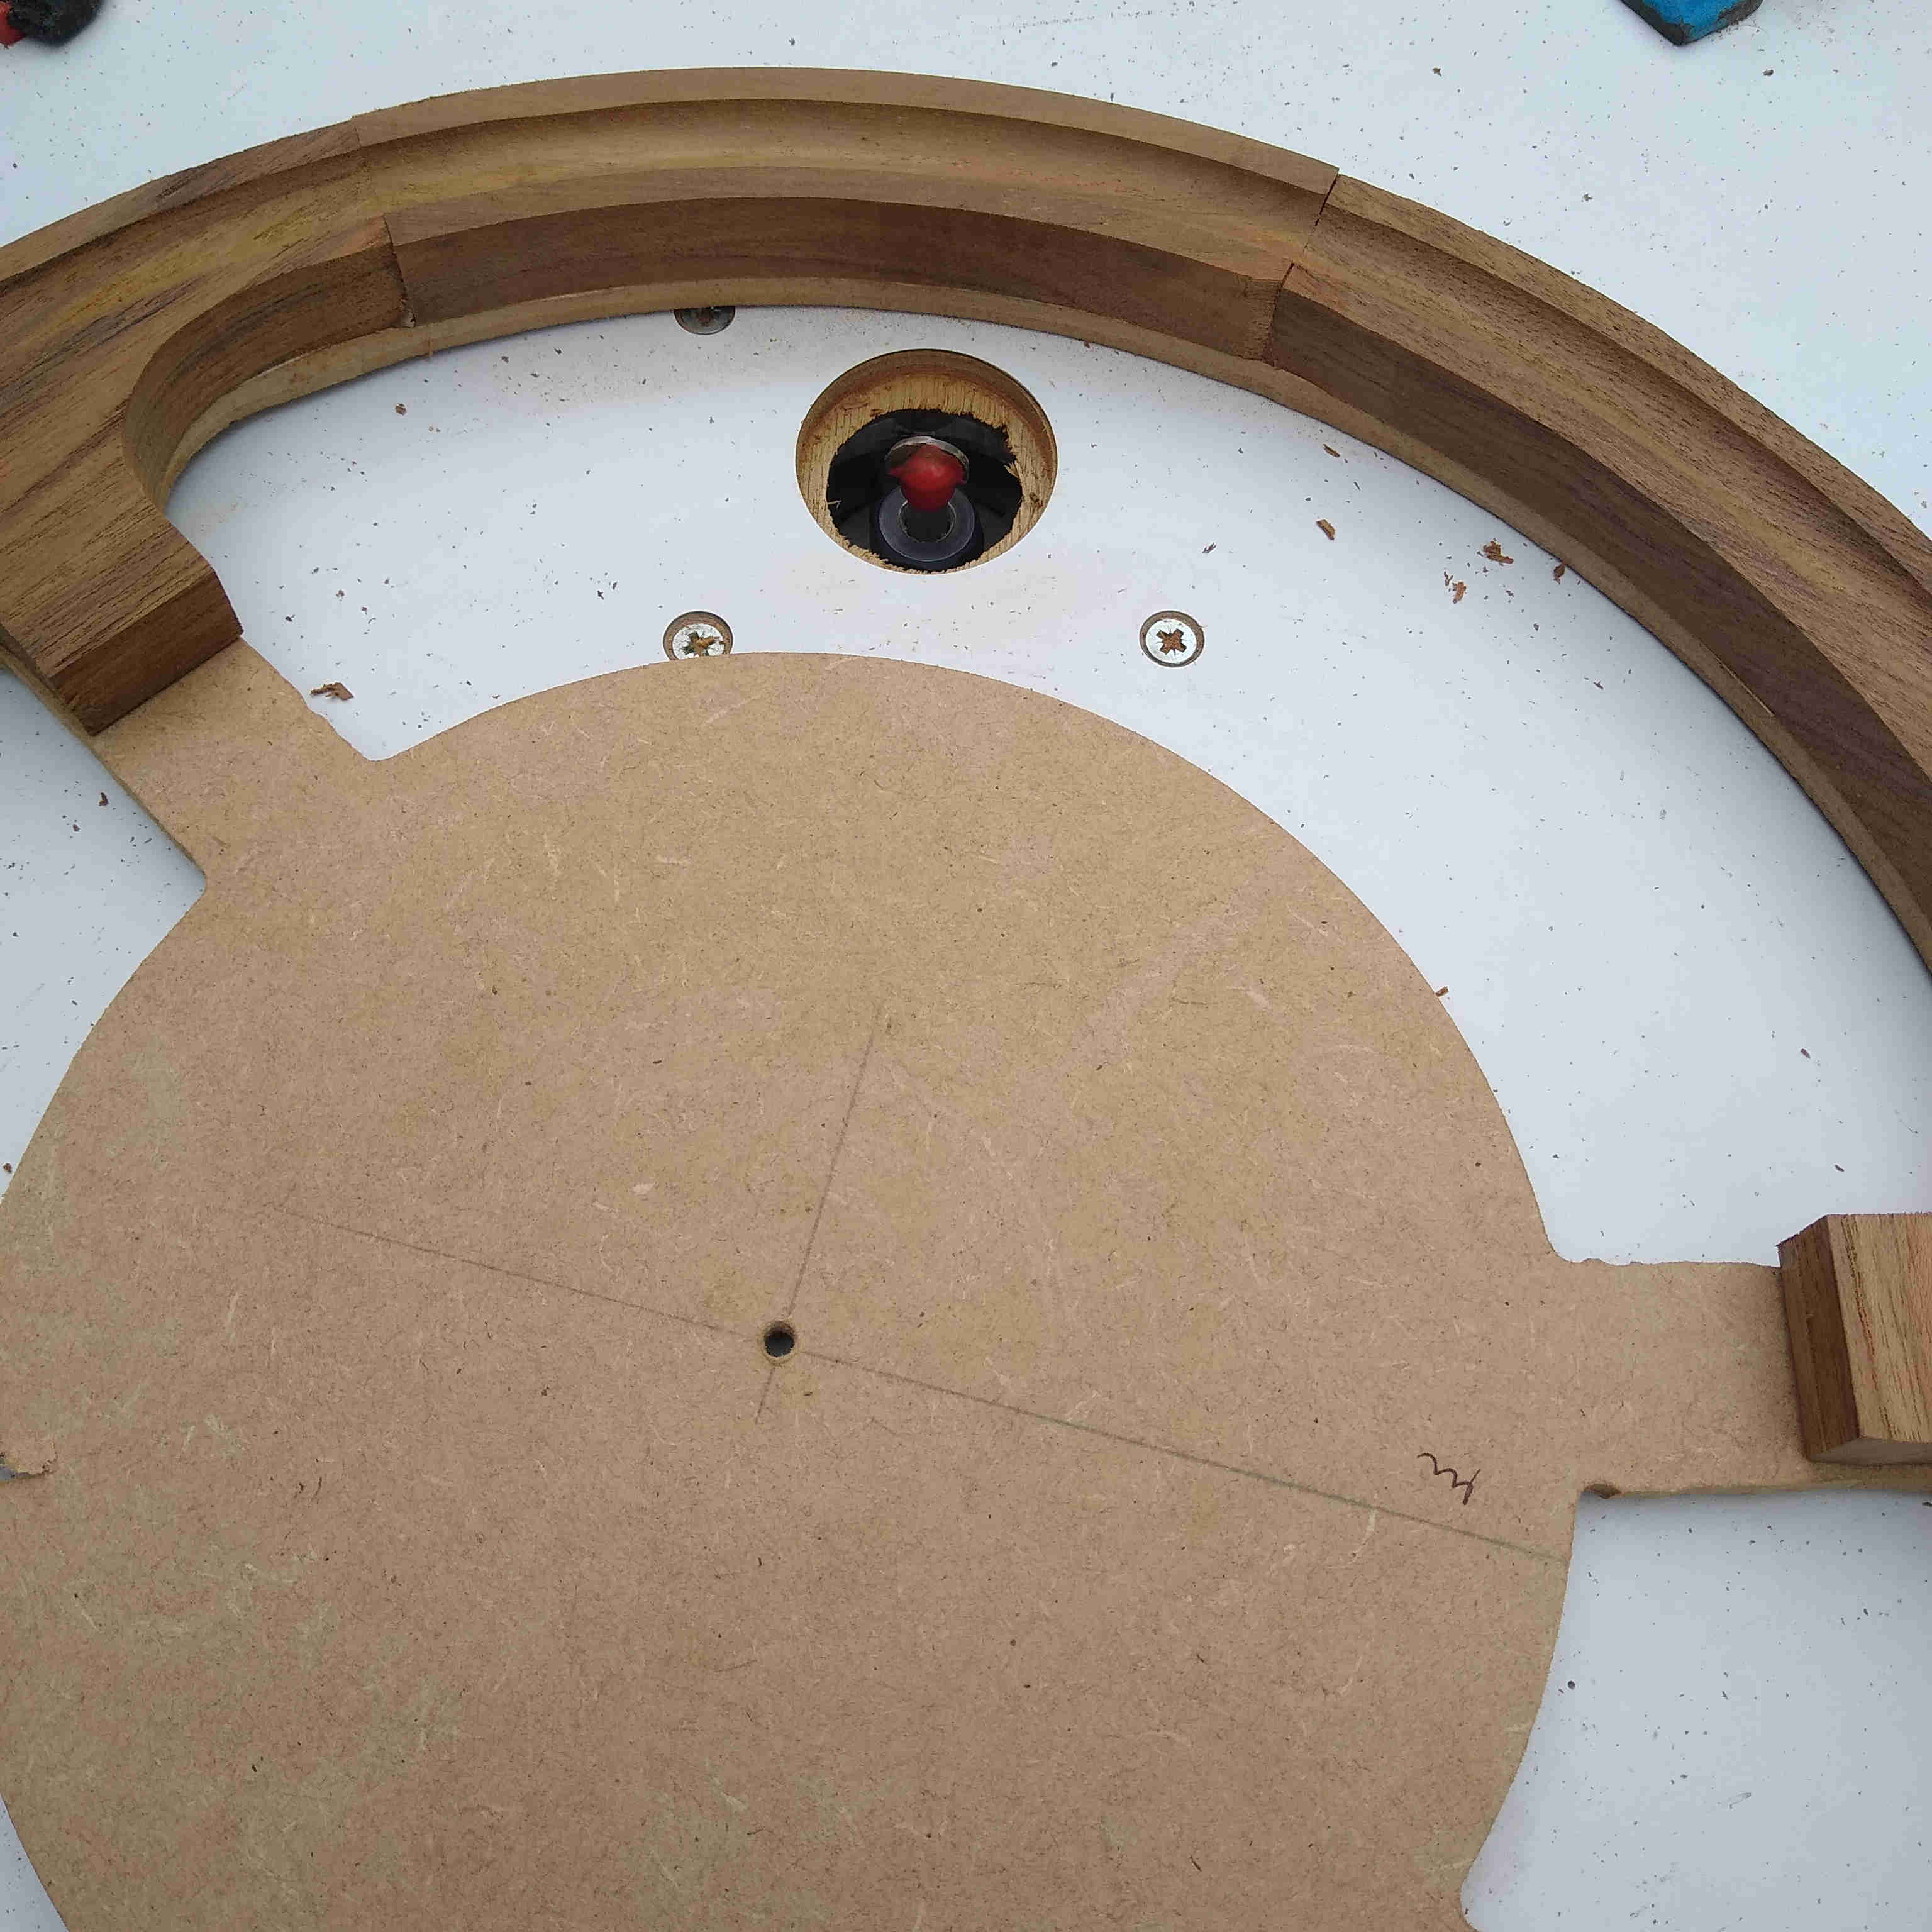 |
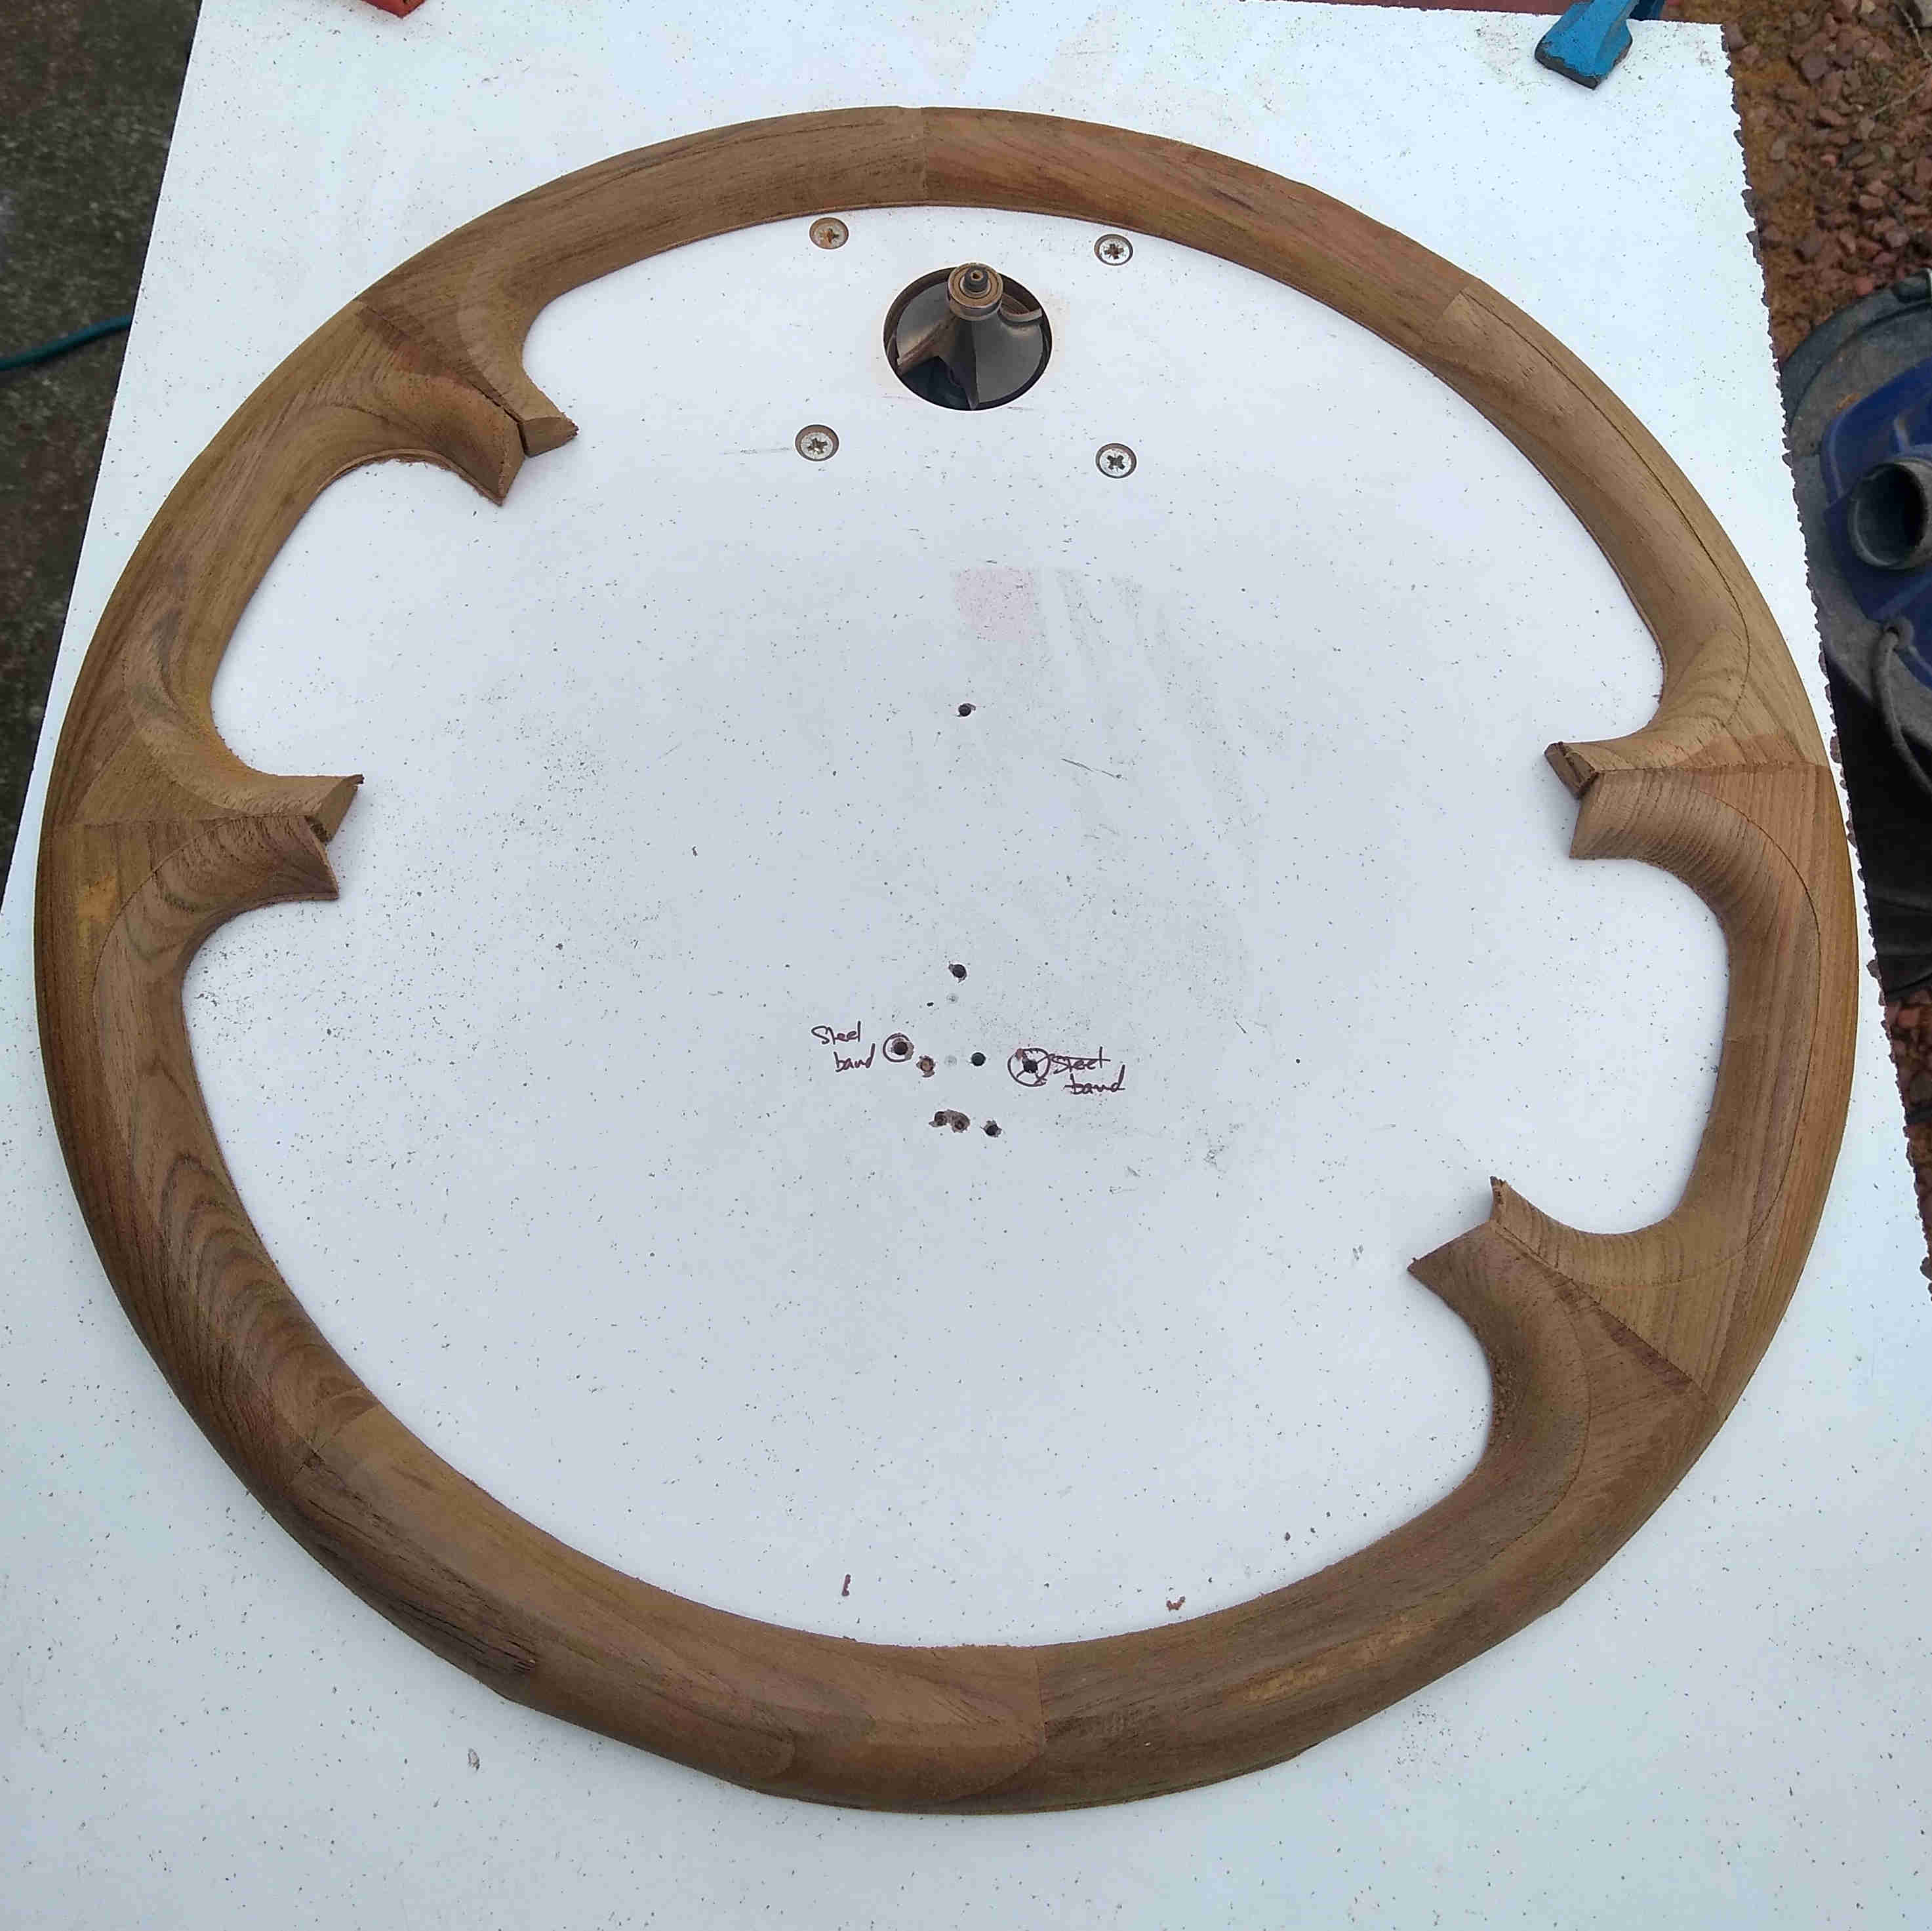 | Finally, still using the template as a guide and using a ½" round-over bit, the inner and outer curved edges were cut. (picture shows template removed and piece turned over) |
| Turning to the inner metal work, any remaining plastic was burnt off with a blow torch. The ring was cut off the spokes, a piece cut out and the ends welded together to make a smaller ring to fit the groove in the wood. | 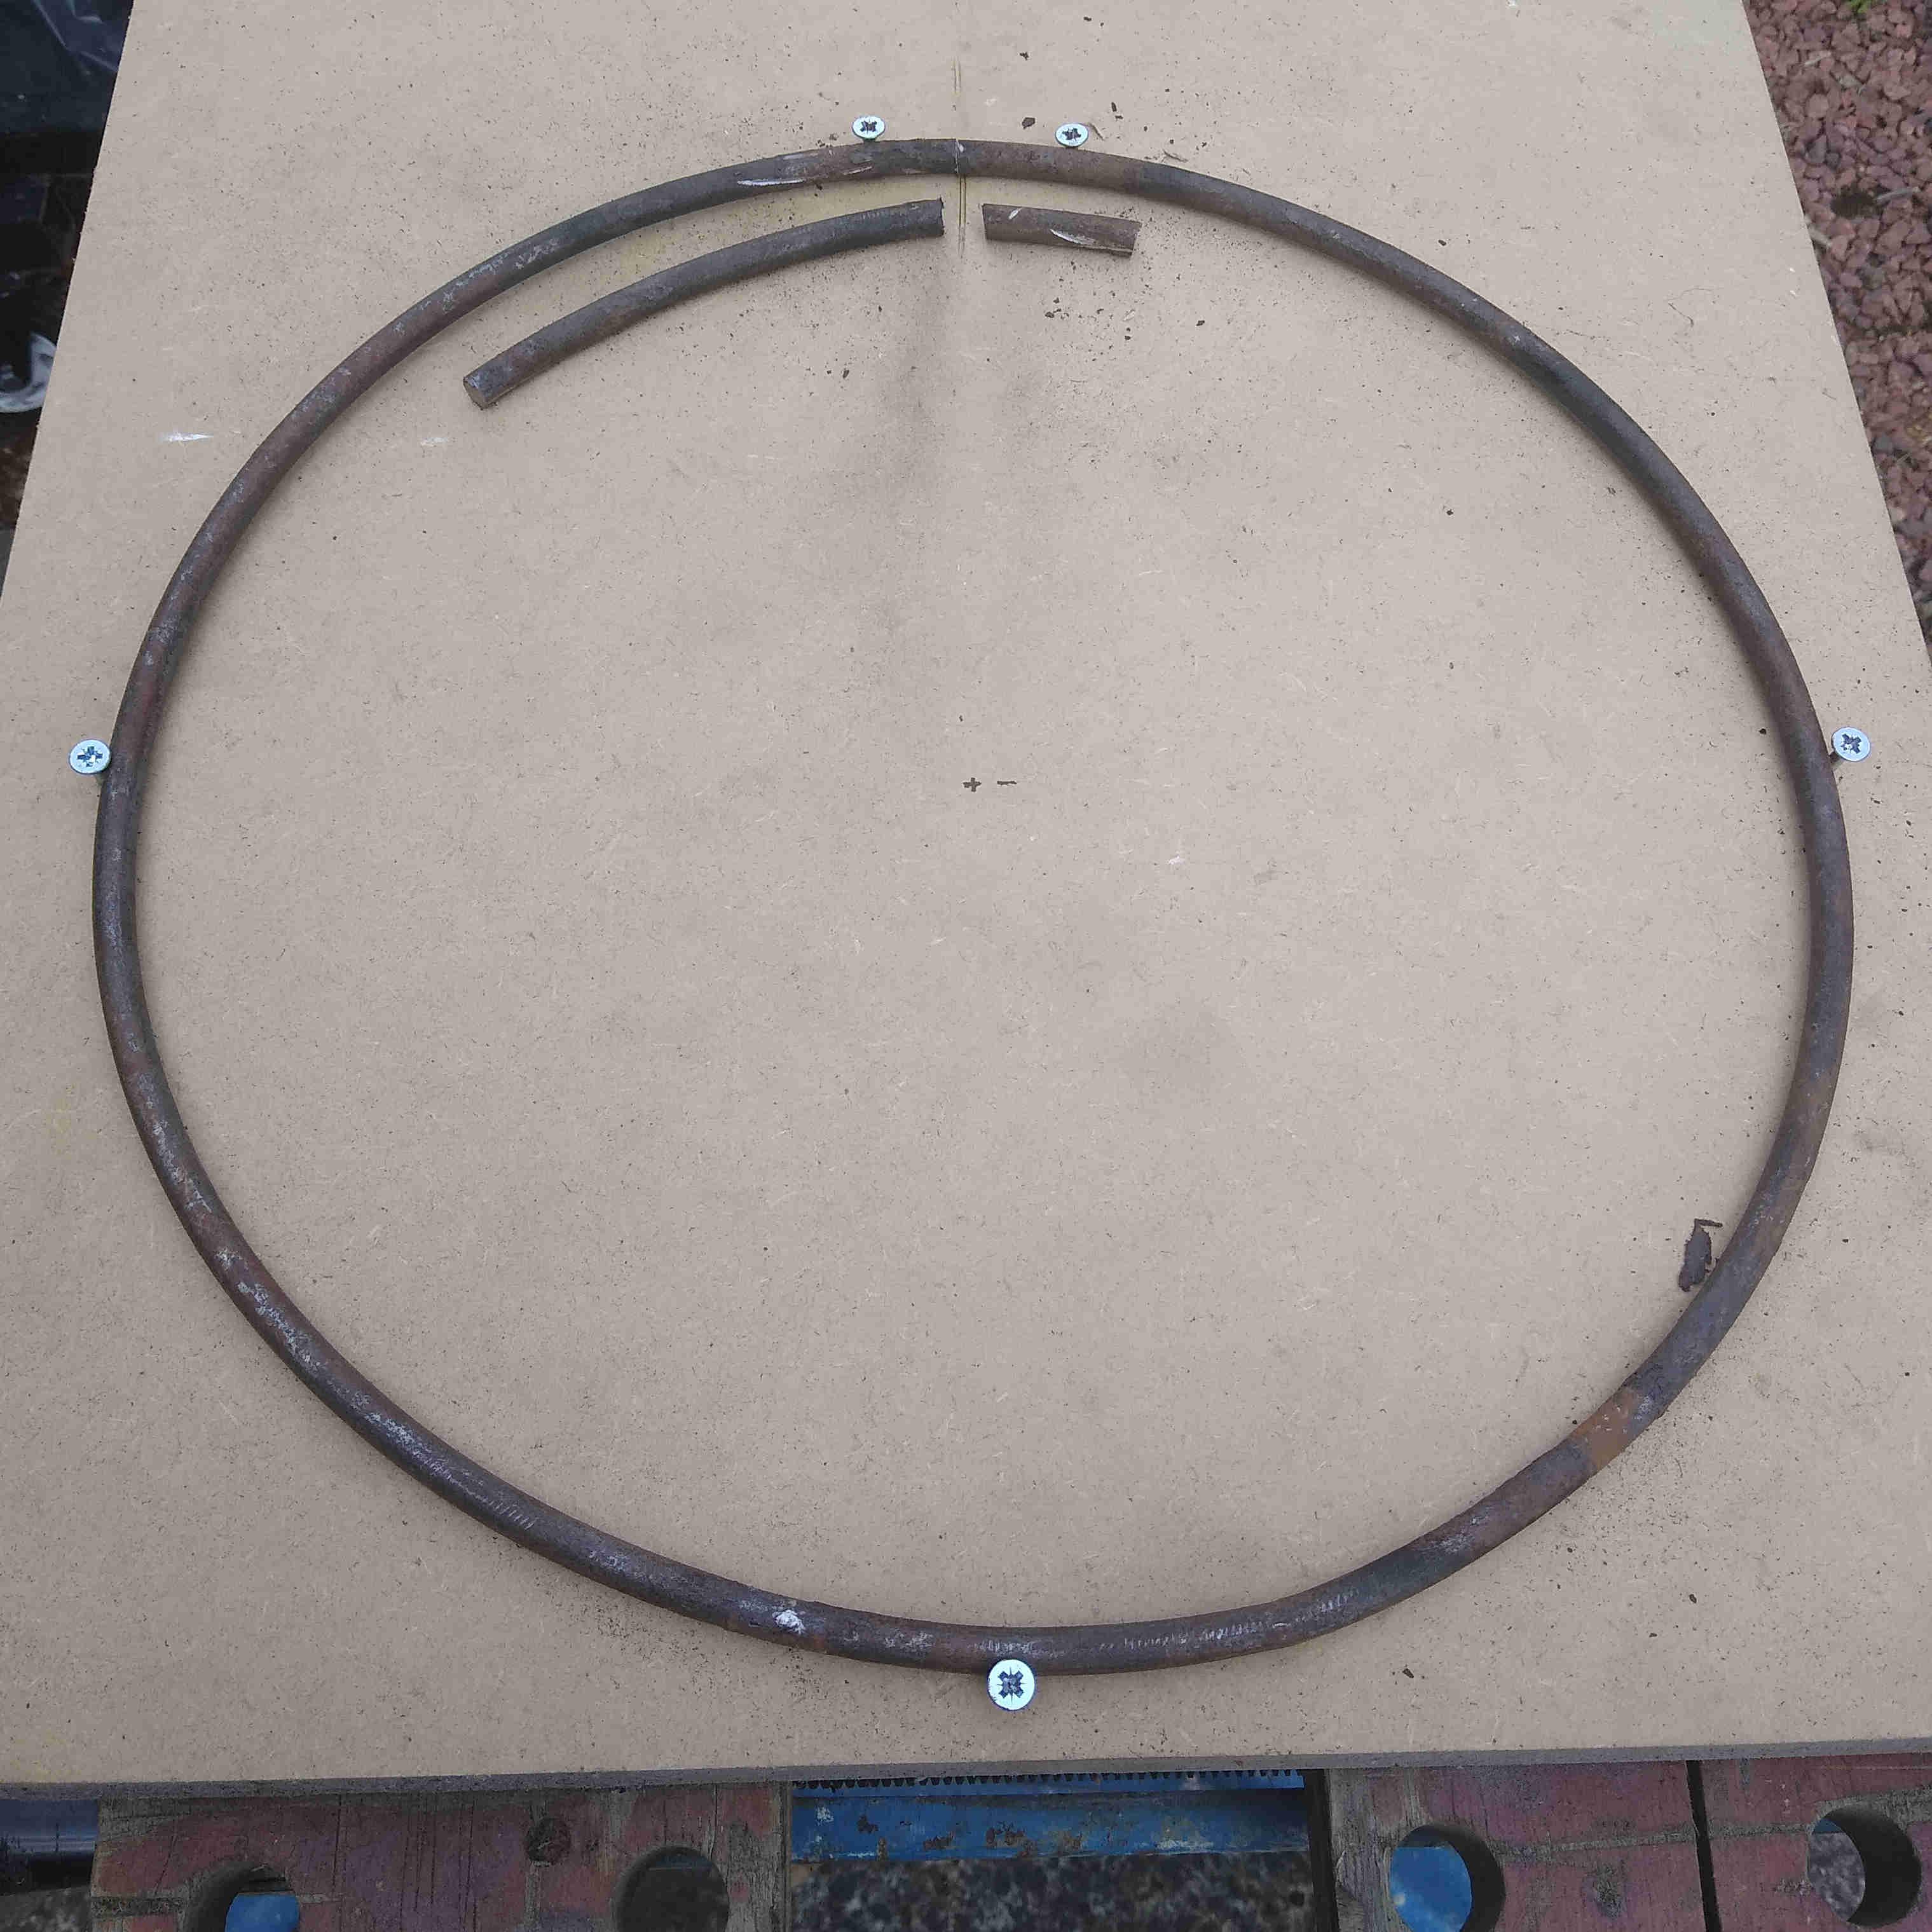 |
 | The spokes were cut down to size and MIG welded onto the ring. |
| The metalwork would now comfortably fit inside the channels | 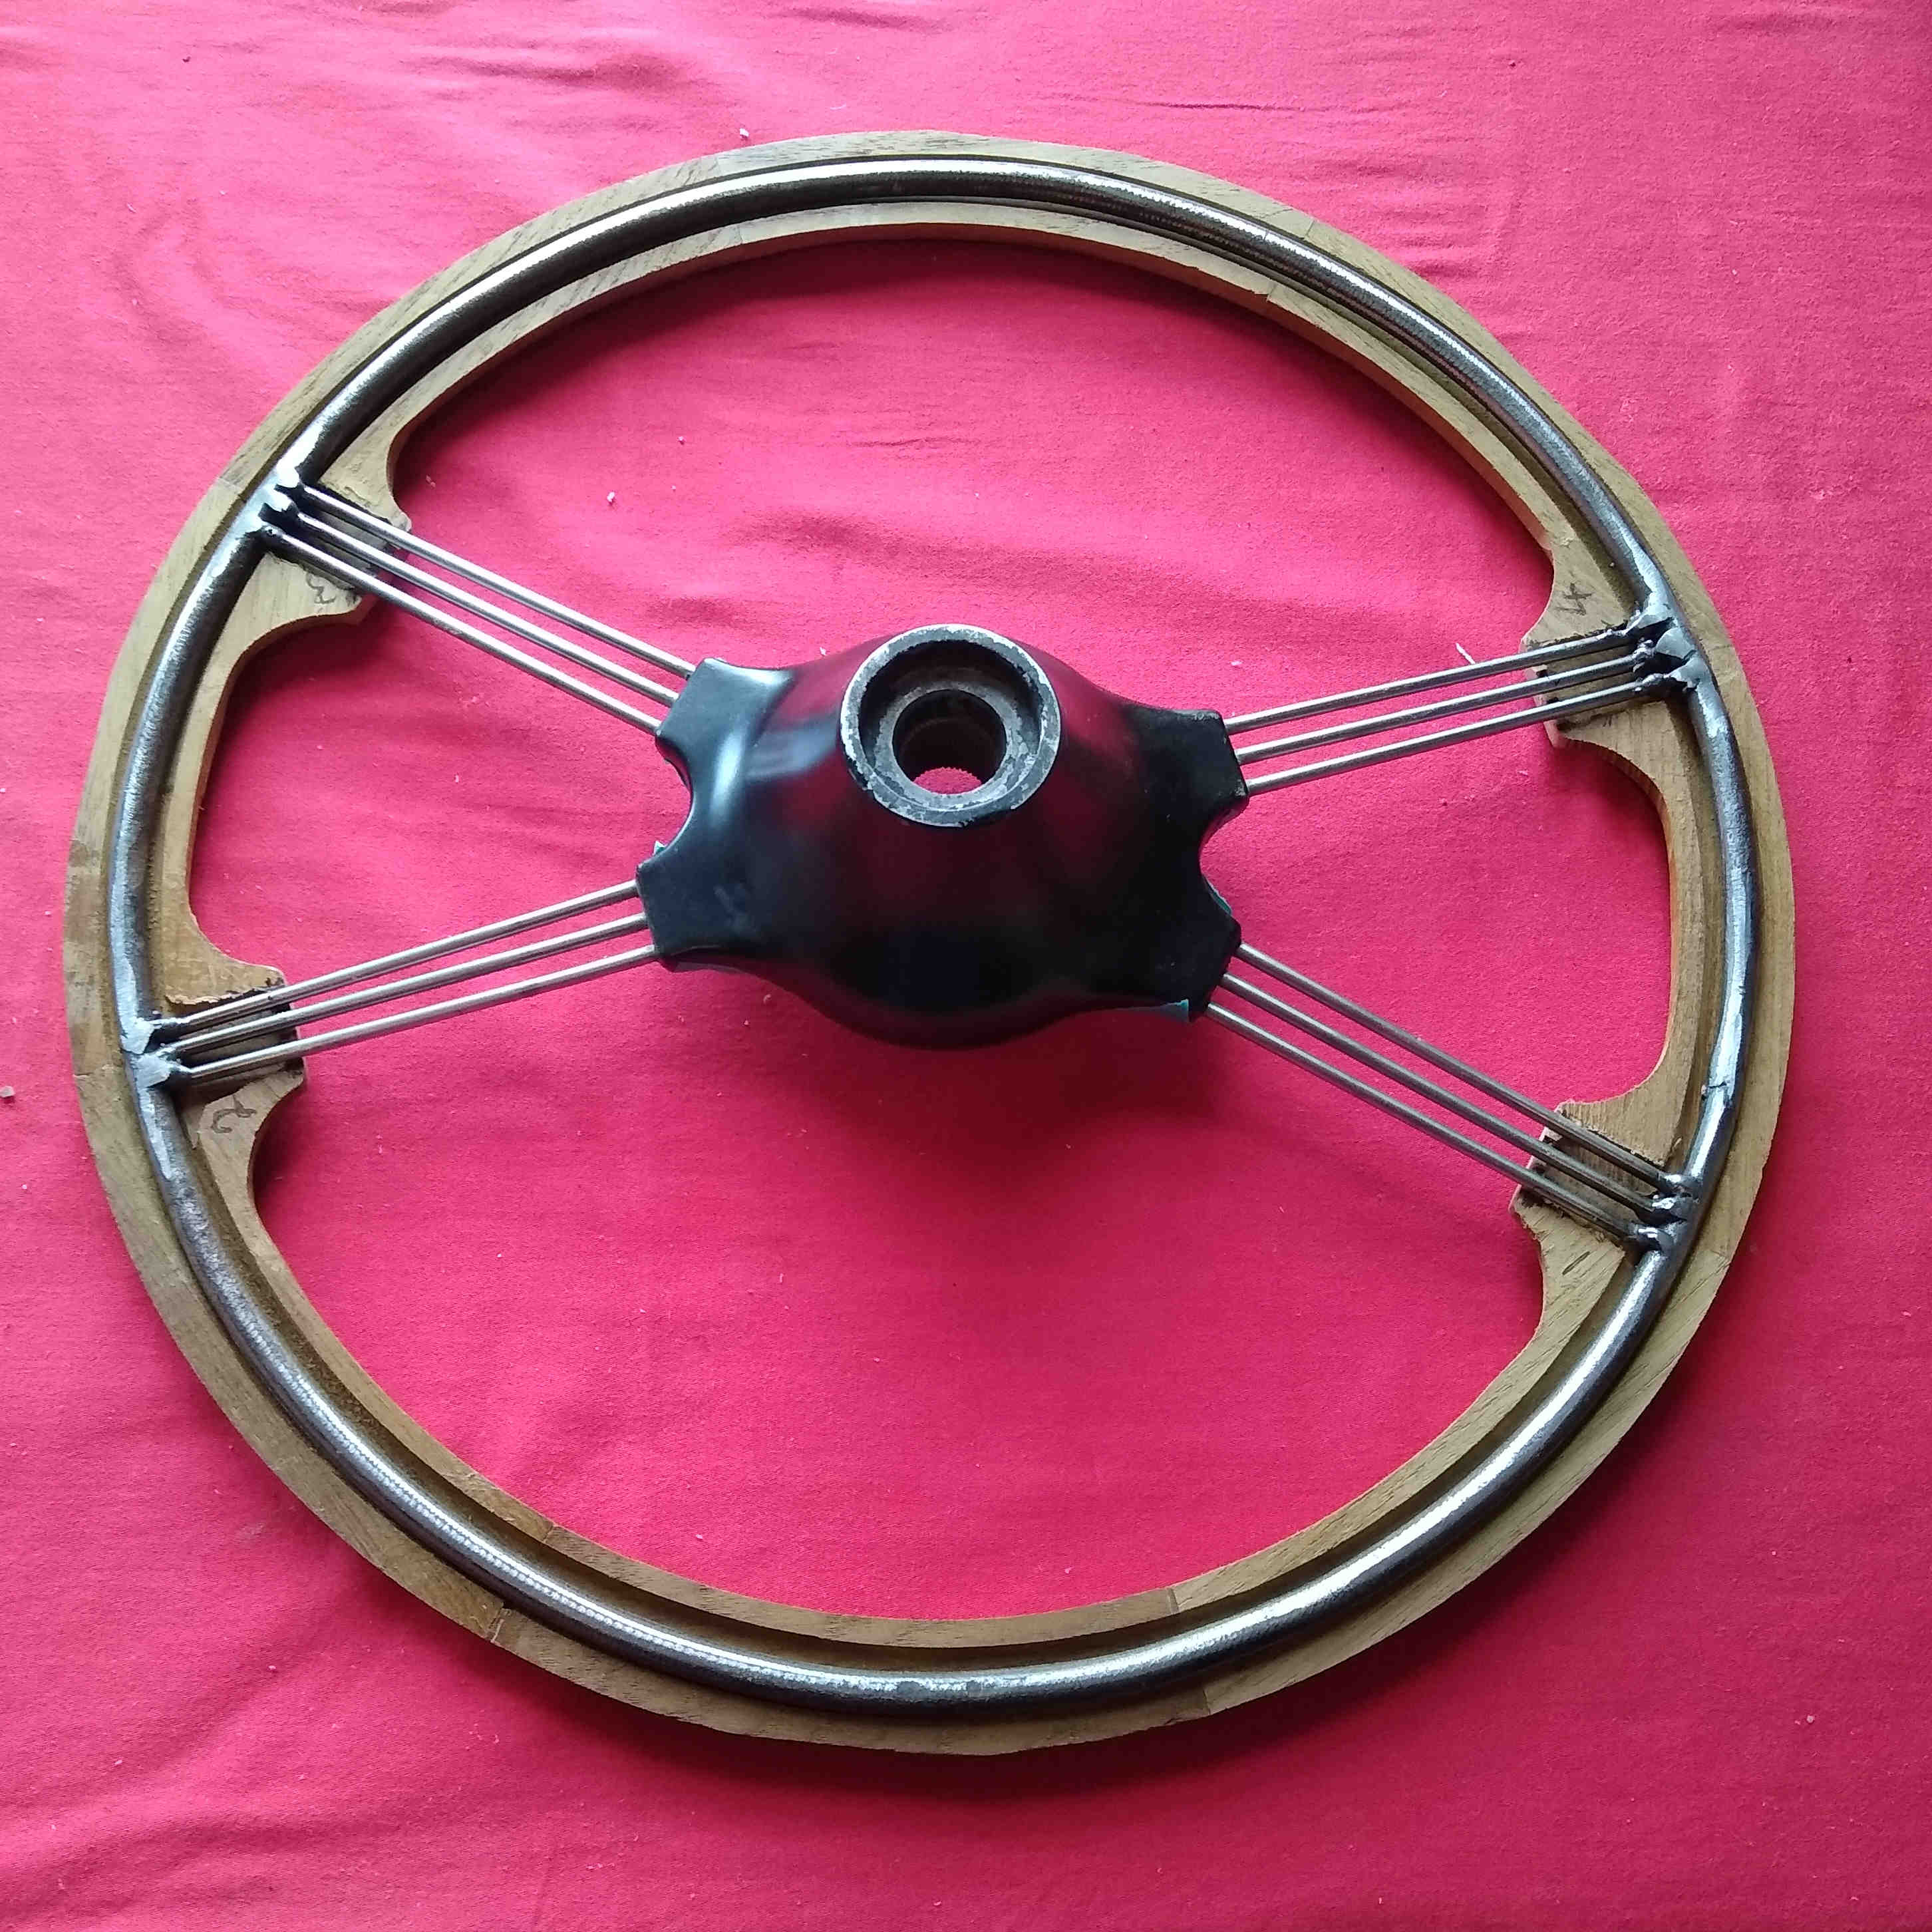 |
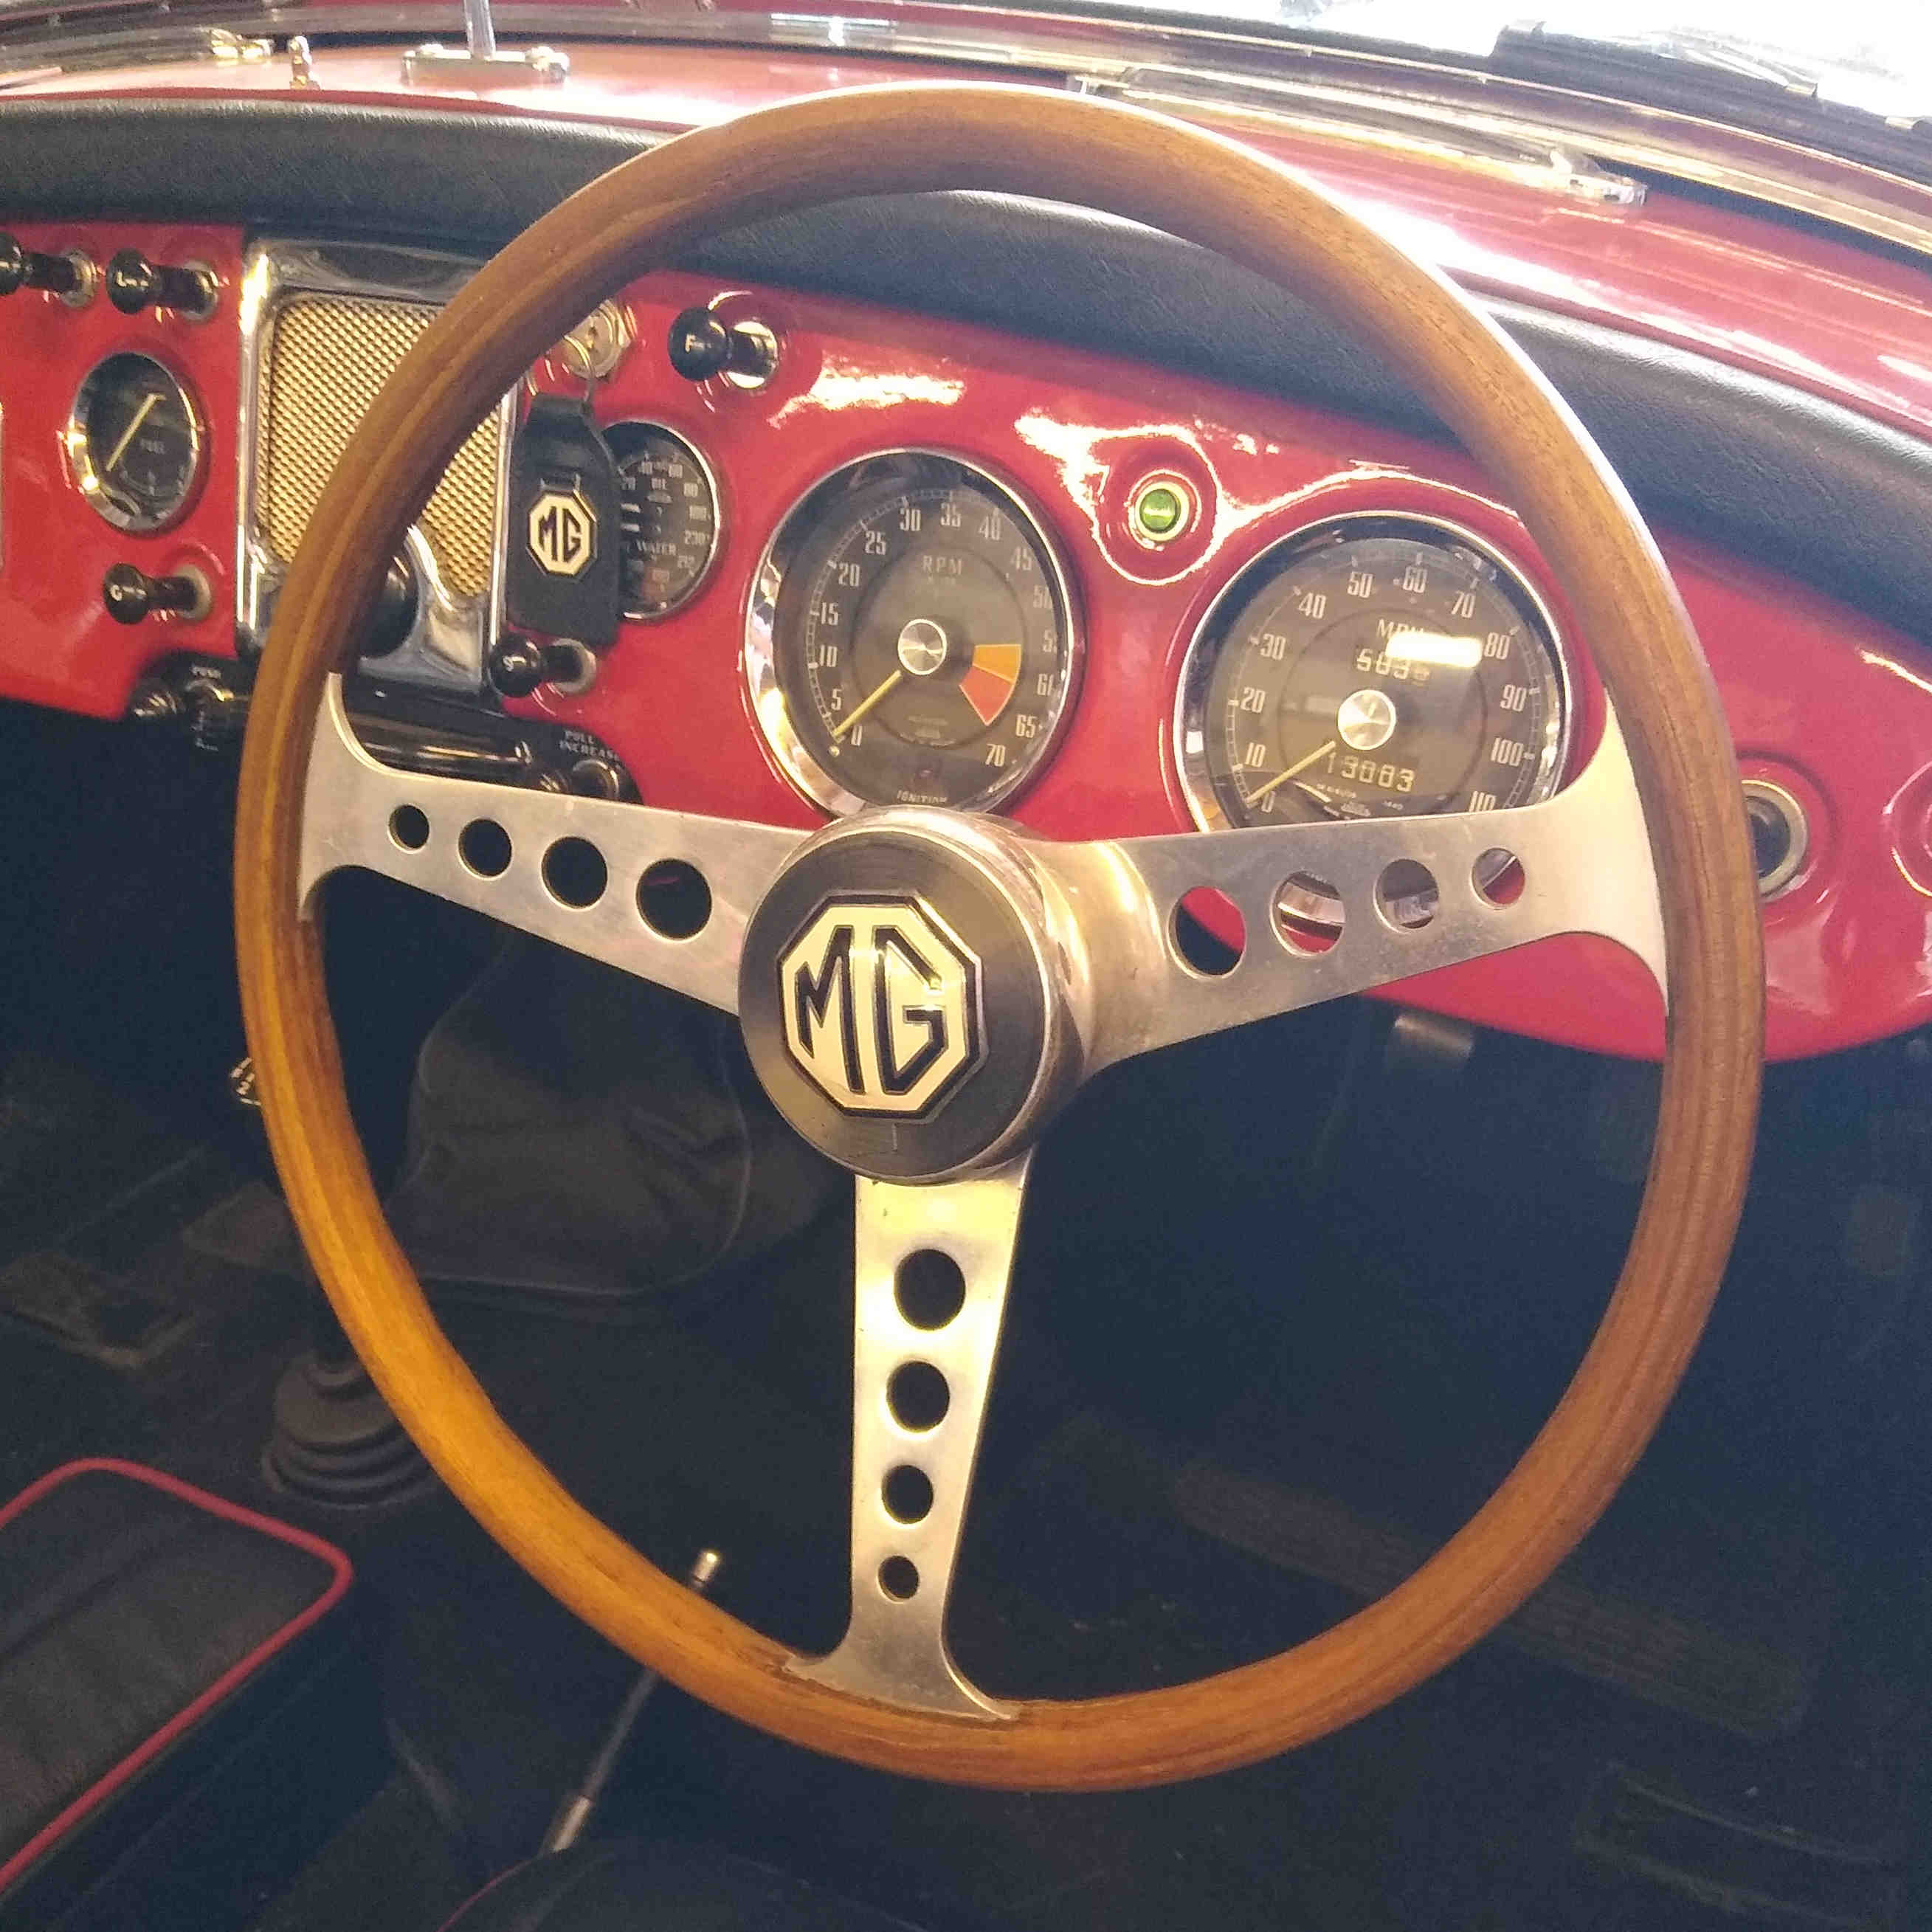
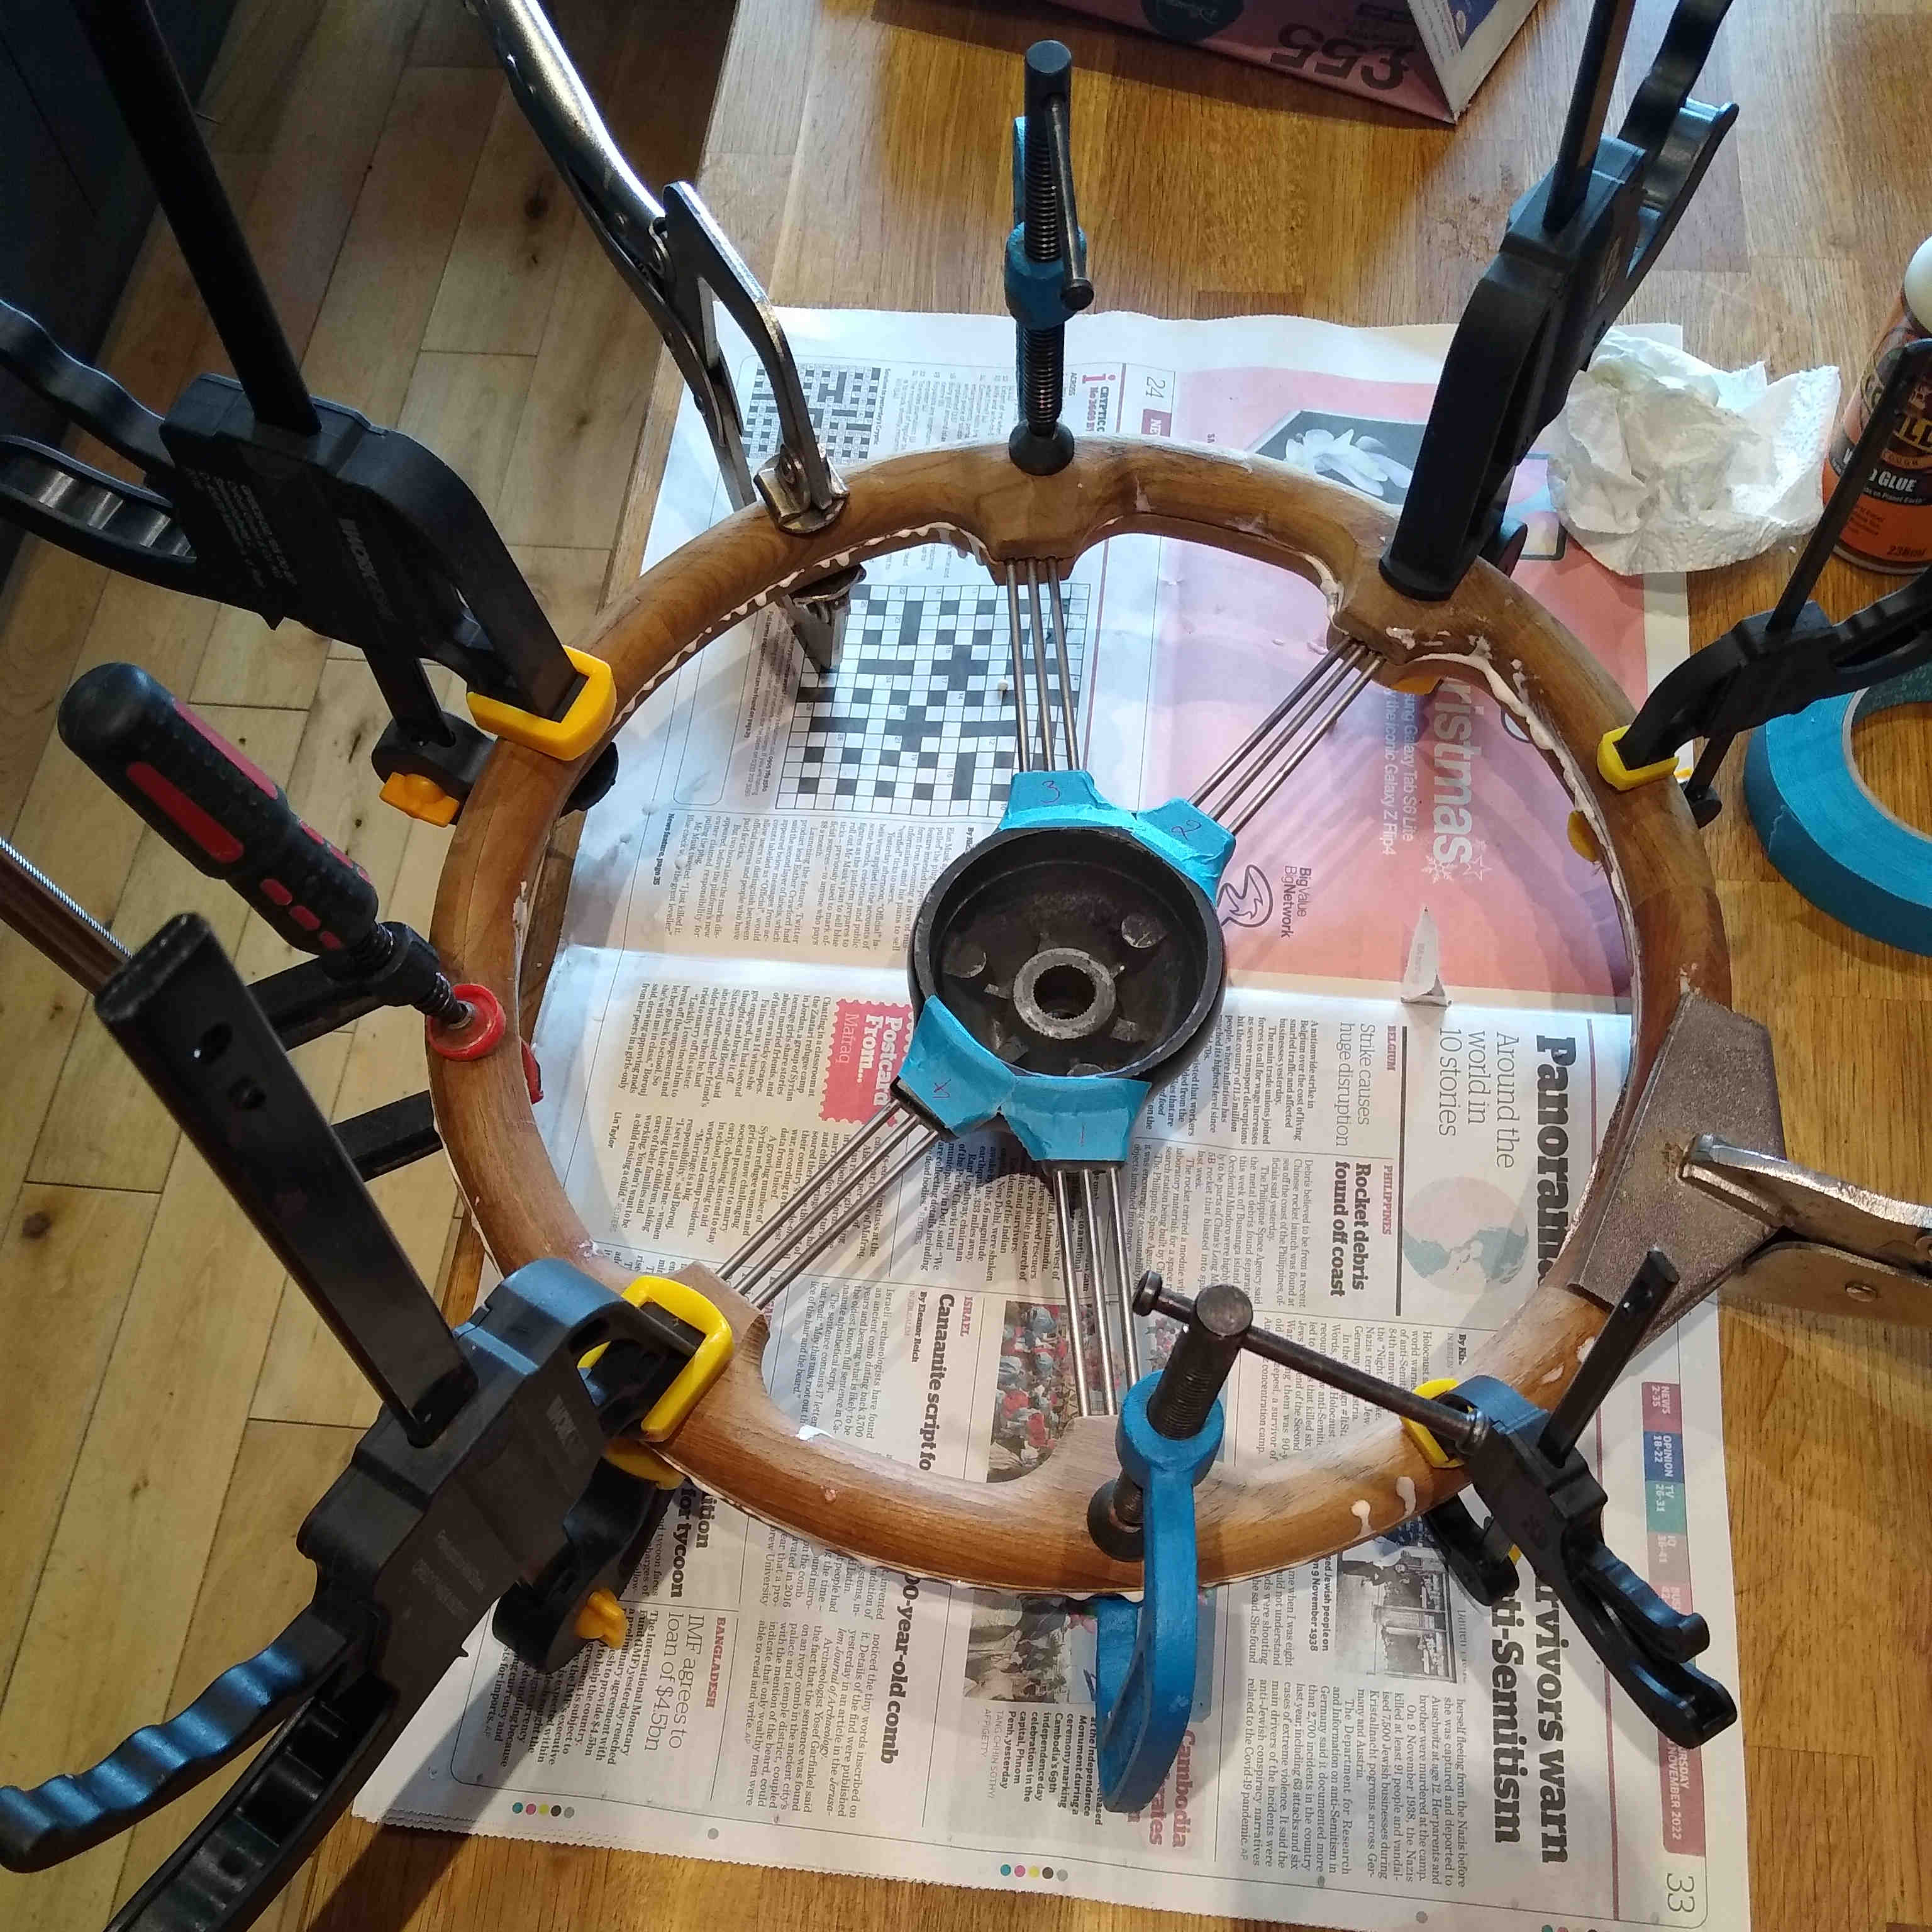 | The two wooden halves were glued together, with the metalwork captivated in between, and clamped to cure overnight. |
| After much sanding, several coats of yacht vanish was applied with light rubbing down between coats. Initially I was going for a shiny polished finished but, after sandng the varnish with a Scotchbrite pad I quite liked the satin finish - I thought this would be more comfortable on the hands and has a more natural wood look. | 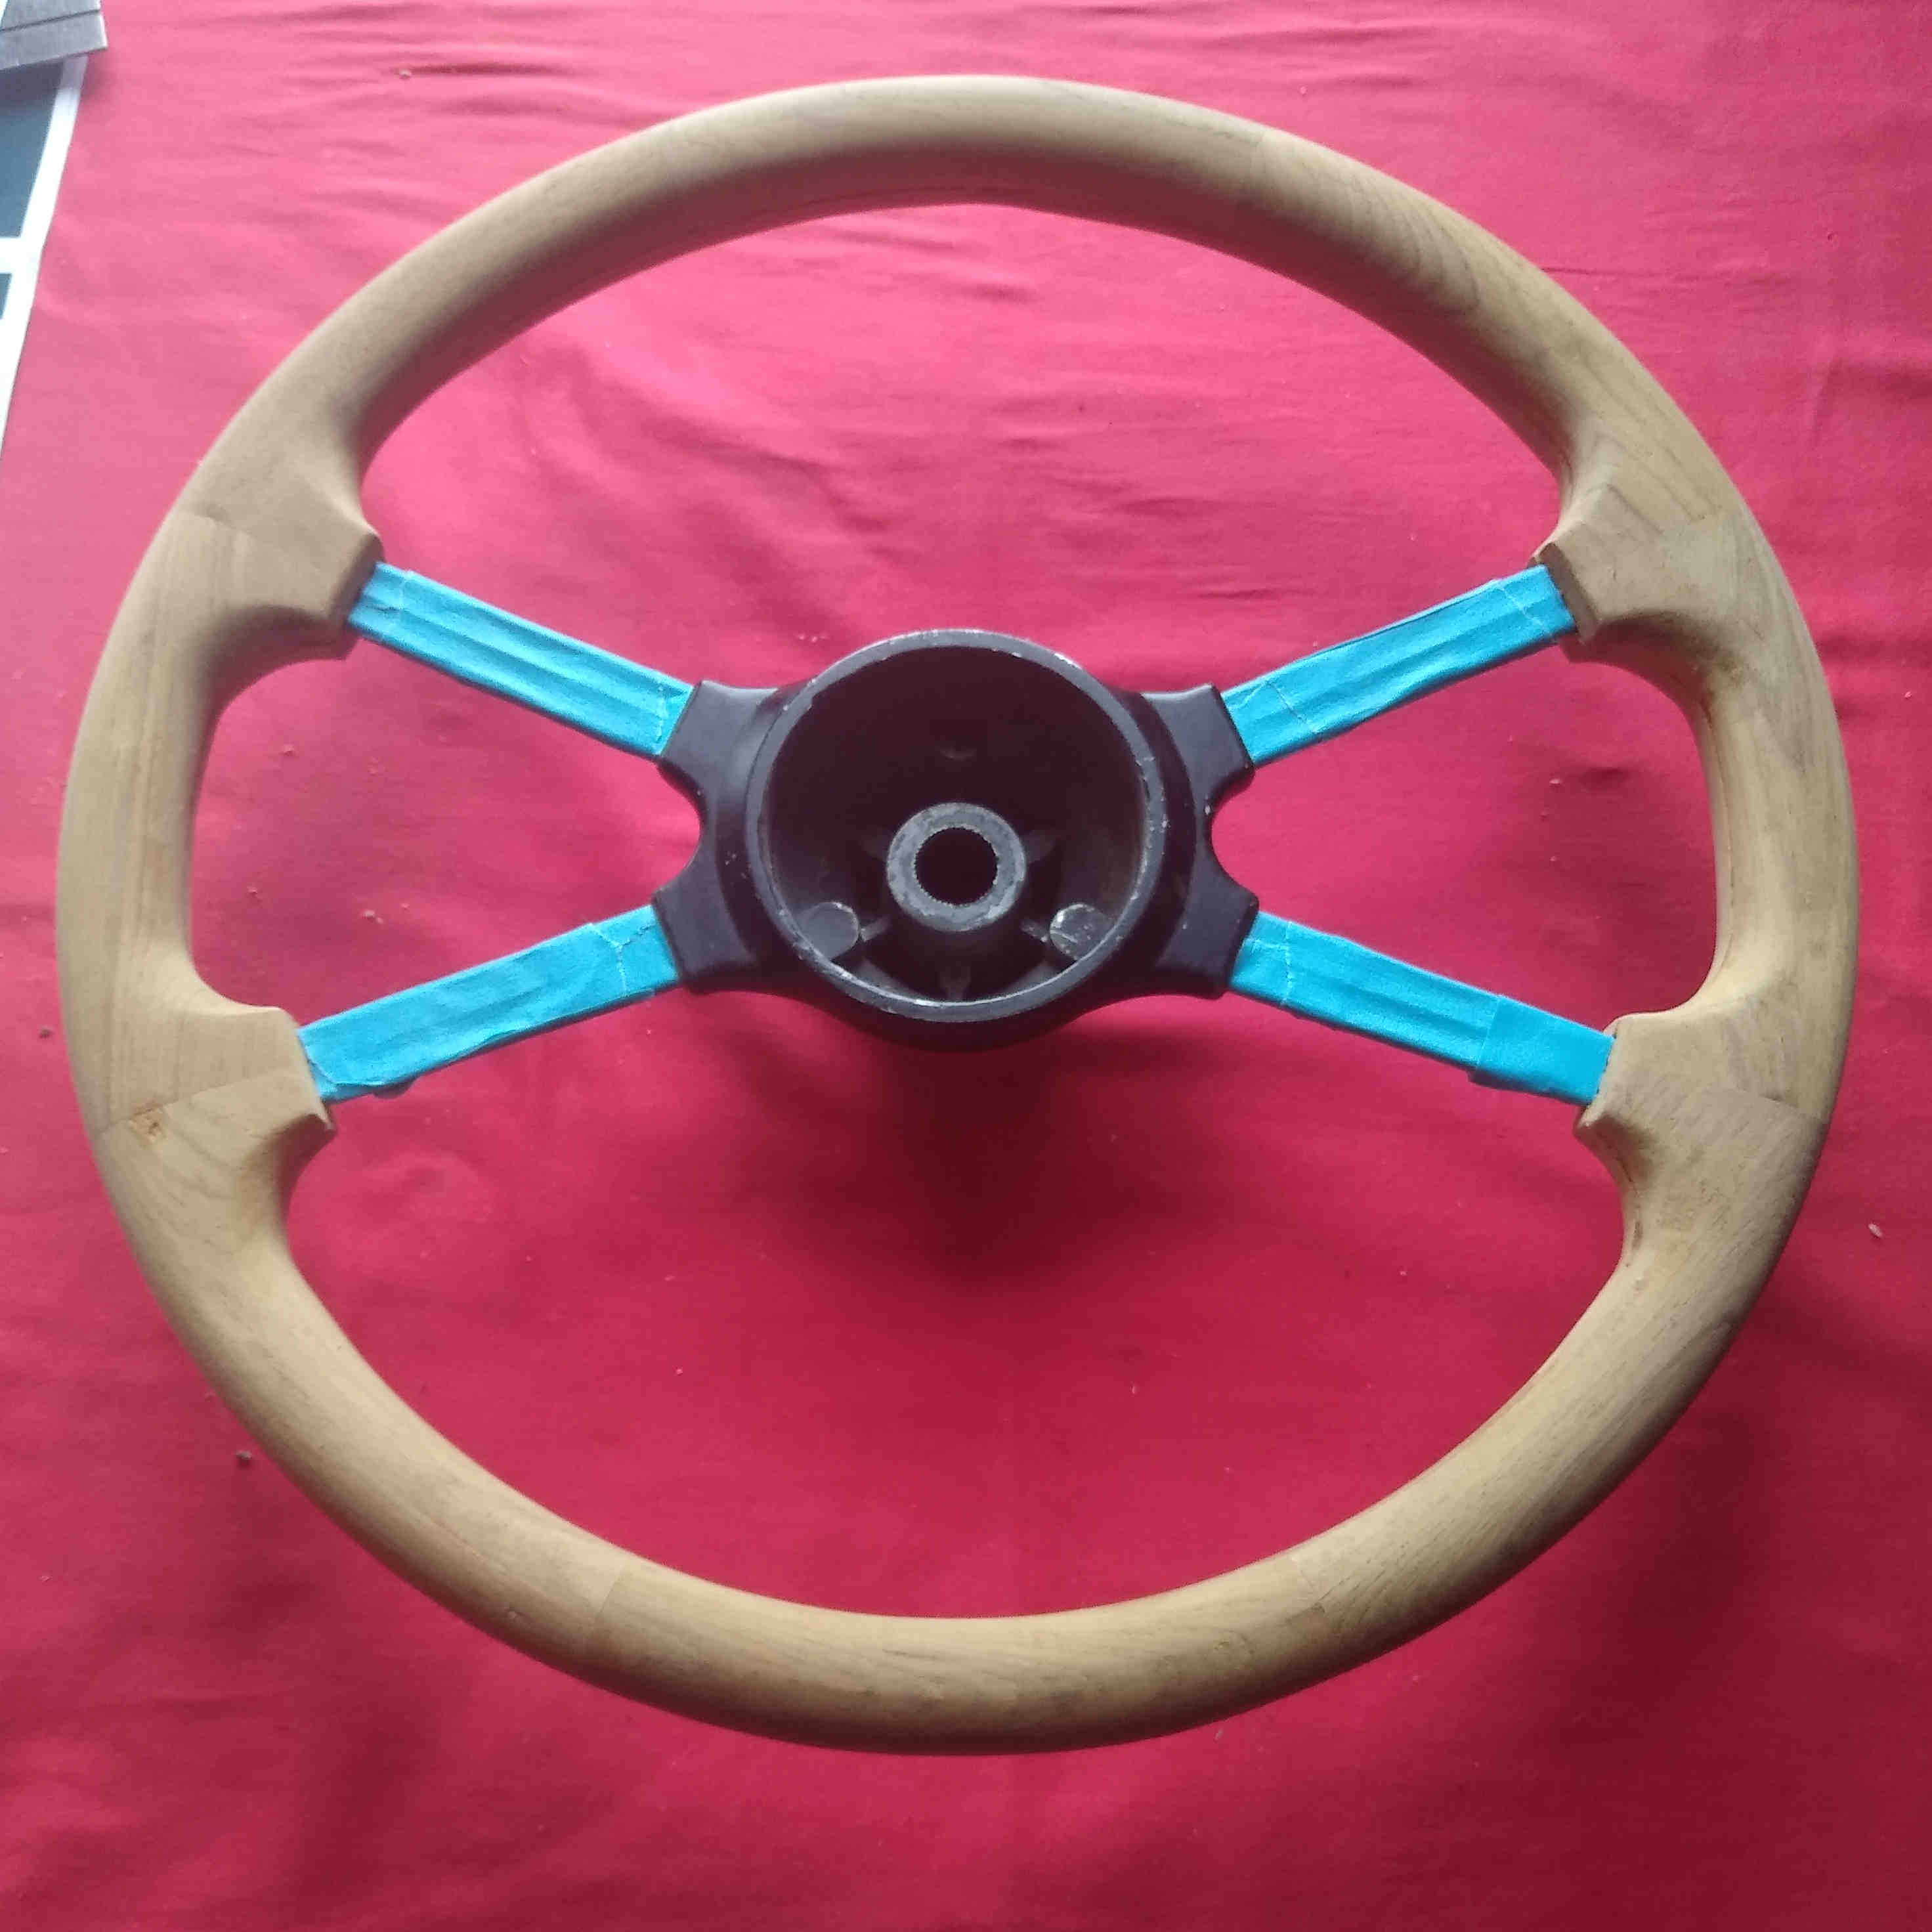 |
Last job was a lick of paint on the boss and away we go.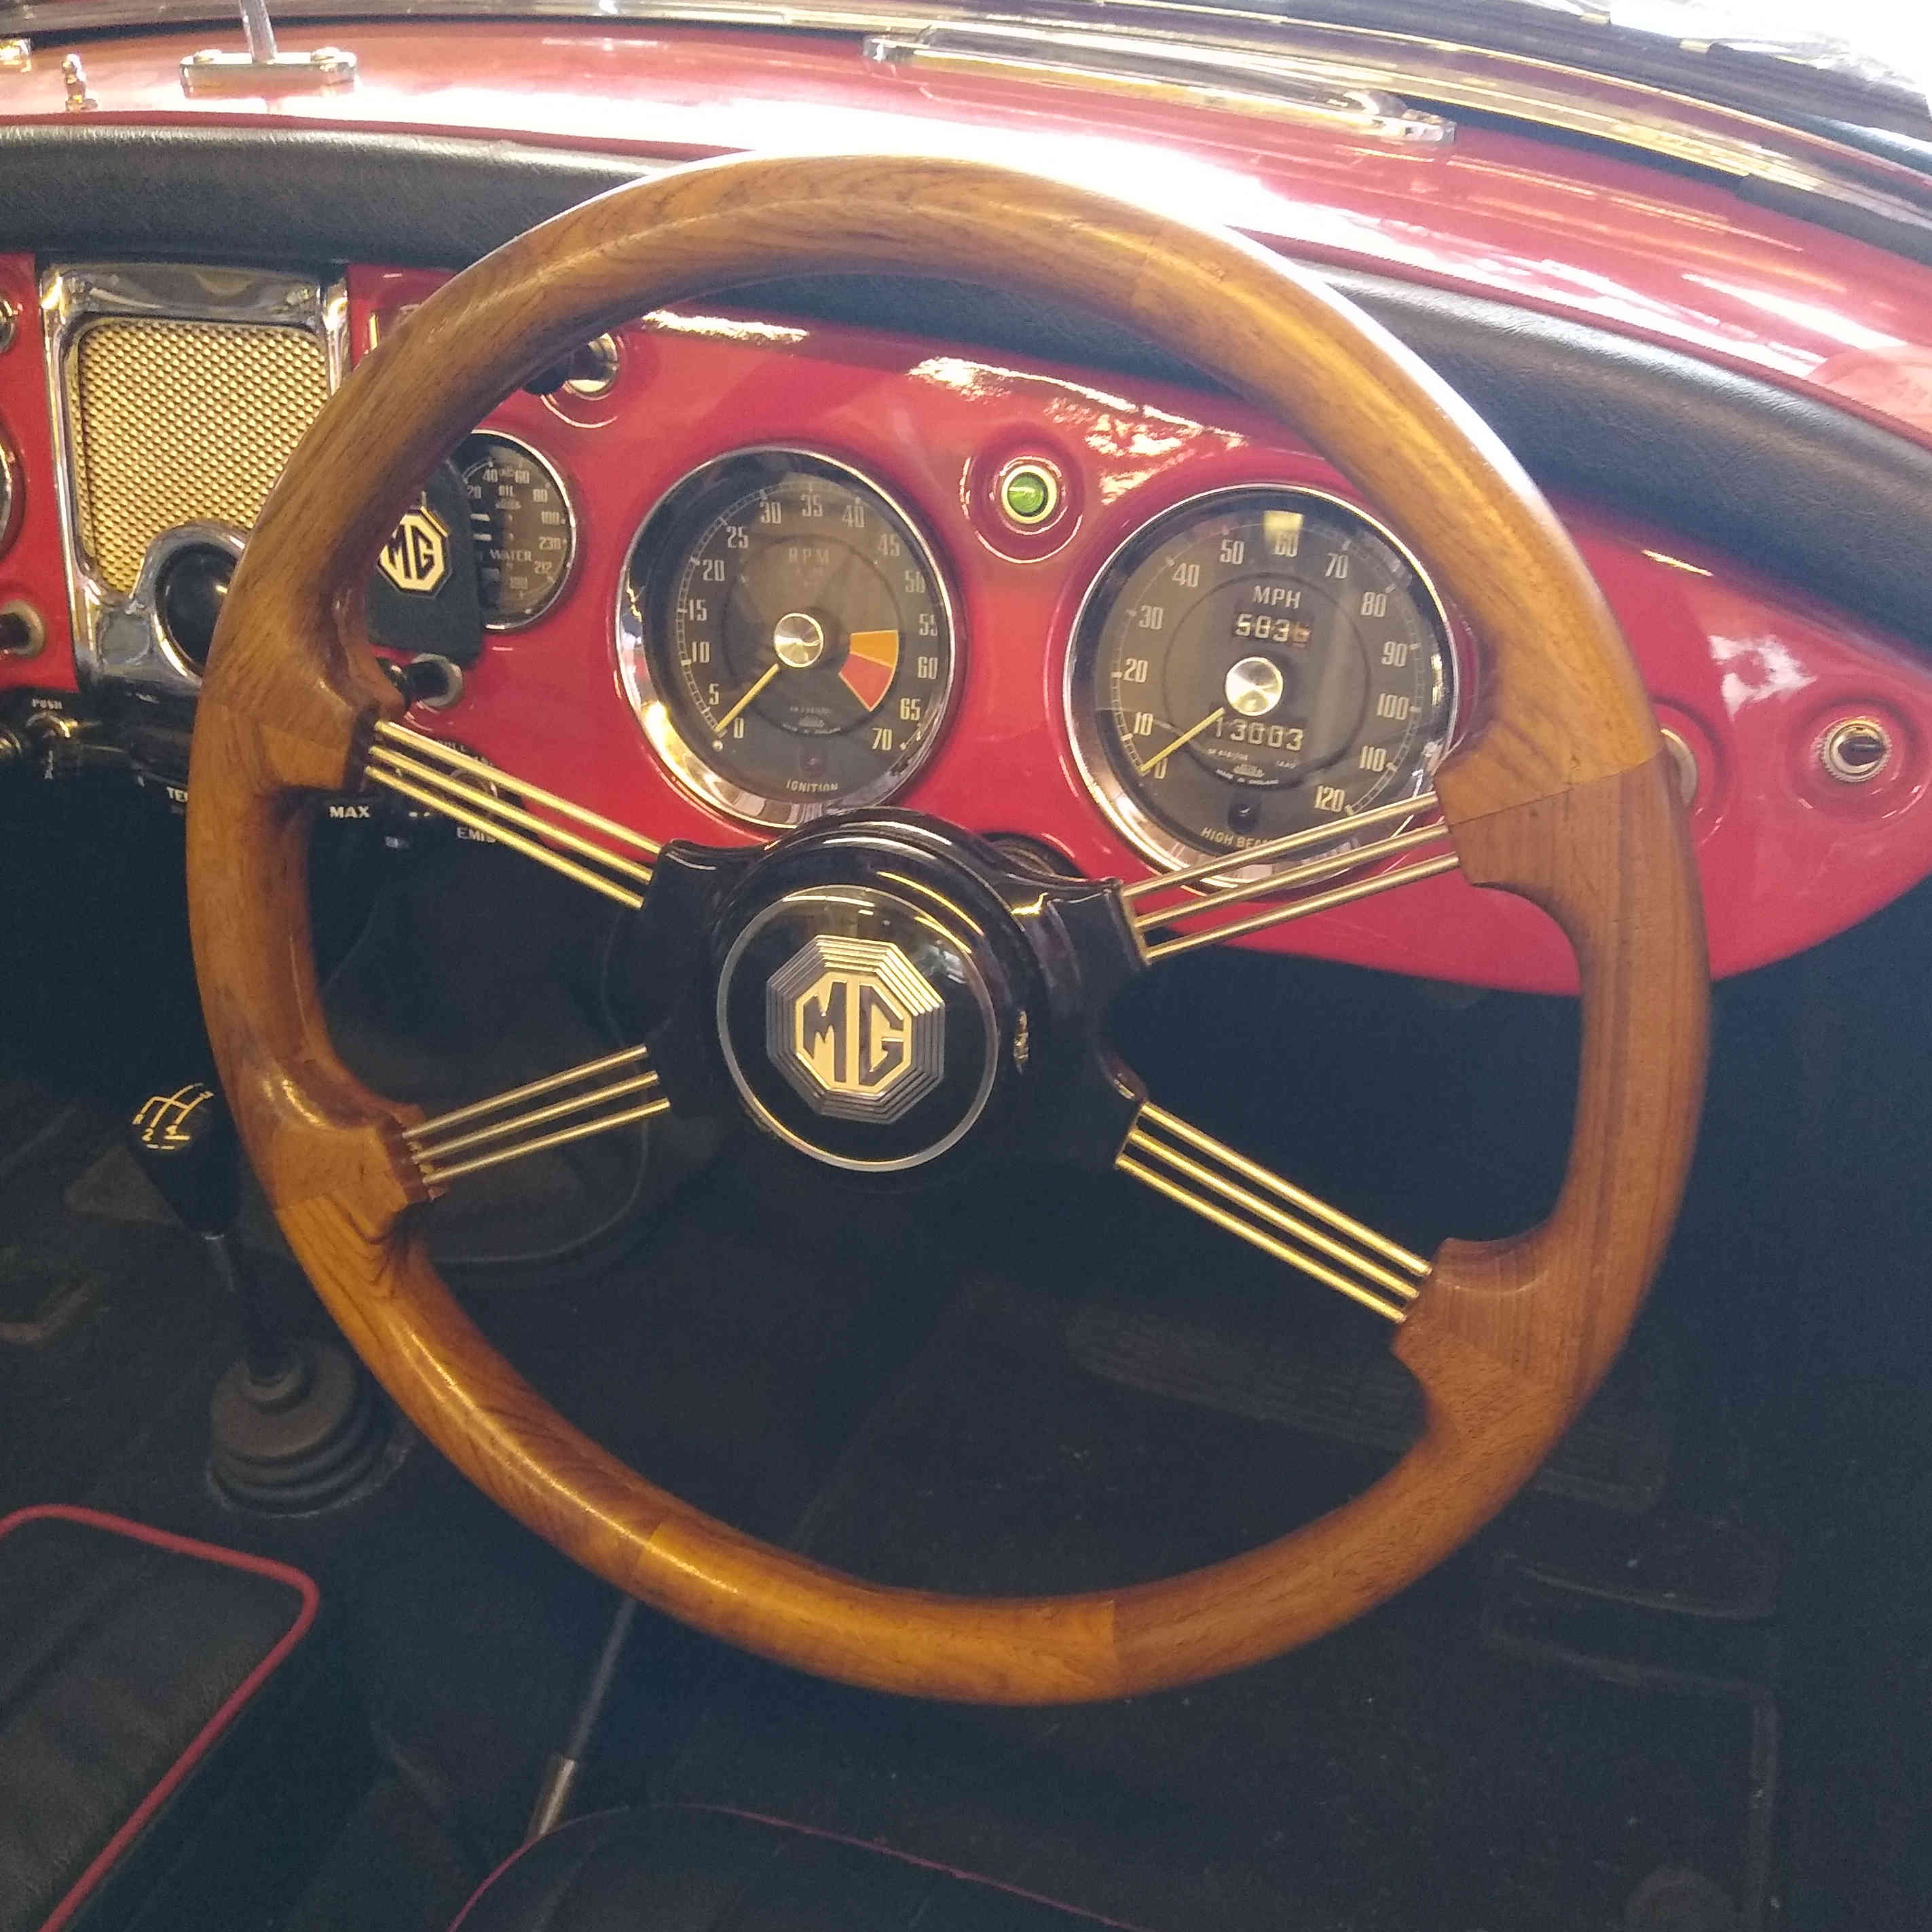 | |